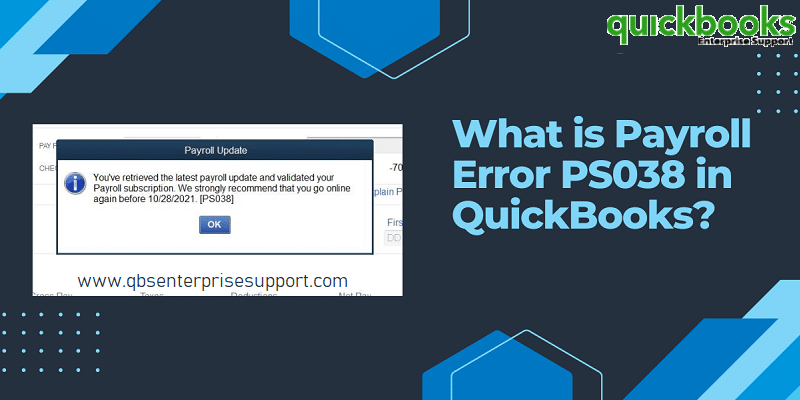
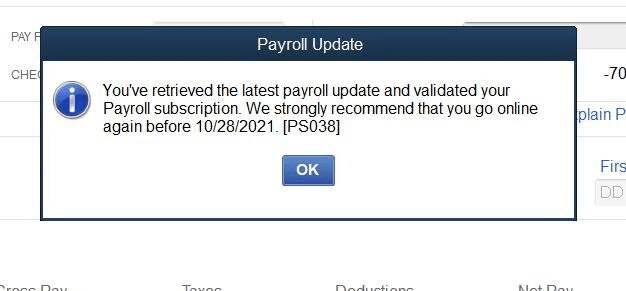
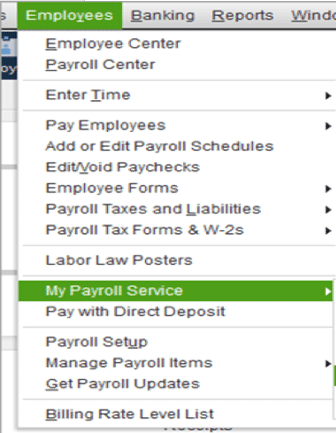
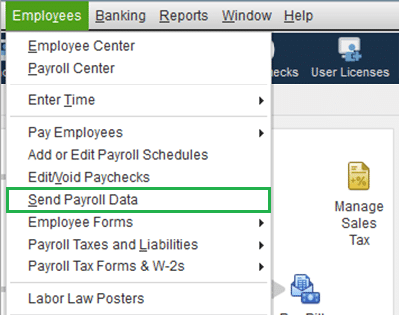
Bumped into QuickBooks error PS038 when trying to download the latest payroll updates or send payroll data in QuickBooks Desktop? Well, this error is accompanied with a warning message that states: 'You have retrieved the latest payroll update and validated your payroll subscription. We strongly recommend that you go online again.' This error can show up when running payroll, downloading tax table updates, and if paychecks get stuck as Online to Send. As a result of this error, one might now be able to run QuickBooks payroll smoothly.
Furthermore, this error can be extremely annoying. In such a scenario, it becomes crucial to fix this error by implementing the right set of steps. And to help you with that, we have curated this segment sharing the complete information related to QuickBooks error code PS038 and its quick fixes.
When can QuickBooks payroll Error PS038 appear?
QuickBooks payroll has been facing several error codes belonging to the family of PSXXX error codes, including Error PS034, Error PS038, Error PS036, etc. This error may show up for different reasons, few are as:
You might get this error if QuickBooks program is not up to date.
When users try to send online paychecks but get stuck at the Online To Send option, an error message related to such error may immediately pop up on the screen.
This error may also appear when you try to download and install the latest Tax Tables.
If there is data integrity issues within the company file.
Methods to Fix QuickBooks Error Code PS038
Fixing QuickBooks payroll error PS038 involves some basic procedures and steps. Let's check each of the steps and find out the right fix for the issue.
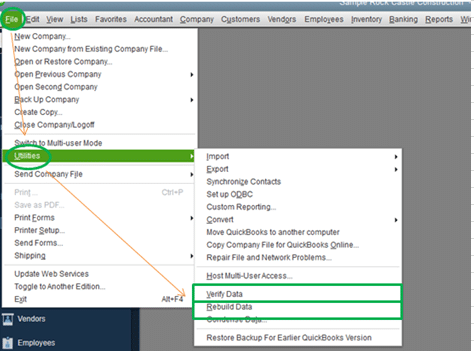
After that move to File menu and then Run verify data utility.
This will show the stuck paychecks that are waiting to be sent.
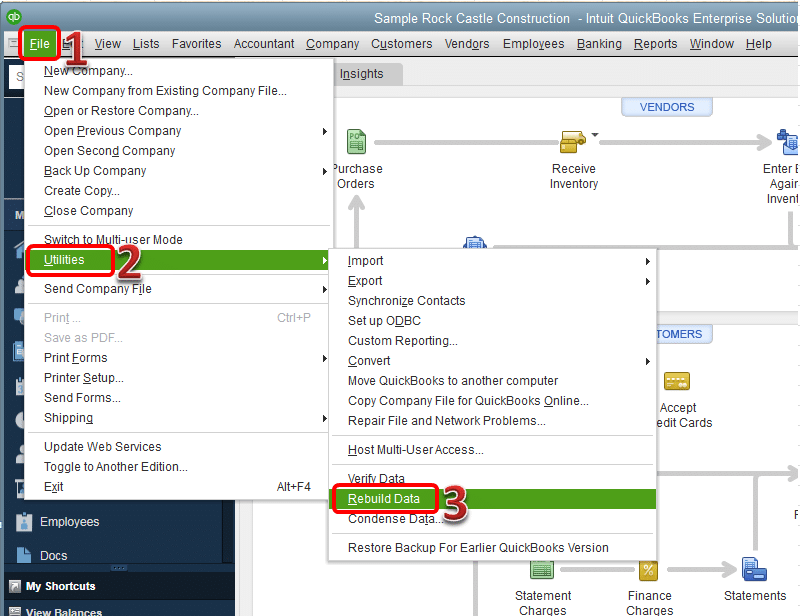
Steps to use Rebuild Data Tool
After which, you need to Rebuild the data file.
Click on File menu.
Select Utilities and then opt Rebuild Data option.
Also, try to download the payroll updates and check if the issue continues.
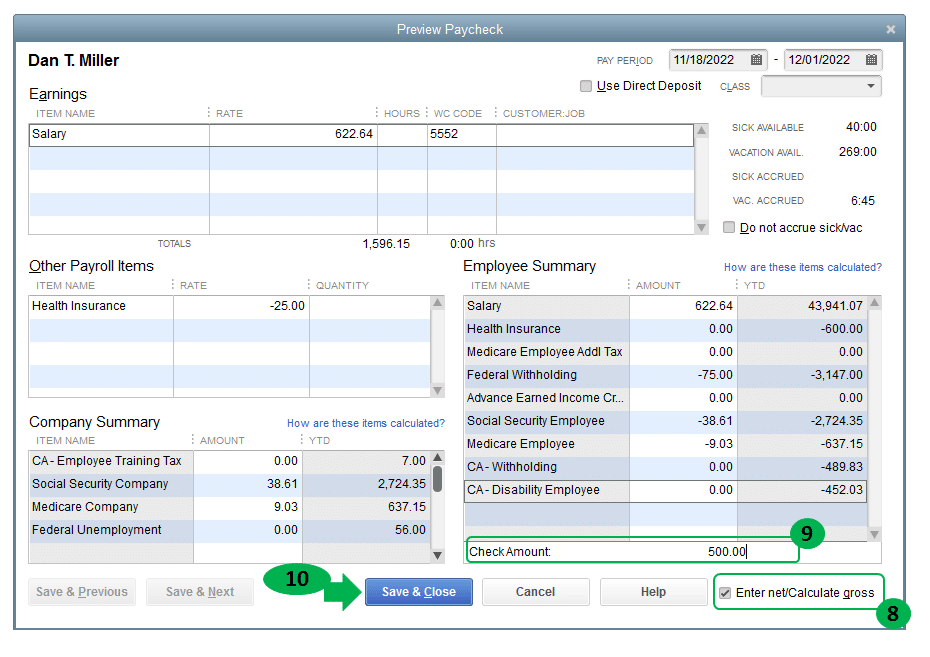
Solution 5: Toggle the stuck paychecks
Here, you need to open the oldest stuck paycheck.
After that, choose the Paycheck detail tab.
You now have to add the same earnings item as the last earnings item in the list in the Review paycheck window under earnings.
Now, a net pay locked message will show up, you need to choose No tab.
After that, ascertain that there are no changes to the Tax amounts and net pay.
Hit OK tab.
In case you get a past transaction message, choose Yes.
Now, choose Save and Close.
After that hit the Yes tab to the recording transaction warning message.
And then, open the Paycheck again.
Choose the Paycheck details tab.
Also, delete the earnings items that you have just added in the earnings section.
Ensure that there are no changes to the tax amounts and net pay.
Also, hit OK tab.
Repeat the steps for each of the stuck paychecks found in the second step.
After that, repeat step one and also download the tax table update again.
Solution 6: Update and backup the company file
Just before you perform any of the procedures to fix error PS038 in QuickBooks, you need to begin with updating and backing up the QuickBooks data. You are supposed to perform the steps to update your QuickBooks software to the latest release and further create a backup of your company file.
Final words..!
Towards the end of this segment, we believe that you might be able to fix QuickBooks payroll error PS038. Just in case you face the same issue even after performing the set of steps listed above, then do not hesitate to connect with XpertBooks Pro. Our professionals can help identify the root cause and guide you through the appropriate troubleshooting process.
FAQs
What is QuickBooks PS038 error and why it occurs?
It is a payroll error and mainly occurs when one clicks on Online to Send option.
What are PSxxx errors in QuickBooks?
PSxxx error format indicates errors in QuickBooks Payroll. Most of these errors indicate QB payroll update issue.
Can System restore fix QuickBooks PS038 and other payroll errors?
In some cases, YES!
What are the requirements to rectify QuickBooks payroll Error PS038?
To rectify Payroll Error PS038, you need to follow these important steps: 1. Make sure your payroll subscription is active and up to date. In case it is not active then renew or subscribe to the payroll service. 2. Verify your company details, including the EIN, name and address are correct in QuickBooks. 3. Ensure all payroll items are correctly set up and linked to the right accounts. 4. You need to double-check the accuracy of your state and federal tax settings, as mismatches can cause this error.
How to determine QuickBooks error PS038?
To determine QuickBooks Error PS038, follow these important steps: 1. If system date is incorrect, it can occur. 2. An error message pop-up might appear on your screen. 3. Your QuickBooks desktop is not latest or outdated.
Expanding your business? Or hired new members to your team? Need QuickBooks on multiple computers? Well, it is surely possible to use QuickBooks on multiple computers, you simply have to allow QuickBooks sharing on multiple computers. But for that, you definitely need an upgraded version of QuickBooks. And you will have to enable multi-user mode within QuickBooks to let more than one user to use QuickBooks at the same time. Multi-user mode actually allows multiple users to access the same company file at the same time. To understand how to allow QuickBooks sharing on multiple computers, make sure to stick around this piece of writing carefully. Thus, stay connected to this article till the end.
Allow QuickBooks sharing on multiple computers using multi-user mode
You can switch to multi-user mode by performing a simple set of steps.
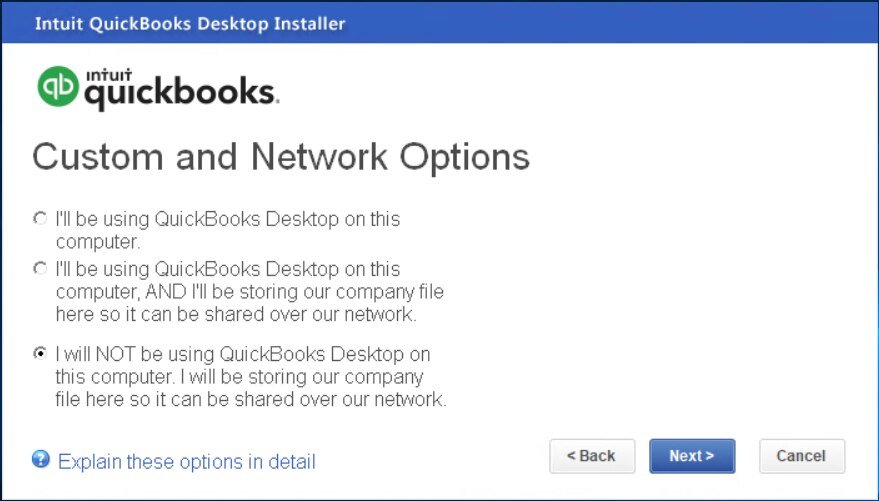
Step 1: Download and Install QuickBooks Desktop
If not already, you need to download and install QuickBooks from the official Intuit website.
Still having queries related to allowing QuickBooks sharing on multiple computers? We can help you with that. You can schedule a call with our experts and our technically sound accounting professionals will assist you with all your queries immediately. We have a team of technical specialists who understand what it takes to allow QuickBooks sharing on multiple systems.
FAQ's
Can I use QuickBooks on more than one computer?
Yes, you can use QuickBooks desktop on multiple computers by setting up multi-user mode. It allows multiple users to access and work on the same company file simultaneously. Make sure you need to provide the correct QuickBooks license for each user.
What do I need to set up QuickBooks sharing?
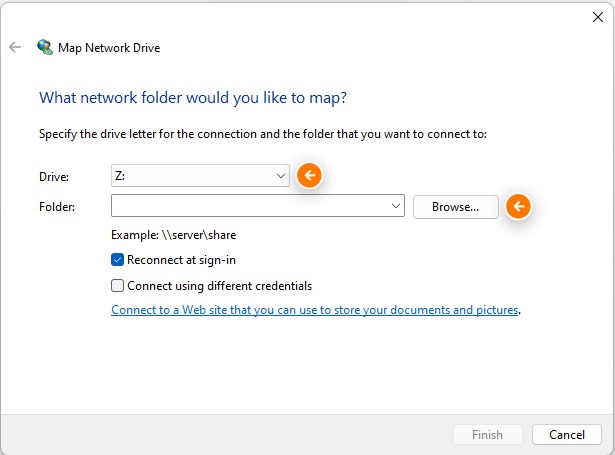
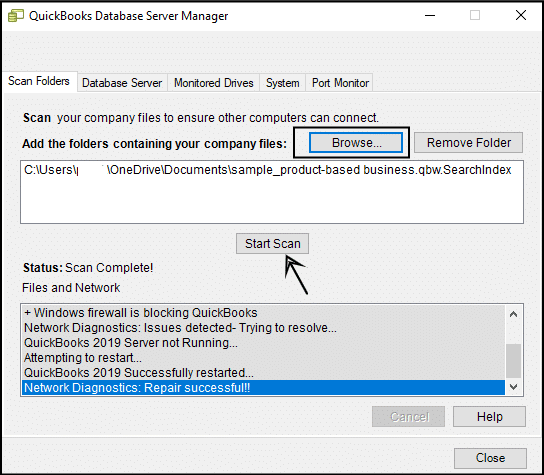
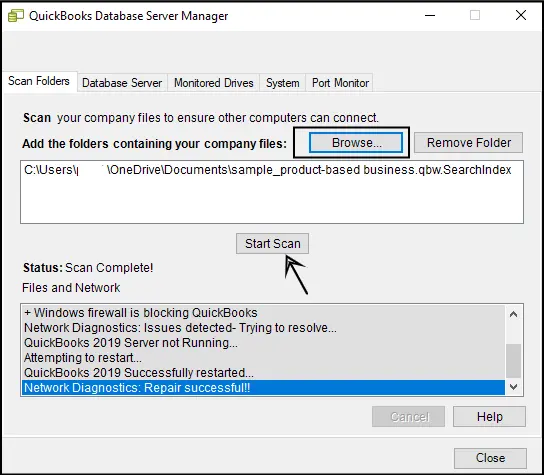
1. Provide a separate QuickBooks license for each user/computer. 2. Verify that all computers must be on the same network. 3. The company file should be stored on a host computer (server). 4. QuickBooks database server manager should be installed on the host computer.
How do I enable multi-user mode in QuickBooks?
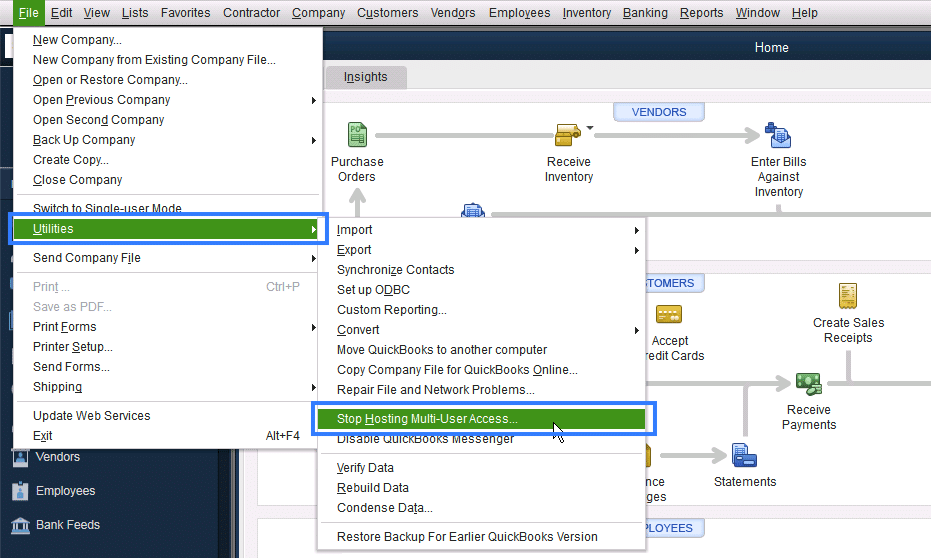
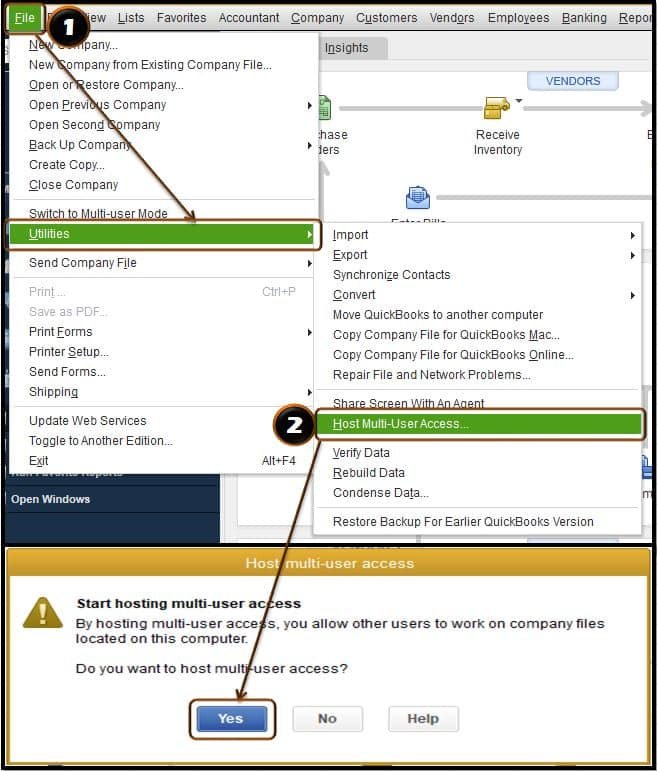
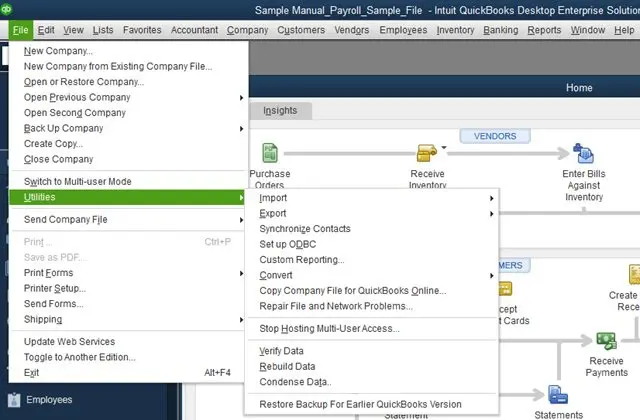
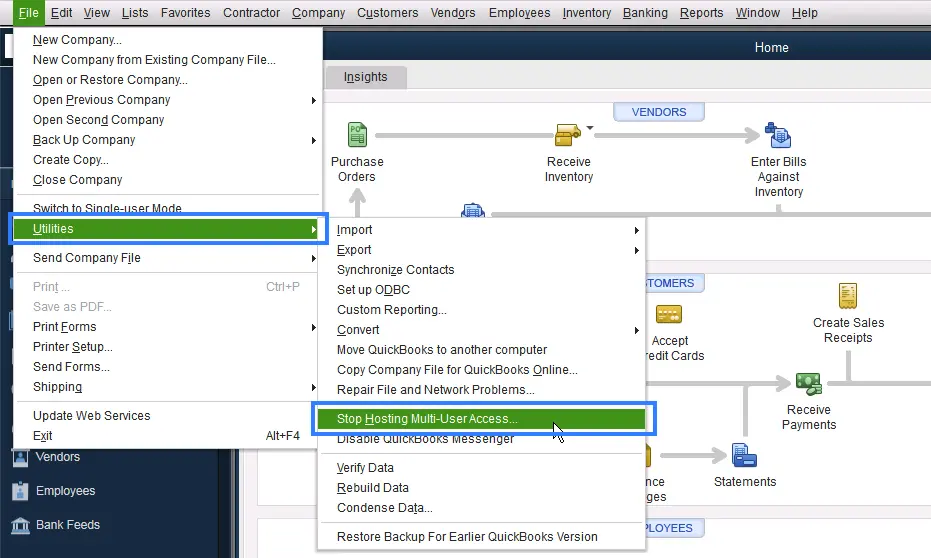
1. Install QuickBooks on each computer. 2. You need to place the company file on the host computer. 3. On the host computer, you need to open your QuickBooks and go to File menu > Utilities > Host Multi-User Access. 4. On other computers, you need to open QuickBooks and select File menu and select Switch to Multi-User Mode.
How do I share the company file between computers?
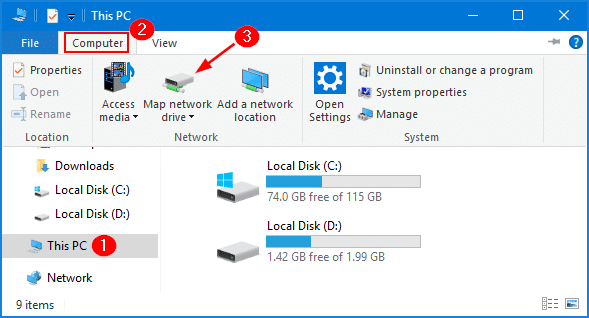
1. Store the company file on a shared network folder on the host computer. 2. Ensure that all users have access permissions to the folder. 3. You need to use QuickBooks to open the file from the network location on each computer.
How many users can work in QuickBooks at once?
The number of simultaneous users depends on your QuickBooks license: Pro: Up to 3 users. Premier: Up to 5 users. Enterprise: Up to 30 users.
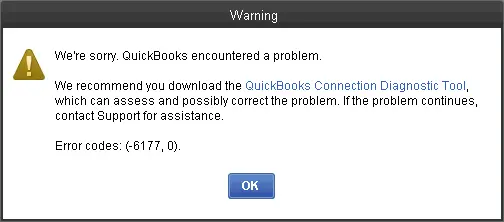
Can you fix Error code 6177? Of course, yes! But how? Well, we have got you covered. Error 6177, 0 is basically a 6000 series error that is usually a company file error. This error generally seen when trying to open QuickBooks or a company file. This error basically indicated that your QuickBooks accounting software is unable to follow the path to open the company file. In order to to fix this error you will have to move your company file. You might end up in this particular error with a warning message flashing on the screen: "QuickBooks is attempting to open the company file. This simply highlights that the software is unable to use the path of the company file triggering this particular error in QuickBooks."
To understand QuickBooks error code 6177, make sure to go through this piece of writing carefully. We have tried to cover the majority of possible information about this error in this segment. Here we are going to tell you the causes as well as the updated methods to troubleshoot this problem. So, keep read on!
In the recent time, many users have experienced and reported this error, when they are using the multi-user mode in QuickBooks. Well, before fixing this error, it is better to understand what this error is all about. Error 6177, 0 in QuickBooks is generally seen or pop-ups, when you try to open the company file. This error comes up on the screen with an error message stating:
Error
Description
Error Message:
QuickBooks is attempting to open this company file. Before you can open the company file from the computer, you must first open the company file on the computer where the company file is located. (-6177, 0).
Error 6177,0:
We’re sorry, but QuickBooks can’t open the company file.
You might also encounter this error if the company file is located on a server system and you are trying to access the file locally. Many other reason can lead to the occurrence of this error. Let us know these factors first before moving to the solutions to fix this technical error. However, in case you find yourself on the same situation, kindly go through the following article till the end.
Possible causes behind error -6177, 0 in QuickBooks Desktop
You can end up in such an error, due to the following reasons. Let us have a look:
One of the major causes behind the occurrence of such an error can be QuickBooks desktop doesn’t use the path to open the company file.
Another reason can be if there is any sort of virus or malware issue found with QuickBooks files.
You can further come across similar issues if the installation is incomplete or corrupted.
Using an outdated version of the QuickBooks software may also lead to such errors.
The company file that you are trying to access may be damaged due to various reasons.
Updated Methods to Resolve QuickBooks Error 6177, 0 (A Comprehensive Guide)
Now that you know enough information related to QuickBooks error code 6177, it is time to implement the right set of steps and fix the issue successfully.
Note: Before proceeding ahead, make sure to set up the full version of QuickBooks set up on the server.
Method 1: Update your file location
In case you keep your company file on a server, an external hard drive, or in the cloud, then you must change its location. You can move it to the local drive for once and then back to where it was. For this, you need to follow the steps below:
Step 1: Move the company file from its original location
It should be noted that the step below can only be carried out on the server system. In case users are not having access to the server system, then they should carry out the below steps on one of the workstations as well.
At first, open Windows start menu on your server system or workstation.
After that, type File explorer into the search bar and open file explorer.
You now have to open QuickBooks folder.
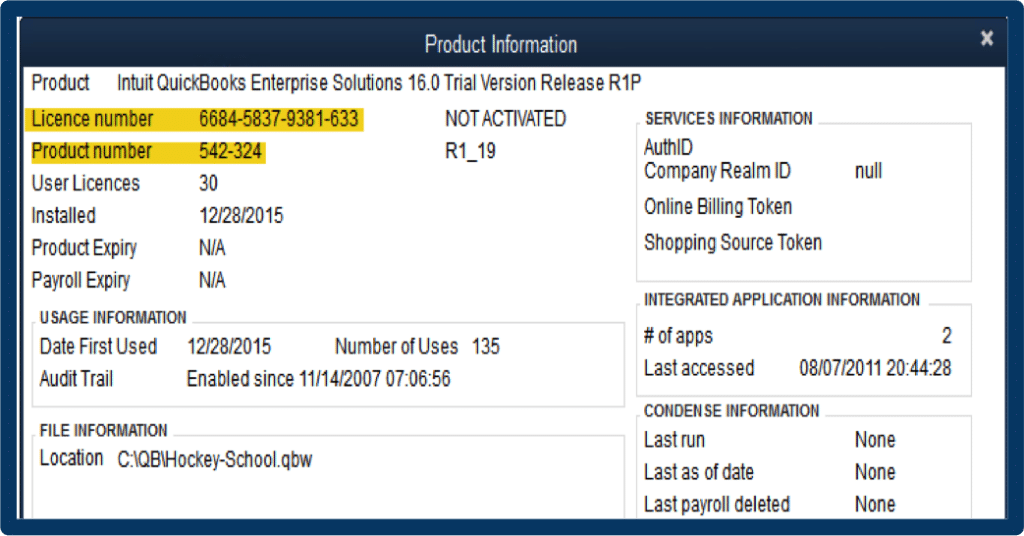
Also, press F2 key to get the QuickBooks product information window and location of company file.
Lastly, move the company file from this folder to C: drive.
Step 2: Steps to create a portable company file and restore it to the server
As the company file is now on the local drive, you need to create a portable company file. This is a compact version of the company file.
You need to first open QuickBooks.
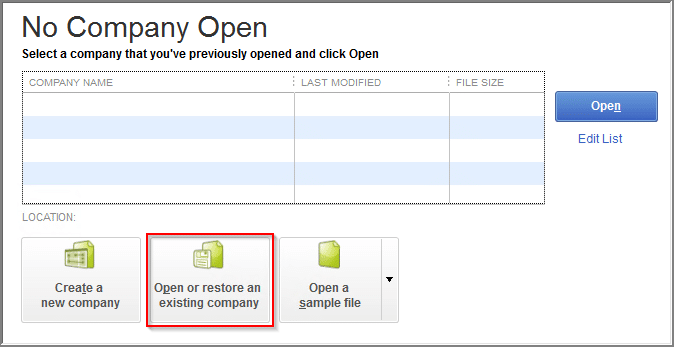
Choose Open or restore an existing company.
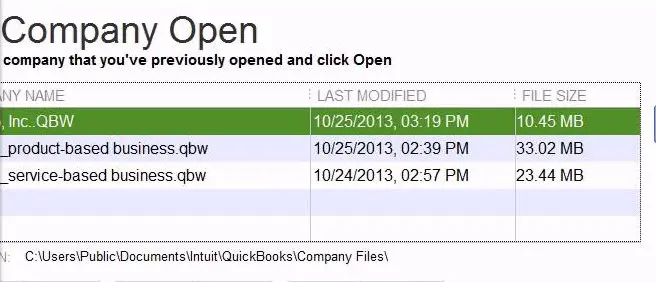
After that, browse Open the company file you moved to the C: drive.
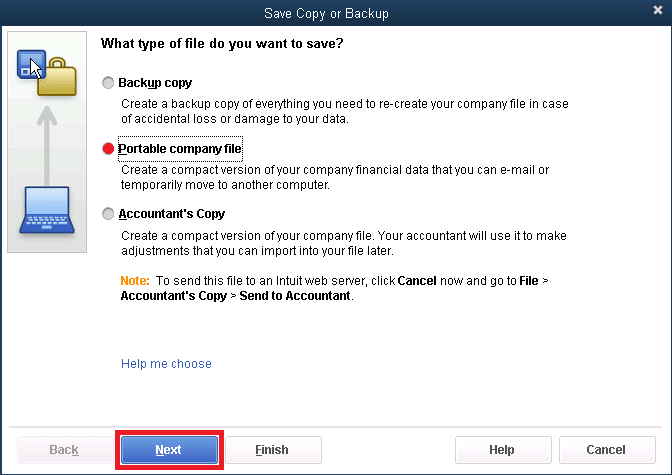
Once done with that Create a portable company file.
It creates a portable version of the file and further resets your file location data.
Now, select File menu and also choose Quit QuickBooks.
Also, reopen QuickBooks.
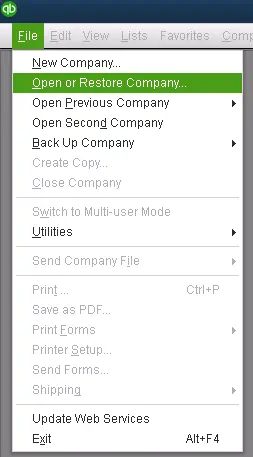
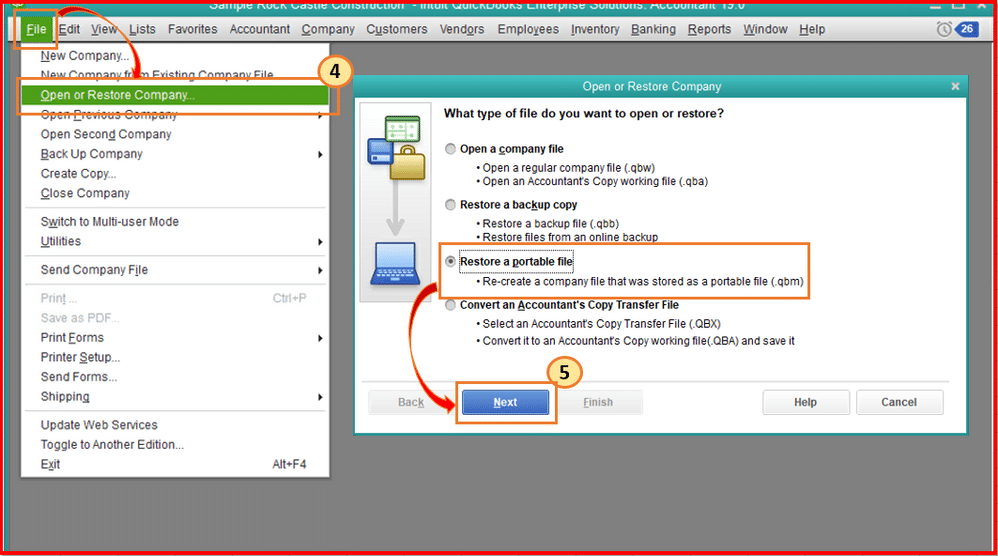
Head to File menu and select Open or restore company.
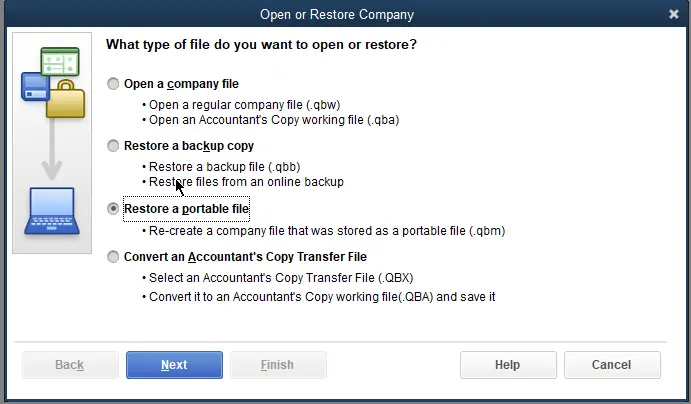
The next step is to choose Restore a portable file and then select Next tab.
Select the Portable company file.
Then, choose Open and Next tab.
Choose the Drive you originally moved your company file from, in order to restore the location.
You need to click on Save and then move to File menu.
In last step, choose Quit QuickBooks.
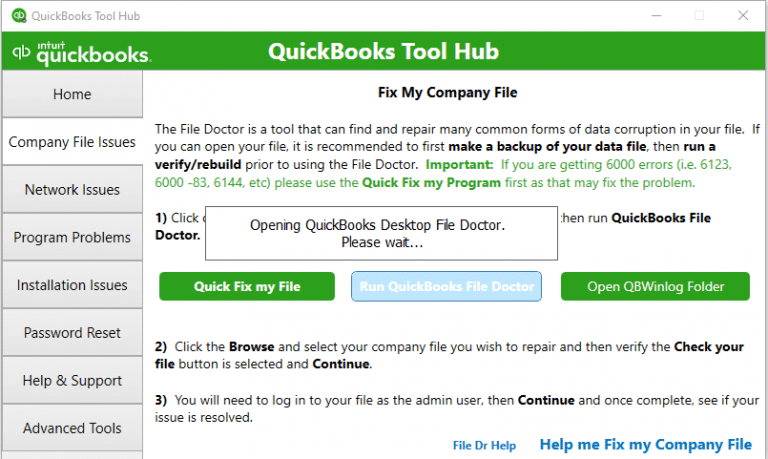
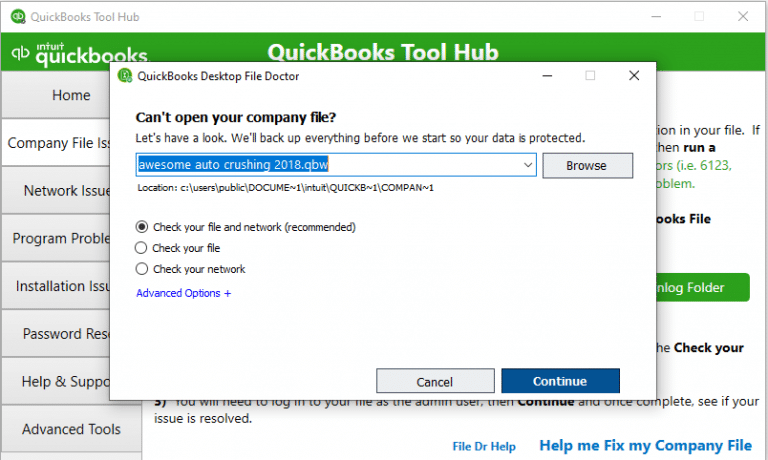
Method 2: Run QuickBooks file doctor on the server from tool hub program
QuickBooks file doctor tool is designed and developed in a way to diagnose and fix the error automatically. You need to download and use the file doctor tool and this will scan and clean up the company file.
If you are using an outdated QuickBooks version, then experiencing this issue is quite possible. Thus, we recommend you perform the necessary steps to update QuickBooks to the latest release.
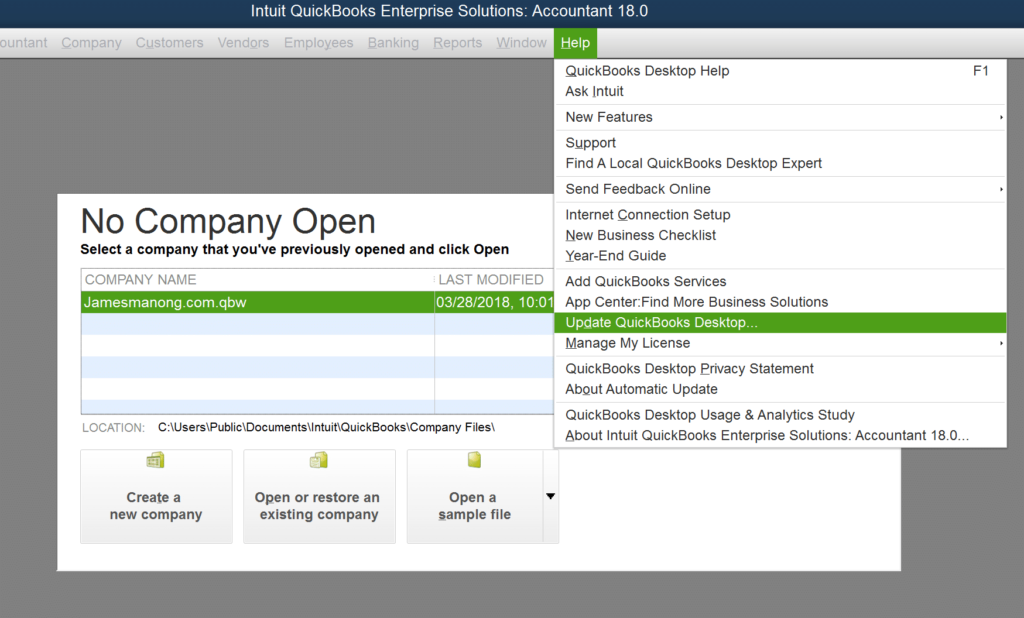
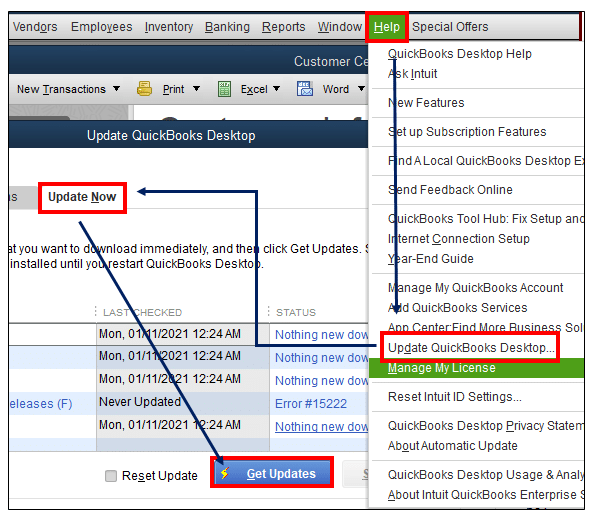
Open QuickBooks and move to Help menu.
After that select Update QuickBooks Desktop.
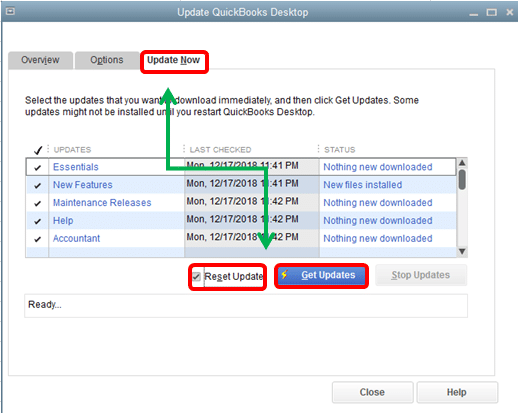
Then, you need to select Update Now and mark a click on Reset Update.
Now tap op Get Updates.
It will take some time to download and update the latest version from the server.
Once done, close your QuickBooks.
Method 4: Move the company file to the server's local hard drive
Moving the company file to the local hard drive can also troubleshoot the QuickBooks Error 6177, 0. For this, follow the directions given below:
Move the company file from server to C drive.
Then, open the company file in QuickBooks.
Followed by creating a Portable file and saving it to local C drive.
Now close company file.
And then Restore the portable file from the C: drive and then save it to the server.
Toward the end of the process, choose the company file and try to open it from the server.
Getting rid of QuickBooks error code 6177 isn’t a tough nut to crack, especially when you have the right set of steps and procedures in front of you. However, if you still find it difficult to fix or if you need our assistance at any point in time, then do not hesitate in contacting us right away. Consult a professional at XpertBooks Pro to identify the root cause and resolve the issue quickly. Our experts team works to identify the root cause and help you restore normal operations as quickly as possible.
Frequently Asked Questions (FAQs)
What is Error message 6177 in QuickBooks?
This error is a technical error that pops up while accessing the company files.
To fix this error, checkout the following steps: 1: You need to update the File location. 2: Also by resetting multi-user hosting, you can easily rectify such errors. 3: Try to move the company files to a hard drive.
Troubled by QuickBooks update error 12045 and unable to find the right fix? Well, this is where you need professional guidance, and to make sure that you treat the error the right way, here we are with this segment sharing the quick fixes and other necessary information about this error. Talking about the QuickBooks error 12045, it falls under the 12xxx error series which is related to internet connectivity issues and is definitely treatable. This error generally shows up when QuickBooks is unable to establish a secure connection with the server while downloading updates. Also, this error can be encounter when you try to update QuickBooks to the latest version or downloading payroll updates. One of the most common reasons behind the occurrence of this particular issue can be if the internet connection isn’t configured well, or if the time settings in your desktop aren’t configured well.
You might end up in this error with a warning message on the screen: “Failed to download the update: Error 12045”. This error is often termed as QuickBooks update error and needs to be fixed immediately to avoid any further issues with the software performance. To help you tackle this error easily, we have curated this particular piece of information sharing the complete details about how you can deal with this QuickBooks error message 12045, its quick fixes and what actually causes this issue. Thus, to learn further stick around this segment carefully till the end.
What causes QuickBooks error 12045?
There are a bunch of factors that can drag you into this QuickBooks error 12045, which we have tried to discuss below. Let us have a look:
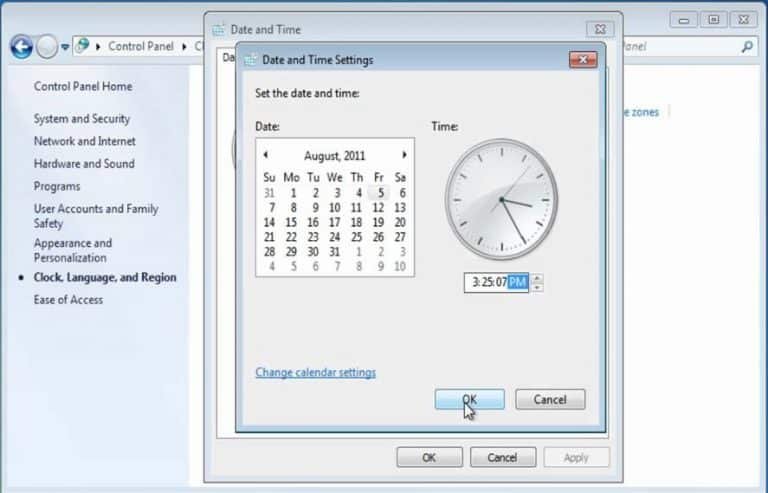
Incorrect date and time settings of your system, as we mentioned earlier.
You need to first tap on the Start menu, type Control Panel, and select it from the results.
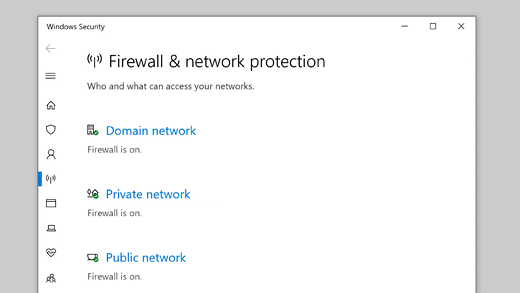
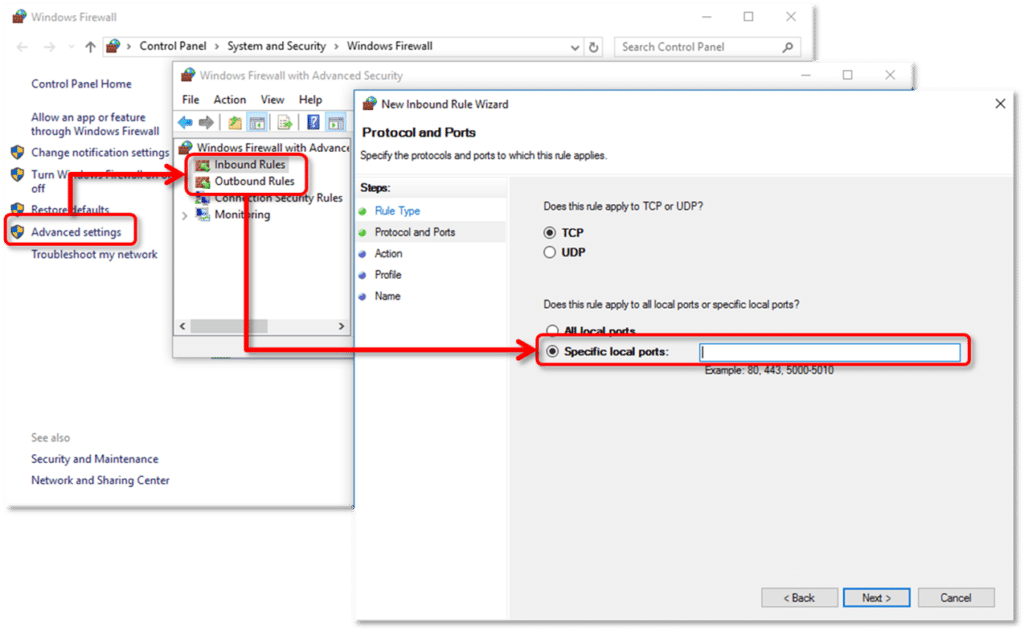
After that, navigate to System and Security, then click on Windows Firewall.
If asked, click Yes to allow the program to make changes.
Select Allow an app or feature through Windows Firewall, then click on Change settings.
Once done with that, locate QuickBooks in the list of programs and ensure that both Private and Public checkboxes are selected.
You now have to click on Add program.
Also click on Browse tab and head to the C:\ProgramsFiles\Intuit\QuickBooks20xx\qbw32.exe
Now click on Open and then Add tab.
Click OK again to save changes and close the Windows Firewall settings.
Additionally, you can put Port 80 & Port 443 corresponding to QuickBooks in the firewall advanced settings corresponding to the following executable files:
QBW32.exe
QBCFMonitorService.exe
FileManagement.exe
QBDBMgr.exe
IntuitsyncManager.exe
QBDBMgrN.exe
QBGDSPlugin.exe
QBLaunch.exe
AutoBackupExe.exe
Dbmlsync.exe
QBServerUtilityMgr.exe
Proper configuration of these settings ensures that QuickBooks desktop can communicate effectively through your firewall and minimizes interruptions during updates or data exchange.
Solution 6: Reset the previous update of QuickBooks
This solution requires you to check-mark the Reset updates option in the update QuickBooks window. To make things easier for you, go with these steps:
Launch QuickBooks Desktop on your system.
Navigate to the Help menu and select Update QuickBooks Desktop.
In the Update QuickBooks window, go to the Update Now tab.
Then check-mark the Reset Update box before clicking on Get Updates. (It will clear all the previous update downloads.)
Click on Get Updates to begin downloading the latest updates.
Once the update process is complete, restart QuickBooks to ensure all updates are properly installed.
Use only official QuickBooks installers and licenses
Summing Up!
Getting rid of QuickBooks error code 12045 isn’t that difficult. However, if you aren’t an accounting professional and finding it difficult to deal with this issue, then we suggest you to connect with our XpertBooks Pro team right away. With an experience of more than a decade, we have catered to clients across the globe and have made remarkable steps in the direction of making the QuickBooks experience seamless and error-free for you.
FAQs
What is QuickBooks Error 12045?
QuickBooks Error 12045 is a network and update-related error that usually appears when QuickBooks fails to connect to the internet while downloading updates or payroll.
Which tools can fix Error code 12045?
Tools like QuickBooks Install Diagnostic Tool and Quick Fix My Program tool are available in the QuickBooks Tool Hub. These can fix Error 12045.
What to do if update errors keep coming?
In such a case, try updating manually in the "Safe mode". Just download the update file from the Intuit website and install it.
QuickBooks community has been reverberating multiple Sales Tax Issues. Users have faced various types of unresolved technical snags as they tried to file tax returns or do other tax-related operations on QB Desktop. These technical problems are large in number; but this article unravels all of them one by one. This article explains common Sales Tax issues in QuickBooks and their easy resolutions. So, keep reading!
After that, check the Bank Register that was used to make the payments.
Herein, the user should identify any improper sales tax payments.
Retype the sales tax payments by following the directions given below:
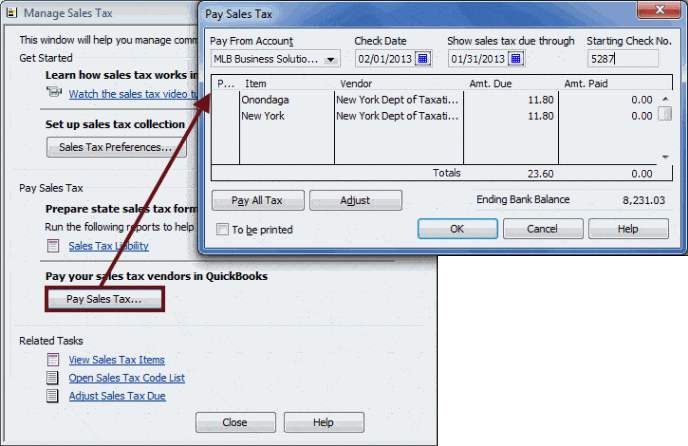
Choose the Sales Tax option in the Vendors menu.
Click on the option to Pay Sales Tax.
In case of multiple accounts, select the one to be used in the Pay From Account field.
The user should have sufficient funds in the checking account to cover the sales tax payments. If the funds are insufficient, then the user should opt for a different account.
After that, type the date of the sales tax payment in the Check Date area.
Alter the date under "Show sales tax due through" to the end of the relevant payment term.
In the Starting Check Number section, the user should type in the check number from the initial payment.
Then, in the Pay column, check the boxes next to the items to pay for.
Now, select the amount in the "Amount Paid" column and modify it if necessary for any of the products.
The total should match the payment made originally. Once that is verified, click on Ok.
Delete the initial payment transactions from QuickBooks other sections
Enter the payment and double-click the saved bank account.
To alter, scroll to the sales tax payment date.
Take note that the entries should be close to one another because the dates on the original and the re-entered payment are same.
The payment will be re-entered as a TAXPMT type. If the initial payment has already been received and cleared by the bank, check the TAXPMT entry and then choose Record.
Make sure to change the check numbers in the register to correspond to the real check numbers if the sales tax payments are made to more than one tax agency and were not initially written in consecutive order. To do this, click on the Number area, enter the correct check number, and then choose Record.
From the Edit menu, choose the Delete Check option after selecting the initial sales tax payment (CHK/CHK type).
Double-check whether the error is fixed
Run a report on your sales tax liability for the most recent date, and contrast the results with the amount remaining in the sales tax payable account.
Run the Vendor Balance Detail report to view the vendor balances corresponding to each tax agency.
Check for duplicate payments by running the Transaction List by Vendor report.
Issue 3: The user must specify vendor name for his/her sales tax account
Viable Tip: The user should enter a vendor name in the Customer: Job section while creating the journal entry.
Negative sales tax payable on the cash basis Balance Sheet report
Possible reason: If the users pays sales tax at the end of the month, they should have the option of doing so either in the month of producing the invoice (on an accrual basis) or in the month it is paid (cash basis). If the payment is made on the accrual basis and the report is run on a cash basis, the user will notice a negative amount for the Sales Tax Payable account.
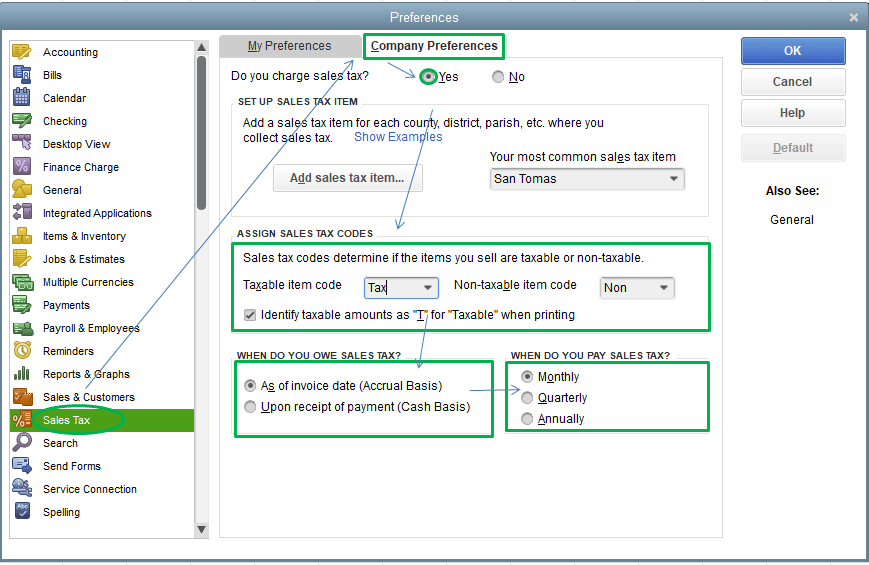
Steps for setting the Sales tax basis in QuickBooks:
The first step is to log in as an administrator to the Company File.
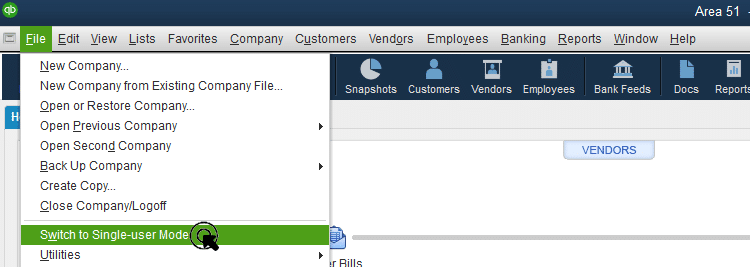
After that, click on the File tab and switch to the Single-user Mode option.
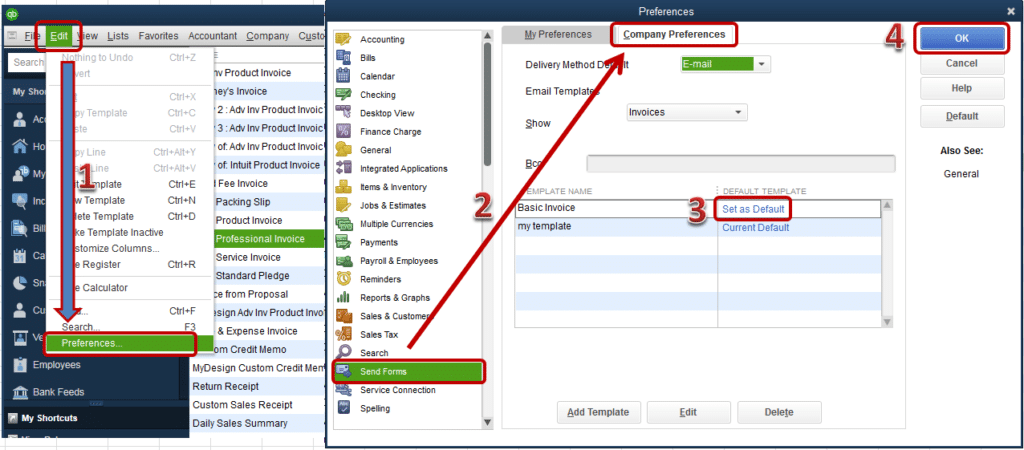
Now, click on Edit and pick the Preferences option.
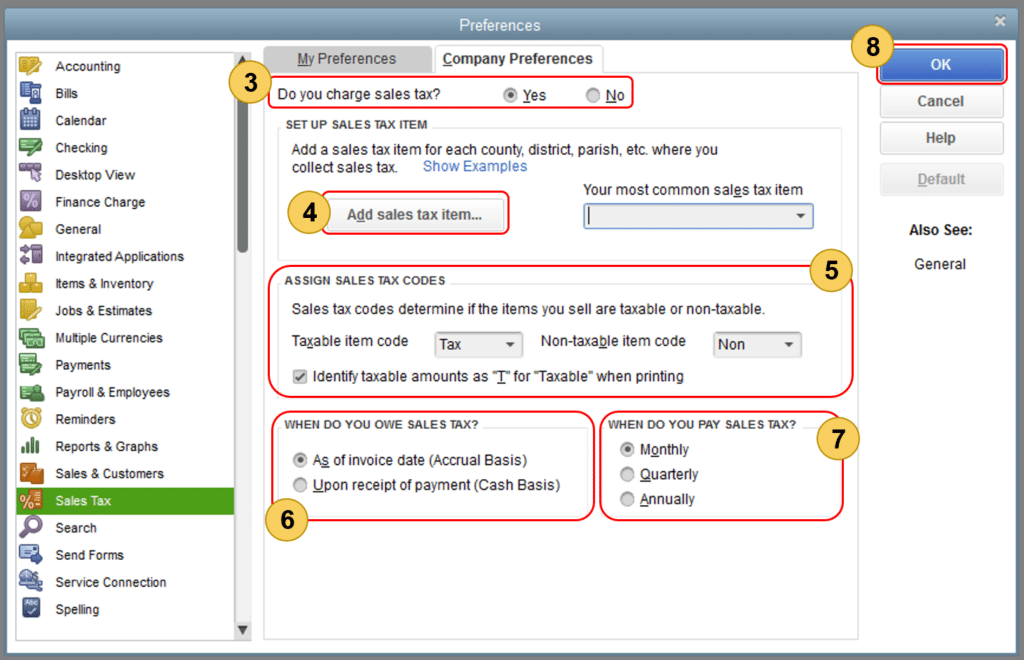
Select Sales Tax in the Preferences window.
After that, click on the Company Preferences tab.
Pick the Appropriate basis corresponding to the company in the ‘’When do you owe sales tax?’’ section.
Once that is done, hit on Ok.
Inactive Sales Tax Items also impact the Sales Tax Group
Quick Tip: When a Sales Tax Item is set to Inactive, the allocated Sales Tax Group does not have the item deleted. To effectively apply the active sales tax items, the inactive sales tax items must be cleared from the Sales Tax Group. The steps for the same are given as under:
Click on the Lists tab.
Herein, hit a click on the Item List.
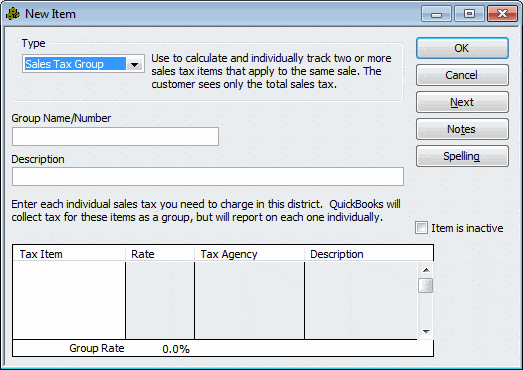
Now, double-click the corresponding Sales Tax Group.
Choose the sales tax item and then press the Ctrl and Delete keys together.
Finally, hit on OK tab.
Issue 4: Error when users try to create a Credit Memo
Possible reason: The sales tax item on the invoice is included even if the sales tax setting in the company file is disabled.
Troubleshooting Method: Turn Sales Tax on in the company file
The steps for enabling the Sales Tax are discussed below:
Click on the Edit tab.
Herein, choose Preferences.
Hit on Sales Tax and then choose the Company Preferences tab.
Click on Yes under the "Do you charge sales tax?" option.
Issue 5: This item is used in a customer data and cannot be deleted
Possible Cause: The Additional Info tab of the Edit Customer page shows that at least one customer is allocated to the sales tax item that the user is trying to remove.
Steps for deleting the sales tax using Customer Contact List report
The easy steps for removing the sales tax by using the Customer Contact List report are as follows:
Click on List and then choose the Customer Contact List option in the Reports option.
Select the option to create a Custom Report.
After that, choose the Tax Item option from the list of available columns.
Now, sort the report and locate the corresponding customer that is linked with this item.
After that, select the Tax Item option.
Click on Ok.
If the sales tax item is correct, select any client by double-clicking on his/her name.
Now, click on the edit Customer option and then hit on the Sales Tax Settings.
Remove the tax item to be deleted from the Tax Item section.
Issue 6: Sales tax line item is inaccessible while printing invoices
Quick Tip: There must be a description in the description column of the Sales Tax item in the Item List for it to print as a separate line item on the invoice.
Procedure for adding description to the Sales Tax Item
Hit on the List tab and pick the Item List.
Double-click on the Sales Tax item that does not appear on printed invoices.
The users should now type the sales tax or the description of the sales tax item as they wants it to appear on the printed invoice.
Issue 7: The existing credit with [Vendor Name] is sufficient to pay sales tax due
Primary causes:
When applying the discount to the amount due in the Sales Tax window, it does not print a check but instead records the payment in the Sales Tax payable register for the full amount and does not apply the discount.
A sales tax discount does not have the same vendor name as the sales tax item.
Troubleshooting Method:
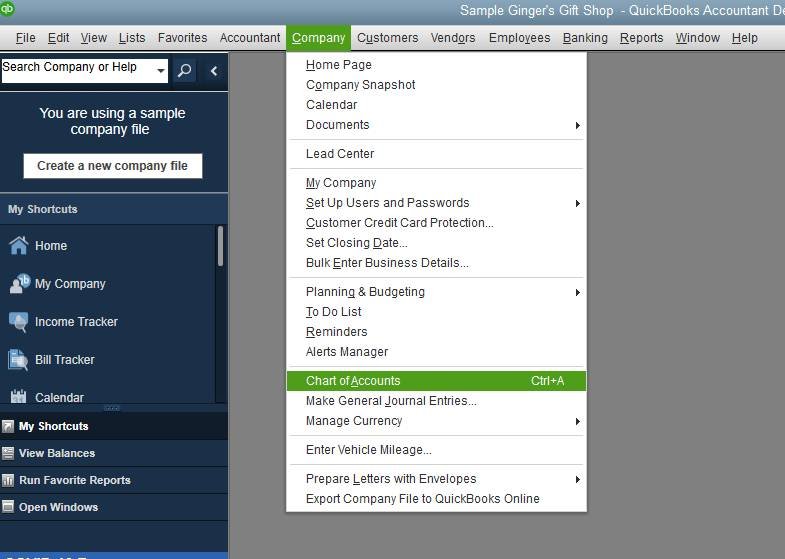
Hit on the Lists tab.
Now, choose Chart of Accounts.
Double-click the chosen Sales Tax Payable account to open its register.
Locate and choose the payment for the sales tax just sent.
Select the option to delete Sales Tax Payment from the Edit menu.
Now, click on Ok.
Make sure to keep the register for Sales Tax Payable open.
Now, head to the Vendors tab and select the Sales Tax option, followed by the option to Pay Sales Tax.
Check to make sure the discount is not from the same vendor as the sales tax item. On the sales tax item, take note of the seller name.
To close the Pay Sales Tax window, click on Ok.
Visit the Sales Tax Payable register once again.
Locate the discount and modify the vendor name to correspond to the seller listed for the sales tax item.
For the modifications to be saved, choose the Record option.
Head again to the Vendors option.
Click on Sales Tax option and the Pay Sales Tax option.
To pick both the discount item and the sales tax item, place a check in the Pay column next to the appropriate items.
To close the Pay Sales Tax window, click on OK tab.
Summing Up!
With that, we arrive at the conclusion of this illustrative article. In this thorough piece of writing, we have incorporated all the viable solutions that can aid QB users in the easy resolution of various common sales tax issues in QuickBooks desktop. If users have any other queries related to the accounting program which need urgent resolution, they can contact XpertBooks Pro. Our team works to identify the root cause and help you restore normal operations as quickly as possible
Frequently Asked Questions (FAQ's)
How can I fix 'QuickBooks is not calculating sales tax correctly for some transactions' issue?
You need to cross check the sales tax codes that are assigned to your products or services. Also, you need to make sure that they're correctly set-up in your file and your customer tax settings are accurate.
What to do when I accidentally deleted a sales tax payment in QuickBooks?
Sorry to say, but once a sales tax payment is deleted from your QuickBooks, it can't be recuperate. You need to manually recreate the deleted payment first and reconcile it with your bank statement.