QuickBooks Event Log Error 4 occurs when there is an issue with the .NET Framework 4.0 in Windows 7. It is one such error that you may face very often and keeps your annoying repeatedly. As we all know that, QuickBooks is one of the best and widely used accounting software and has proved to be very useful for small and medium businesses. It helps them in keeping a track of their accounts seamlessly.
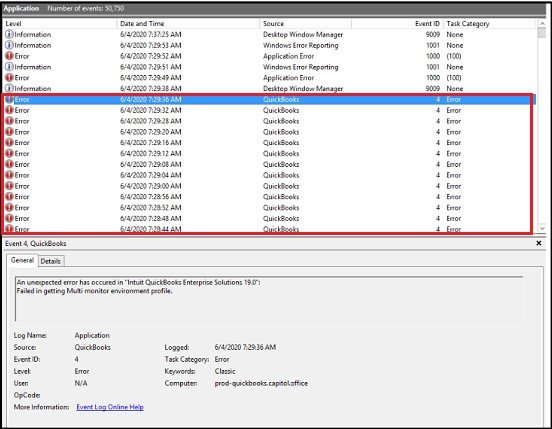
But many users face errors with QuickBooks desktop that hampers their work and sometimes, lead to loss of company file data and some other important data. In this case, it is important to find a solution as soon as possible. When QuickBooks Event Log Error 4 occurs, the following message appears on your desktop screen:
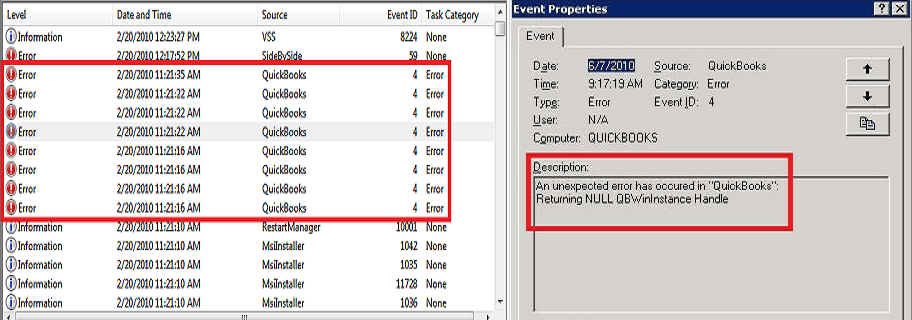
QuickBooks Event ID 4:
An unexpected error has occurred in QuickBooks: Returning NULL QBWinInstance Handle.
Description
Event ID 4: An unexpected error has occurred in QuickBooks WPR: calling ABORT_CLOSE
Description
Returning NULL QBWinInstance handle
Problem
An unexpected error has occurred in QuickBooks WPR: OpenPrinter call failed
Description
Integration Manager couldn't connect to QuickBooks. Please make sure that it is open: when it takes place.
Description
An unexpected error has occurred in QuickBooks WPR: SetNameDriverAndPort call failed
Event ID 4:
An unexpected error has occurred in QuickBooks WPR: validation failed
What are the causes of QuickBooks Event Log Error 4?
There are a bunch of factors that can drag you into such an error. The most prominent ones are enlisted as follows:
Here's how you can fix QuickBooks Event id 4 Error in Windows
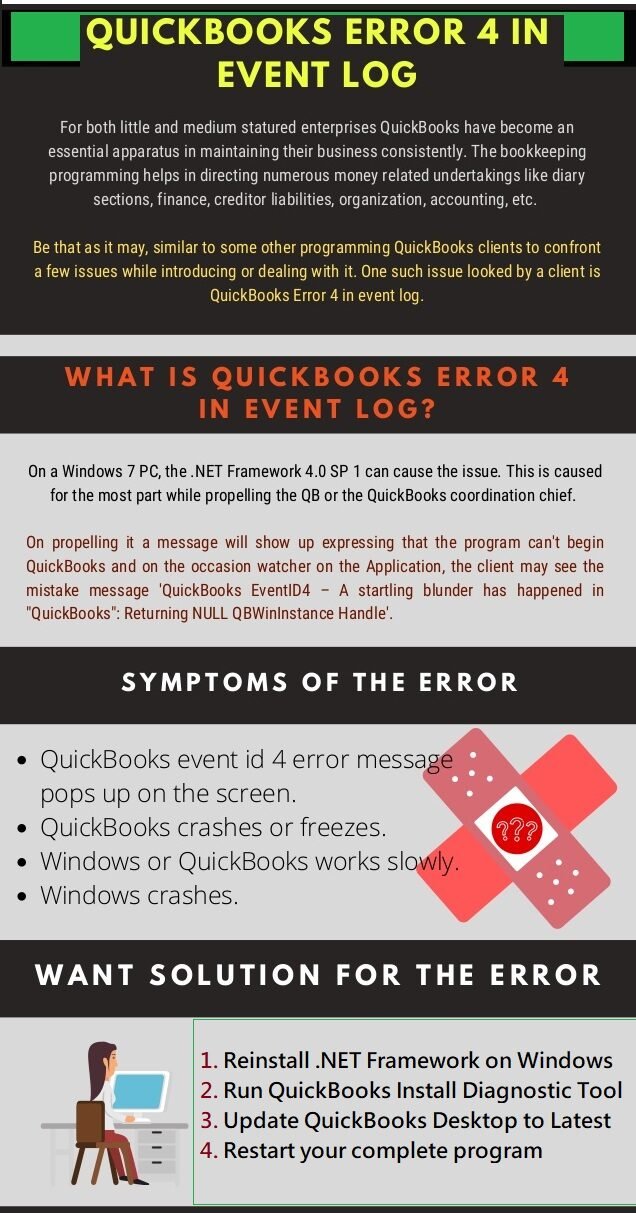
Firstly, checkout the following infographic image in order to troubleshoot the QuickBooks event ID log error 4:
You can also follow the manual solution methods that are given below:
Method 1: Reinstall .NET Framework on Windows
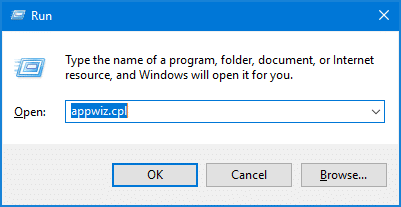
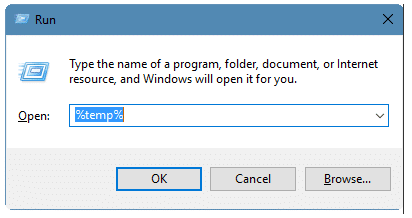
Open Run Window using the 'Win + R' short key.
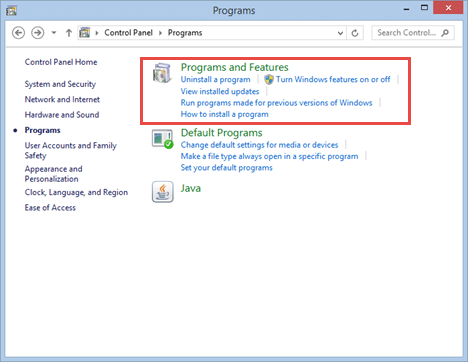
Type appwiz.cpl in the dialog box. Then press Enter key.
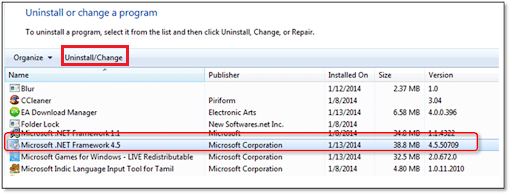
As the new screen opens, hit a click on Add/Remove under the Programs and Features list.
Find Microsoft .NET framework 3.5 and click on it. If the latest version is available, locate it.
Now hit a click on Uninstall.
Once it is uninstalled successfully, restart your system.
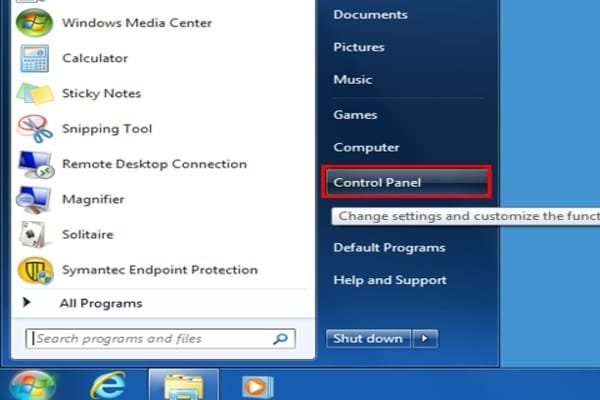
Open Run Windows again and type Control panel.
Again click on Add or Remove Windows feature located on the left side of the windows.
From the list, click Microsoft. NET. Framework.
Now tick mark the first and second box and then hit a click on OK.
Once you perform all the previous steps, click on ‘Finish.'
Lastly restart your system and open QuickBooks Integration Manager.
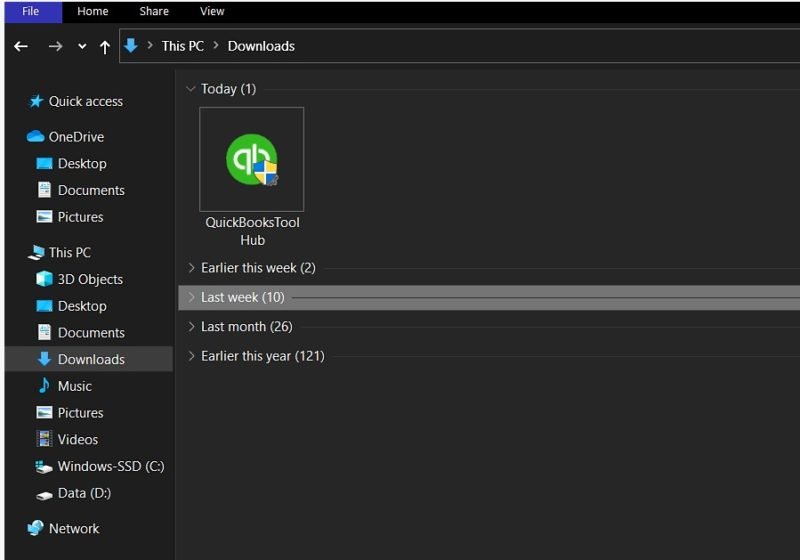
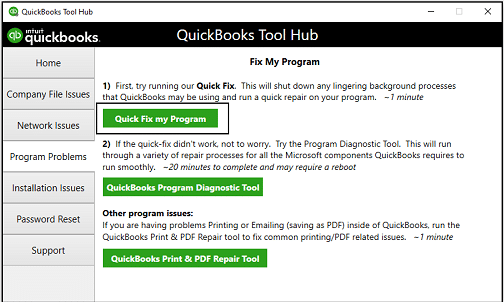
Method 2: Run Quick Fix My Program from Tool Hub Program
QuickBooks tool hub program has the ability to fix most common errors that occurs at the time of installation, updation and downloading the software. To run quick fix my program, go with the following steps:
We have firm confidence that the troubleshooting methods given above assisted you in resolving the QuickBooks Event Log Error 4. In case the solutions given above do not help you in fixing the same problem, then you can get in touch with our accounting experts by calling to our toll-free number. Our experts are readily available to addressing all your queries.
FAQ's
What is QuickBooks Event Log Error 4?
Event Log 4 error is a technical snag in QuickBooks that appears due to a corrupted .NET Framework.
In which QuickBooks desktop versions the Event id 4 error occurs?
This error mainly occurs in QuickBooks Desktop 2018, 2017, and QuickBooks Desktop 2016 versions.
What error messages appears when QuickBooks Event Log ID error happens?
You may see one of the following error messages: 1. "An unexpected error has occurred in "QuickBooks": Returning NULL QBWinInstance Handle" 2. "Unhandled Exception Caught! Exiting application…" 3. "QuickBooks has encountered a problem and needs to close." etc.
How can I fix Error 4 in QuickBooks?
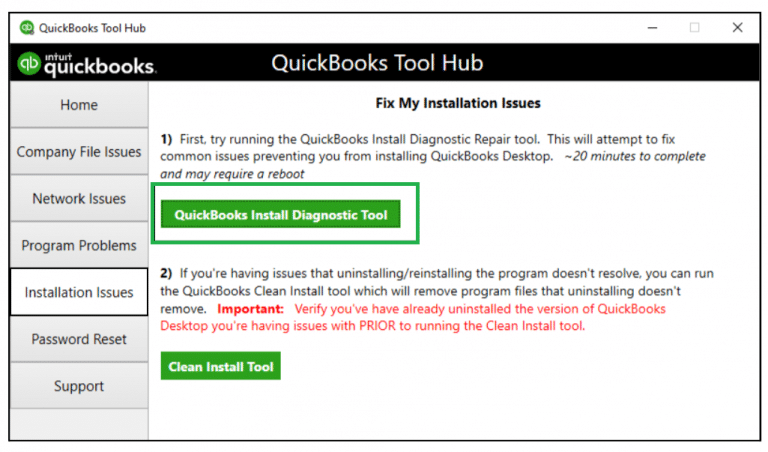
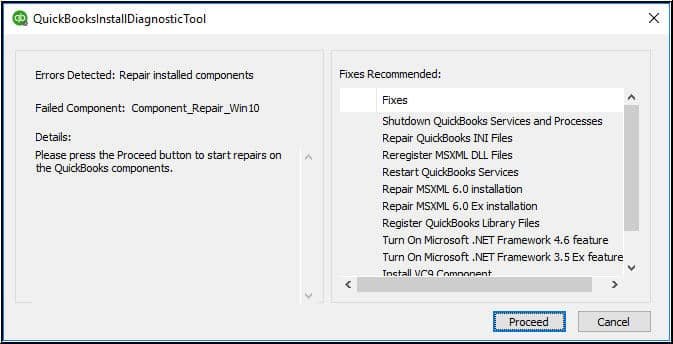
This error can be resolved by performing any of the following methods: 1: Run QuickBooks Install diagnostic tool from tool hub program. 2: Also, launch the Quick Fix My Program to fix such errors.
Are you facing QuickBooks error code 12152 and struggling to understand why your software refuses to update? If yes, then you’ve landed at the right place to get answers. Just like any other software, QuickBooks is not immune to errors or technical glitches. At times the errors can be easily handled by the users and sometimes they would require professional help to fix the issue. This error is usually related to internet connection settings, as the QuickBooks is not able to connect with the server if the internet connection settings is mis-configured and that’s why the software cannot be updated. You should first check whether the internet is working or not instead of starting with the different solutions to fix this problem. In this segment, we are going to discuss all the facts associated with this error code.
What is QuickBooks error 12152?
Well, before learning the causes and solutions to this error, it is recommended to first get a brief about this error. According to the experts QuickBooks Error 12152 usually occurs when users try to download payroll updates or update QuickBooks desktop. This error can also be seen when there are any kind of issues with Internet connection settings. Any kind of technical glitch in the internet connection settings makes it hard for the software to connect to the servers, which ultimately end up in issues in updating the software. There can be a handful of factors causing such an error which will be discussed in detail later on. So, we recommend you to continue reading this article till the end.
What causes QuickBooks error code 12152?
The QuickBooks update error 12152 can happen due to many reasons and the common ones are listed below:
This error often caused by mis-configured internet settings
Older version of QuickBooks, especially QuickBooks desktop 2014 or earlier.
The license data is not identified by QB software.
There might be a problem with the API keys of Windows.
May be your computer is infected with virus, Trojan or malware.
Problem with the software installation, for instance the installation has got expired.
There can be issues with your Windows Registry
QuickBooks or may be your computer got abruptly switched off due some reason like power cut etc.
If some important file or folder got deleted.
Symptoms of QuickBooks Payroll Update Error Code 12152
Identifying the error code 12152 in QuickBooks desktop becomes easy, with the help of the below-mentioned signs and symptoms.
Error Code 12152 frequently displays on the screen.
The software becomes slow or unresponsive.
Ways to Resolve QuickBooks Error Code 12152 (When Updating the Software)
Below are the solutions to resolve error code 12152 in QuickBooks:
Method 1: Repair QuickBooks Desktop
You need to repair QuickBooks desktop to resolve this issue. The steps to be followed over here are:
Press the Start button type Control Panel into the search bar.
Click on the Open button to launch the control panel.
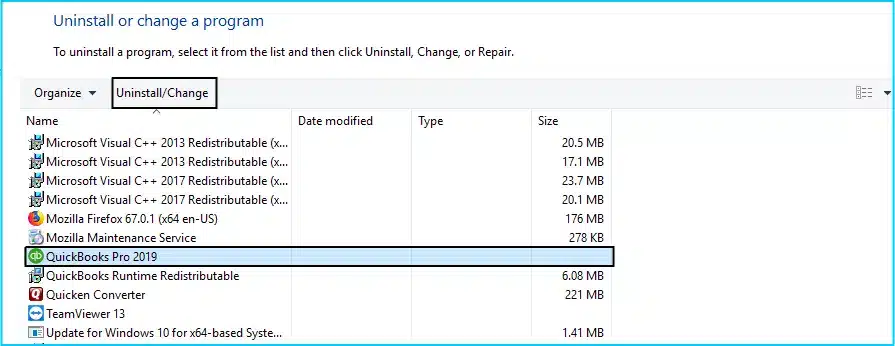
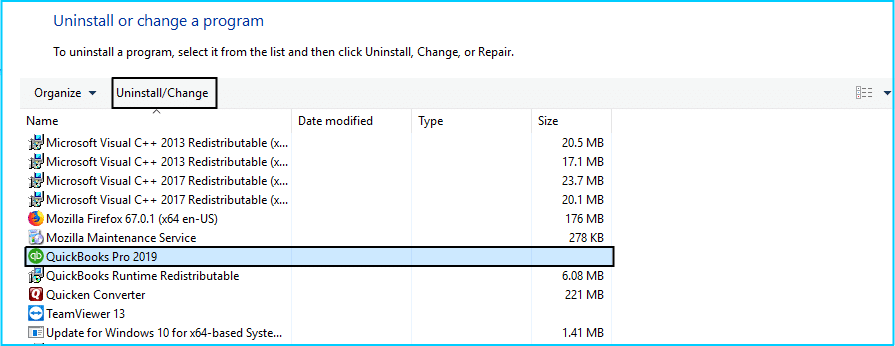
Now click on Programs and select Programs and Features option.
Choose QuickBooks Desktop from the list.
Hit a click on Uninstall/Change option.
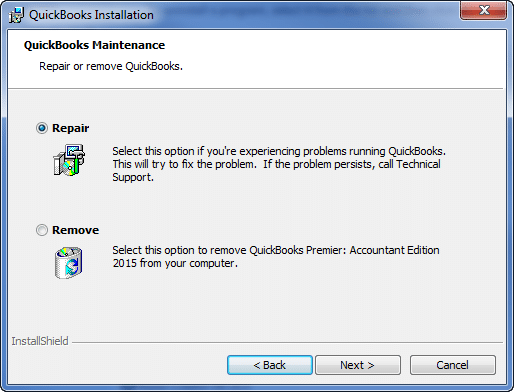
In the next step, select the Repair option.
Follow the on-screen instructions carefully to repair QuickBooks desktop.
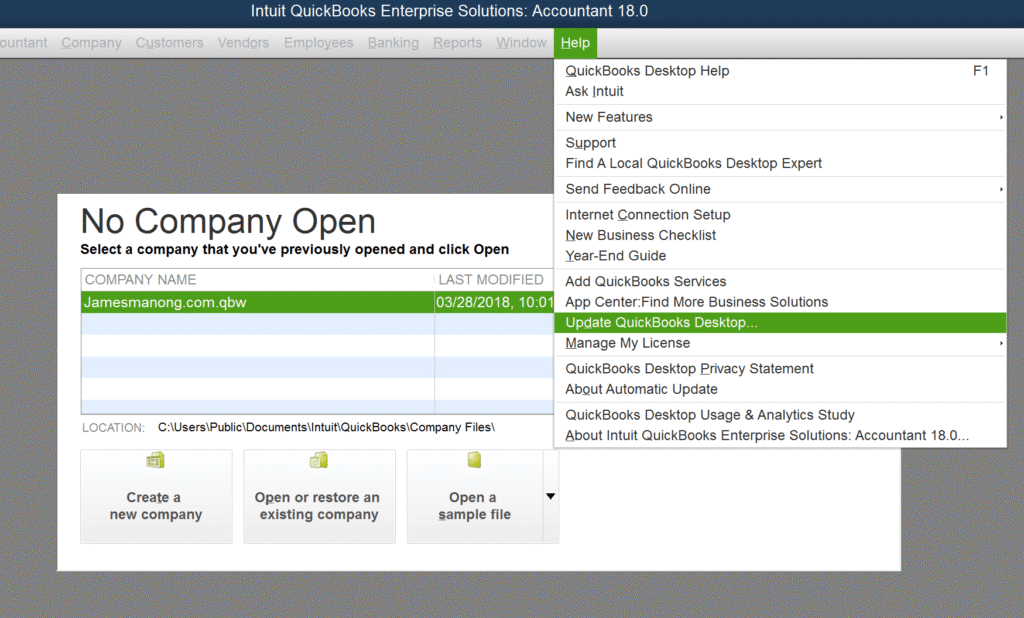
Method 2: Reset QuickBooks updates
Once the updates are reset, QuickBooks automatically downloads fresh update files from the server. Follow the steps given below carefully to reset QuickBooks updates successfully.
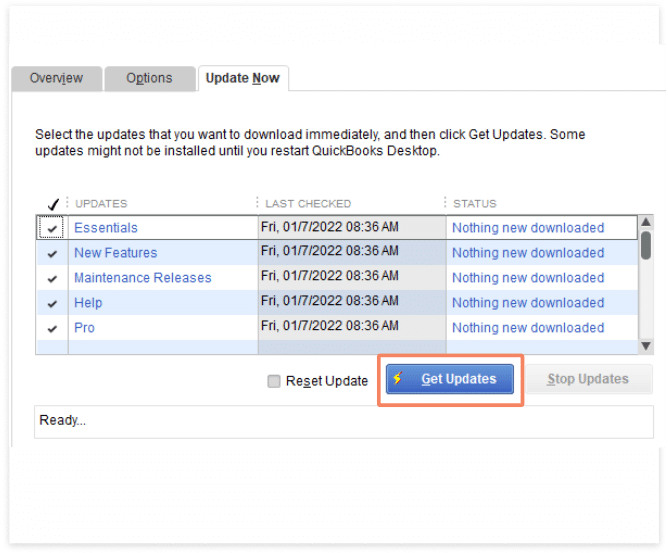
Now checkmark on Reset Update option and hit a click on Get Updates option.
Now wait for QuickBooks to download the latest update files completely.
Once the download process done, close and reopen QuickBooks desktop.
To install the updates, hit on Yes.
Restart the computer after the installation process completes.
Method 3: Restore your system
The next solution is to restore the PC. Restoring the system can work in fixing the error up to a great extent. You are simply required to follow the steps below:
First thing that you have to do is to restart your PC.
Log in into the system by using Windows admin credentials.
Now hit a click on the Start menu which is located on the bottom left of the screen.
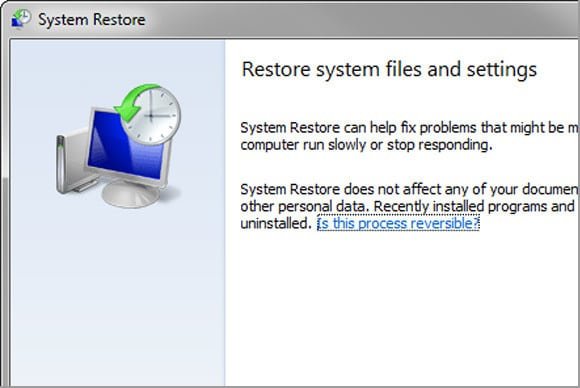
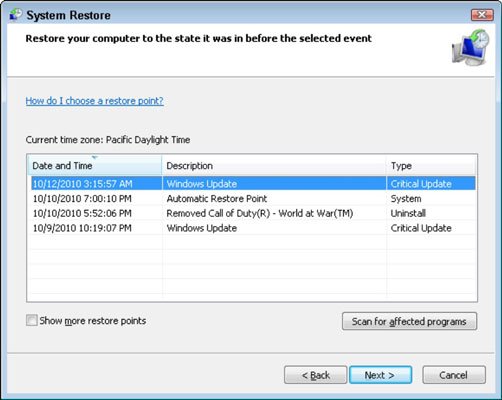
In the search bar, type System Restore.
Now, search for the option that says Restore computer to a previous time and date.
Choose the above option, and then go to the Next button and hit a click on it.
From the list of restore points, go for the latest one.
Confirm your choice by once again clicking on the Next button.
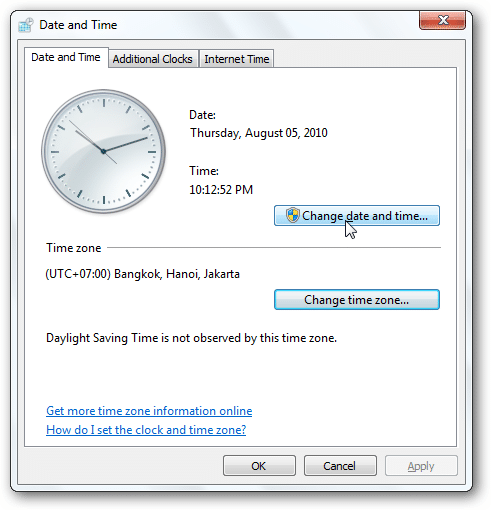
Verify the Date and Time of your PC are correct on your system.
If it isn’t correct, then go bottom right of your system.
Now put the cursor on the time that is displayed and right-click on it.
Hit a click on Change date/time.
Now restart your QuickBooks desktop and check if the error has got resolved or not.
If you are Windows 11 user then follow the below given steps:
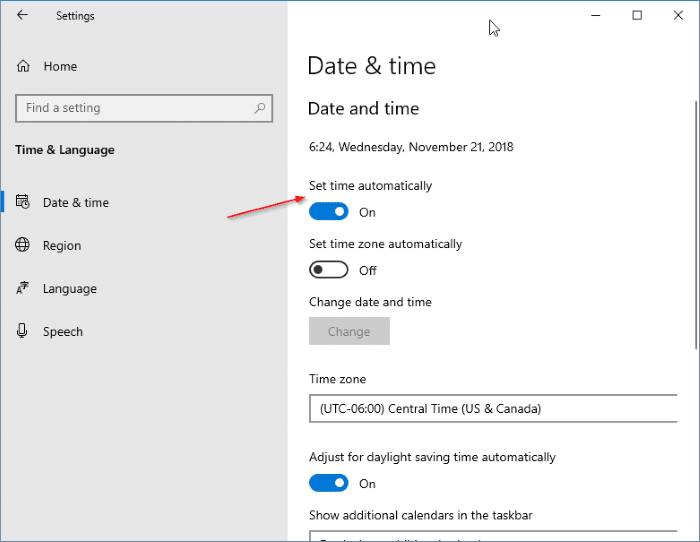
Go to the Settings tab and click on Time & language
Navigate to the Date & time page.
To set the current time click on Set time automatically option.
In the Time zone section, ensure that correct time zone is chosen. In case it is not selected, then choose the correct one from the drop-down box.
If the daylight saving time applies to your time zone, just enable the “Adjust for daylight saving time automatically” option.
Method 5: Reset Internet explorer settings
Another solution can be to check the working condition of the internet of your system. As many times, internet options might lead to such sort of errors. The steps involved in this process are as follows:
Navigate to the Start menu.
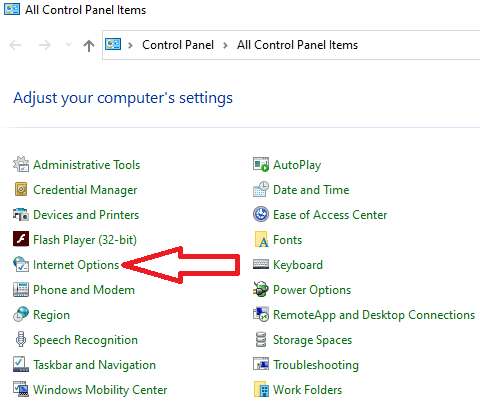
After that type Control panel in the search field and hit on Enterkey.
Now the Control panel window will get opened.
In this window, search for the Internet Options.
After this, hit a click on Internet Options.
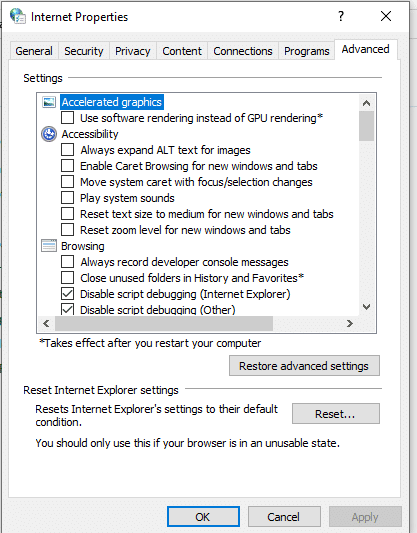
Now go to the Advanced tab and click on it to open it's window.
Lastly you have to choose the Advance reset option.
It is suggested that any changes in the Windows Registry should by done by some expert and not by yourself. This is because if anything goes wrong while you are making changes to the registry then your computer might stop working.
Go to the Start menu.
In the search field, type Command and hit on it.
Press CTRL and Shift keys together and hit Enter key on your keyboard.
You will see a User Account dialogue box on the screen.
Hit a click on Yes button.
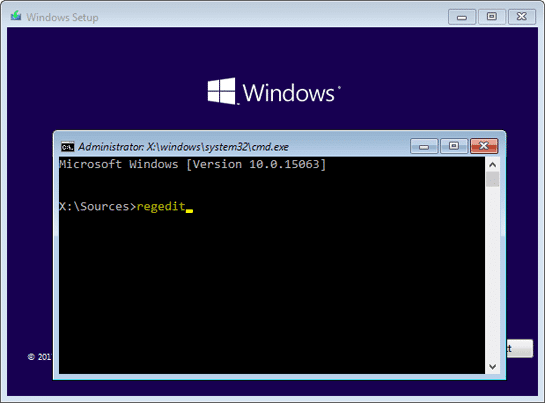
Once done you will see a block box with a clinking cursor will be displayed on the screen.
Now type regedit and press the Enter key.
Choose the key that is related to error 12152 in the registry editors like the Google Chrome or Internet Explorer
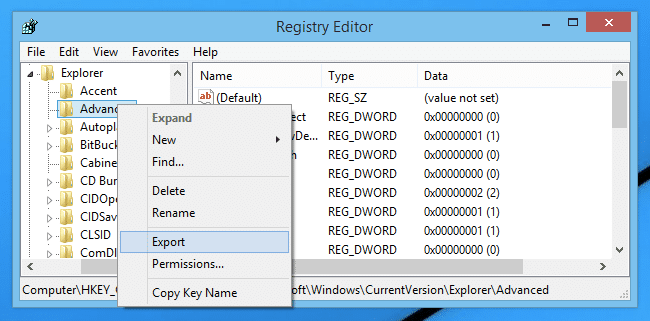
From the File menu, hit on Export option.
Store the Google Chrome or IE backup key in a folder.
Now give the folder a name and also, ensure selected branch is chosen.
Once done, hit a click on Save button.
Verify that the file has been saved as a .reg file.
Through the solutions mentioned above, you can quickly resolve the QuickBooks error 12152. However, if the problem still appears on your software, you must have to connect with the error handing team. Our experts will guide you with quick and relevant solutions to your problems or queries.
These payroll errors may be encountered for several reasons, including: 1. Erroneous internet settings. 2. If you are using an older version of QuickBooks. 3. License data not identified by QuickBooks, may also lead to this error.
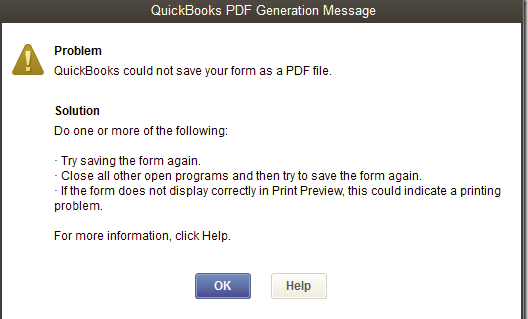
QuickBooks accounting software is a bliss, when it comes to features and functionalities. One such built-in feature is QuickBooks PDF converter, which converts QuickBooks reports and forms into Adobe portable document format files. Having QuickBooks reports in PDF form, makes it easier to share the financial reports to personnel who don’t have QuickBooks installed in their systems. However, situations might arise when you might bump into QuickBooks issues related to printing, emailing, or saving as a PDF file from QuickBooks desktop. There is a lot more about PDF converter, its installation, and troubleshooting of errors.
What is QuickBooks PDF Convertor?
QuickBooks PDF convertor is one of the most important background component because it directly controls how invoices, reports and forms are created as PDF files. It is a built-in utility in QuickBooks desktop that helps users to create, save and email PDF files directly from QuickBooks forms such as invoices, reports, pay stubs and purchase orders. In case the converter stops working, users may encounter some issues at the time of saving transactions as PDF or printing forms. Thus, to know more, make sure that you stick around this space till the end. And unleash some of the most important information related to QuickBooks PDF converter.
So as to install the QuickBooks PDF converter, the below steps can surely work. Let us dive in deep and further explore the steps involved:
Right click on QuickBooks desktop icon and select Properties tab.
Go to the Find target tab or open the File location.
Double click on Install application, or install.exe to install the PDF converter alternatively.
Hit a click on OK tab when the installation gets complete.
Press the Windows Start tab and hit a click on Search tab.
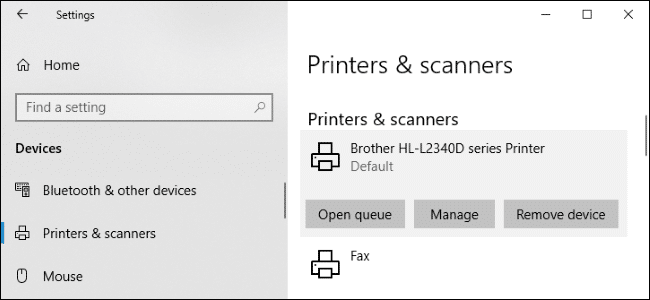
Type in the Control printers in the open field and click on OK tab.
This will also open the Printers and scanners window.
Right click on Document converter and click on Rename option.
Enter the QuickBooks PDF converter and hit on Enter key.
Also ensure typing the name accurately as shown here, including spaces.
Steps to Delete the QuickBooks PDF converter
Now that you have learnt the steps involved in installing QuickBooks PDF converter let us explore the steps that can be implemented in order to delete the same.
Login to the Windows using the Admin credentials.
In case you are using Microsoft Windows XP, then open the Printers and faces window and head forward using these steps:
Move to Windows Start tab on the bottom left of the screen, and click on it. Choose the Run tab.
Type in the words stating Control printers in the run window.
Hit a click on Ok tab.
If you are using newer version of Microsoft Windows, including Windows 10, then in that case, open the Printers and faxes/ devices and printers window and follow the steps ahead:
Head to the Windows logo tab and click on the same.
hit the Run tab, if not available, then use the start search bar to Find run.
In the run window, enter the words Control printers.
Hit a click on OK tab.
In case the printers and faxes window opens up, it is suggested to right click on QuickBooks PDF converter icon.
From the list that appears, right click on Get the delete option.
Click on Yes in the confirmation window. And you are good to go…
Steps to Re-install QuickBooks PDF converter
If you want to get back the PDF converter after deleting it, then carry out the steps listed below related to reinstalling QuickBooks PDF converter.
Find the QuickBooks icon on the desktop.
Hit a right click on QuickBooks icon.
From the list that is seen on the screen after right clicking, select the Properties option.
In the properties window, hit a click on the Find target or Open file location option.
You will be driven to a Windows Explorer window.
Double click on install.exe file or Install application.
This will install the PDF converter.
Now tap on OK tab.
Head to the Windows Start tab and also select Run.
Type in Control printers in the open field.
Followed by hitting OK tab to open Printers and faxes.
Hit a right click on the Amyuni document converter and choose Rename tab.
Enter the correct name according to the QuickBooks version being installed in the system and hit enter tab.
QuickBooks 2006-2009 R8: QuickBooks PDF converter
QuickBooks 2009 R9 and later: PDF converter 3.0
QuickBooks 2010 R1 and R2: PDF converter 2.0 QuickBooks
Select NO for the default printer and then hit a click on Next tab.
Now choose Do not share this printer and then hit a click on Next opt.
A prompt will appear as Print a test page on your screen. Choose NO and hit a click on Next.
Troubleshooting PDF Converter Issues (PDF and Print Issues in QuickBooks Desktop)
While converting PDF, you might bump into certain errors, which can be resolved using the rectification methods listed below. Let us explore further:
Solution 1: Run QuickBooks Print and PDF repair tool from QuickBooks tool hub
In order to get rid of the PDF and print issues, one can make use of the QuickBooks print and pdf repair tool. This can be accessed using tool hub. We have jotted down the steps involved in this process, let us have a look:
Step 1: Download and install Tool hub
Start with closing QuickBooks.
It is highly recommended to download the most recent version of QuickBooks tool hub. You can save the file somewhere that it can be accessed without any hassle. In case you have already installed the tool hub earlier, then you can find out the version being used by clicking on to the home tab or selecting the about to view the version.
Open the downloaded file.
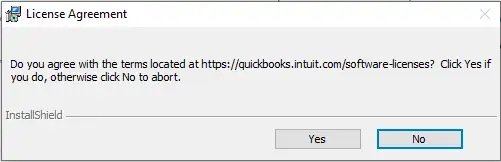
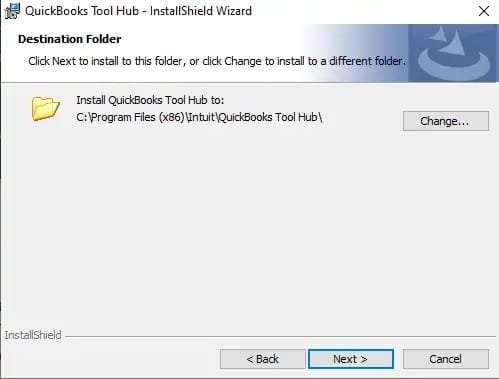
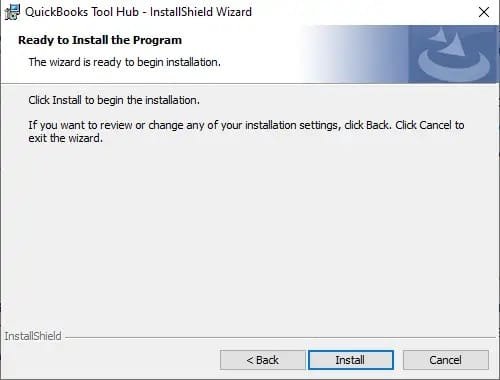
Pay heed to the onscreen steps to Install and agree to the terms and conditions.
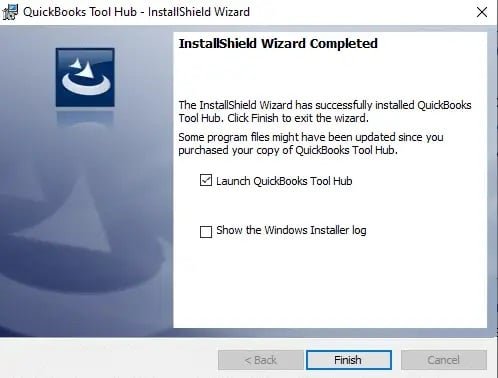
Double click on the tool hub Icon from the Windows desktop to launch the QuickBooks tool hub.
Step 2: Run PDF and print repair tool
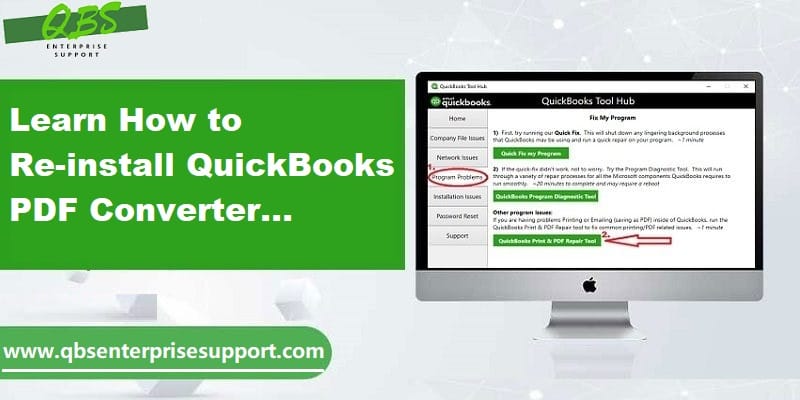
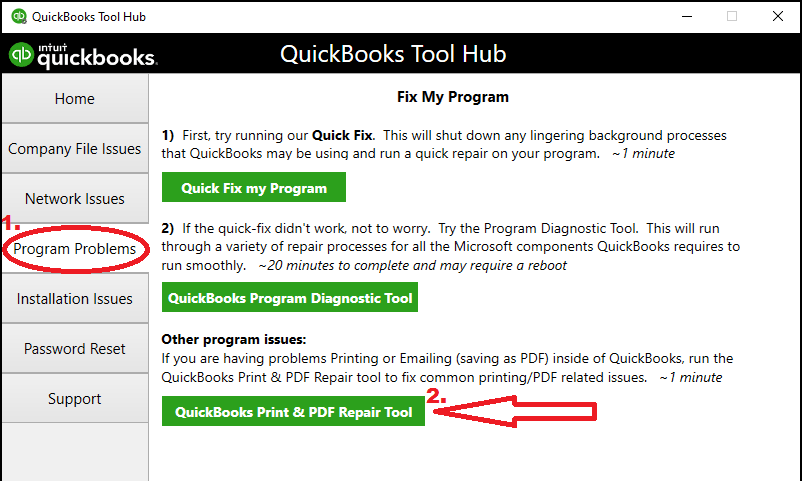
Now that you have installed the tool hub, it is time to select Program problems.
Click on QuickBooks PDF and print repair tool option. This would take about a minute to run.
Once done with the process, try to print, email or save as PDF from QuickBooks desktop again.
Solution 3: Testing, reinstalling and adjusting permissions for XPS document writer
If none of the above solutions worked, you can give a try to the below steps for fixing the issue successfully. But before that, it is important to be kept in mind:
Keep it mind that intuit doesn’t support Microsoft apps and isn’t responsible for the tools as well.
Moreover, if you are uncomfortable with the tasks, it is suggested to reach out to IT professional.
Steps under this process:
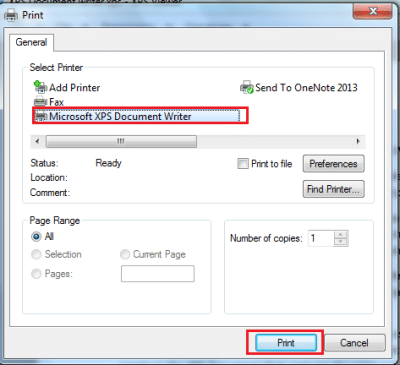
At first required to test the XPS document writer and print outside QuickBooks.
Verify the XPS services and check if they are enabled or not.
Head forward by reinstalling Microsoft XPS document writer.
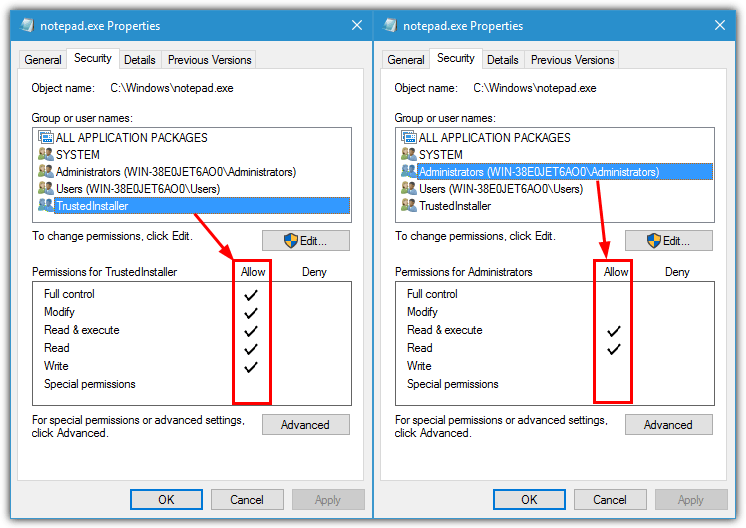
And adjust Windows user permissions for XPS document writer.
Edit the Security software settings.
Install or repair MSXML 6.0.
Create a New template for the form.
And bypass the print spooler.
To wrap it up!
There is a lot of learn about QuickBooks PDF converter, and we have tried to summarize some of the most important information related to it in this piece of writing. For some reason, if any of your query remained unanswered, or if you find anything confusing at any stage, do not think twice in consulting our XpertBooks Pro team for quick and precise solution. Our team uses cutting-edge tools and technologies to provide best accounting services to out clients across the world.
FAQs
What types of documents can be converted to PDF using the QuickBooks PDF Converter tool?
PDF converter tool can convert reports, invoices, purchase orders, sales receipts, checks, estimates, vendor bills, credit memos, tax forms, and other documents to PDF format.
Is QuickBooks PDF Converter free to use?
Yes! It is a free-to-use tool that comes along with QuickBooks.
Can I convert pdf files to other formats by using QuickBooks PDF converter?
No! This tool can only convert other extensions to PDF format. A file once created in the PDF format cannot be converted to other formats by using this feature.
Perks of using QuickBooks PDF convertor tool
QuickBooks PDF converter tool rolls in with some great advantages, some of which are listed below: 1. Easy data sharing is one of the major benefits of using QuickBooks PDF tool. This can help in making the well-informed decisions and also boost the business profits. 2. Another benefit can be that the PDF file is supported across various platforms and can be opened with the help of Adobe reader, Foxit reader, PDF-Xchange viewer, or perfect PDF reader. 3. Moreover, once you converts the company’s data in the PDF format, you can email it to the clients and associates. You might also upload the PDF file to a web browser, intranet, or computer server, so that others can also see it. 4. You can also convert various QuickBooks reports such as reconciliation statements, balance sheets, company invoices, and various others.
Have you suddenly been unable to access your company file and left wondering what went wrong? Well, when performing certain activities on QuickBooks, users often bump into certain sorts of errors, which can be pretty much annoying and time consuming to handle at times. One such error is QuickBooks error code 6069 which is directly related to company file issue. This error usually encounters when trying to create an invoice in a particular account or when attempting to save it, the QuickBooks program shuts down. As a consequence of this error, you might have to face loss of data thereby causing issues for the users.
This segment will brief you with the causes and fixes to the QuickBooks error code 6069. Hence, you are suggested to stick to this post till the end. Moreover, connecting with our US. based accounting professionals using our helpline would also work.
What is QuickBooks error code 6069?
QuickBooks error code 6069 is one of those frustrating company file error that can suddenly stop users from accessing their accounting data. This error generally occurs when users try to open a company file and QuickBooks cannot establish a connection to access the database or network file. In some cases, this error encounters while opening a company file in multi-user mode or when QuickBooks is getting difficulty to communicate with the database server. Now talking about the reasons behind to occurrence of this problem, it is often seen in Windows 11/10, Windows 7, 8, Windows XP, Windows 2000, Windows Vista, and Windows ME.
An error message is associated with this error code, which states as:
Error
Warning
6069
“QuickBooks has encountered a problem and needs to close. We are sorry for the inconvenience”.
Updated Solutions to Fix QuickBooks Error Code 6069 Like a Pro
The solution steps applicable for you related to the error code 6069 in QuickBooks desktop largely depends on the cause that has triggered the error on your computer. Therefore, make sure that you scroll through carefully and explore the solutions respectively.
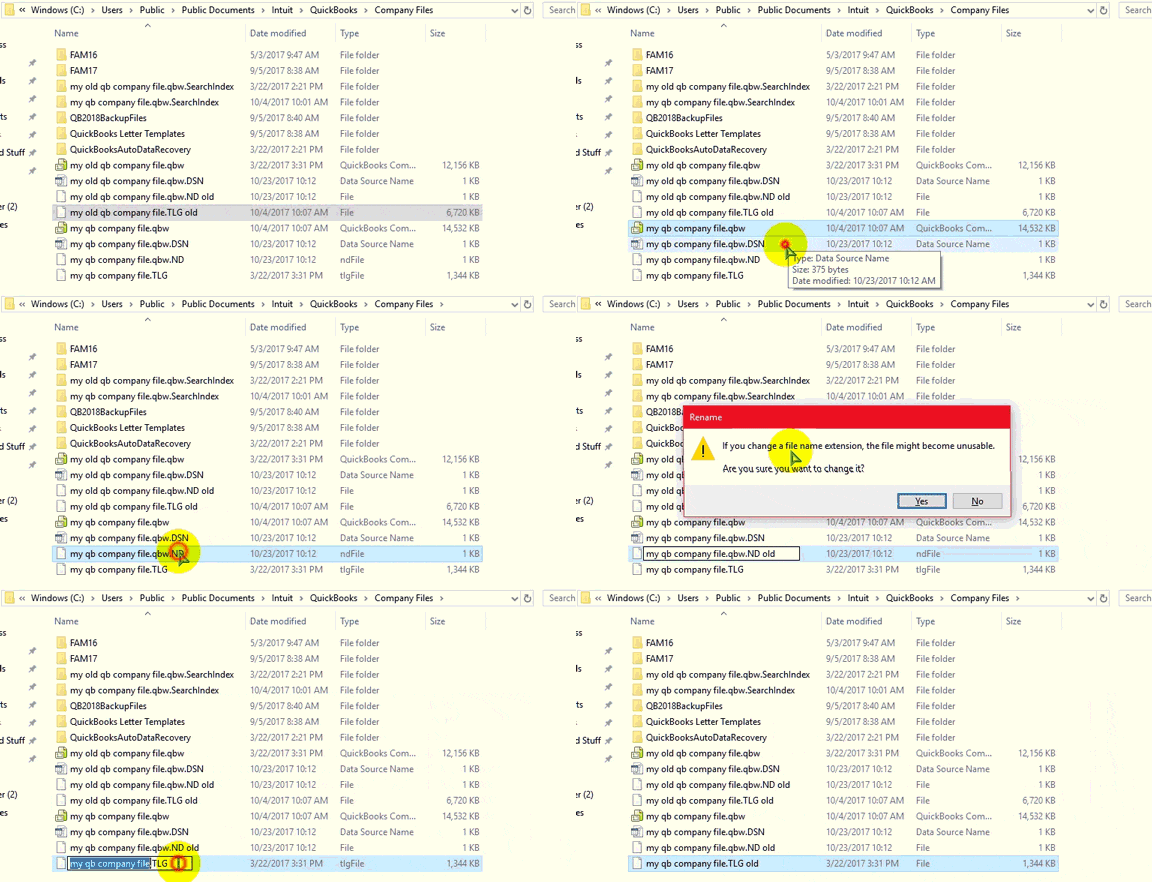
Solution 1: Rename the .ND and .TLG Files
Open the folder where your QuickBooks company file is stored.
Look for .ND or .TLG files that have the same name as your company file but with different extensions. (For example: For example: CompanyFile.qbw.nd, CompanyFile.qbw.tlg)
Hit a right click the file ending with .ND or .TLG and select Rename option.
Now add .OLD extension at the end of the file name. (For example: CompanyFile.qbw.nd.old or CompanyFile.qbw.tlg.old)
Hit on Enter key to save the changes.
Launch QuickBooks desktop again and open the company file.
Once done, your QuickBooks will automatically generate new .ND and .TLG files.
The crux of this piece of information is to deal with the QuickBooks error code 6069 without any sort of hassle. We believe that the causes and their respective solutions that we have enumerated above would have helped you in some or the other way to tackle this error successfully. Whereas, if for some reason the error appears repeatedly, then in such a situation we strongly suggest reaching out to our XpertBooks Pro team of professionals, accounting experts and CPA’s using our dedicated helpline i.e. 1.800.761.1787.
FAQs related to the Error 6069 in QuickBooks
Can QuickBooks File Doctor fix Error 6069?
Yes. In many cases, QuickBooks File Doctor successfully repairs company file and network-related problems causing the error.
Is QuickBooks Error 6069 related to multi-user mode?
Yes. The error commonly appears in multi-user environments where QuickBooks cannot communicate properly with the server.
Is the company file permanently damaged?
Usually not. Most cases involve network communication or configuration issues rather than severe file corruption.
Should I recreate the .ND file?
Yes. Renaming the .ND file allows QuickBooks to generate a fresh network configuration file automatically.
An advanced accounting software, QuickBooks comes with a wide variety of features and tools that help its users manage their business with ease. The software consists of many company files and has multiple segregations – therefore, the number of files in them may also be large in size. If you are a QuickBooks user, you would know that all the work done in this accounting application is neatly separated in files at all times. While using these types of files, you should ensure that they are compressed and can be stored in the system application.
Have you suddenly found QuickBooks error 6105 blocking your access to your company file and leaving you stuck? Are you feeling overwhelmed or unsure how to resolve this problem and keep your business running smoothly? If these questions cross your mind, rest assured with the right steps, you can get back to business quickly. While QuickBooks files may be closed, a file error 'QuickBooks error code 6105' compressed may appear. This error suggests that your company file is either corrupted or damaged. If this error code appears, you may not be able to compress your files. The files may also not get saved or stored in your memory location. As a result, you may have a shortage of space. If you have received Error 6105 in QuickBooks, read this article till the end and, you shall be able to fix it.
What is QuickBooks Error Code 6105?
QuickBooks error code 6105 is a company file error that generally occurs when QuickBooks desktop fails to access or communicate with the company file that is stored on a local system or network server. In most cases, this error directly blocks your QuickBooks from communicating with the database server or locating the company file correctly. When this error encounters, you may get one of the following error message on your screen:
An error occurred while opening the company file
Or
The company file may be damaged or inaccessible.
If you are a victim of this error, then don't worry, in this post we have discussed about QuickBooks error code 6105, it's possible causes and the updated solution methods to resolve this error.
What Causes QuickBooks Error 6105?
Error message 6105 can be caused by one or more of the following reasons:
When the company you are working on cannot be found in the system.
QuickBooks accounting software on your computer is either not genuine or the software's installation wasn’t appropriate.
Incorrect folder permissions for the company file.
Solutions to QuickBooks Error 6105 (Company file damage error)
QuickBooks error code 6105 is a common issue that many users encounter. Troubleshooting this issue isn’t tough either but we recommend you to fix this error as soon as possible as it can damage the company file. You can perform the steps provided further in this article and get rid of this error code.
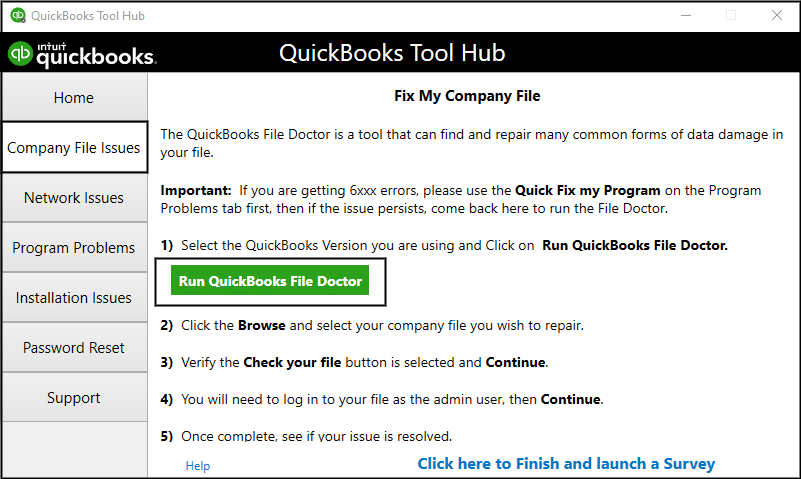
Solution 1: Run QuickBooks File Doctor
QuickBooks File Doctor helps repair damaged company files and network-related issues.
Now select the affected company file and fix the data damage.
Start the repair process and wait for completion.
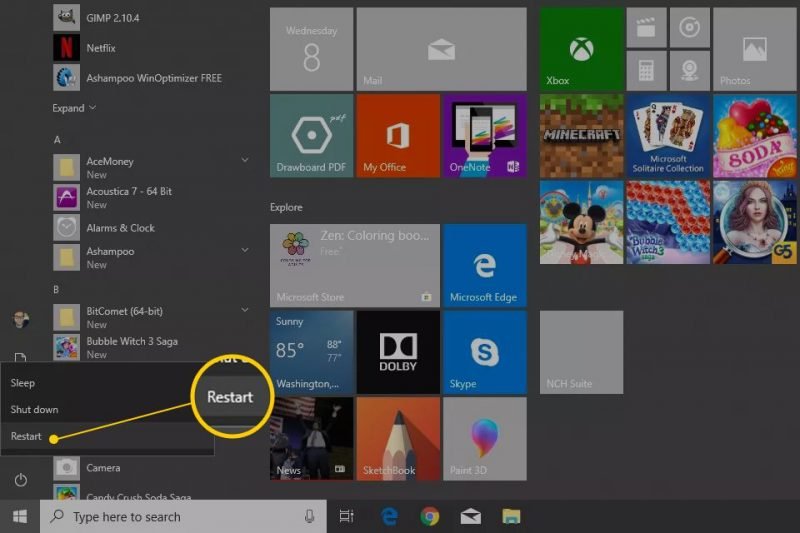
Solution 2: Reboot your computer
Many of your computer and software related issues may be resolved by just rebooting your system. All applications get forced stopped when you reboot your computer and that will be free of third-party applications running at the background upon being restarted. Thus, the QuickBooks company file error 6105 may also get resolved. If the issue persists even after rebooting your computer, move on to the next step.
Solution 3: Check if your company file is installed inappropriately
Maybe your QuickBooks company file or the data is corrupt. If none of the above-mentioned solutions work, you can use QuickBooks Auto Data recovery tool to fix this error.
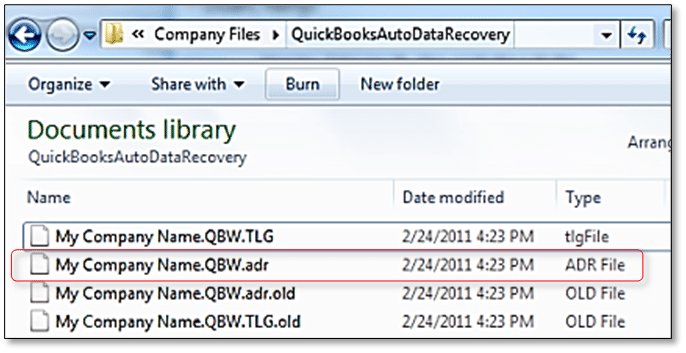
At first, open QB Recovery folder where the QuickBooks company file is stored.
Then look for the QuickBooksAutoDataRecovery folder.
Inside the folder, you may see files ending with .QBW.adr or .TLG.adr extensions.
Now copy the .QBW.adr and .TLG.adr files and paste them into the newly created QB Recovery folder.
Delete the .adr extension from both file names. For example:
Change CompanyFile.qbw.adr to CompanyFile.qbw
Change CompanyFile.tlg.adr to CompanyFile.tlg
Open QuickBooks desktop and browse the recovered .QBW file from the QB Recovery folder.
Now verify that the company file opens properly.
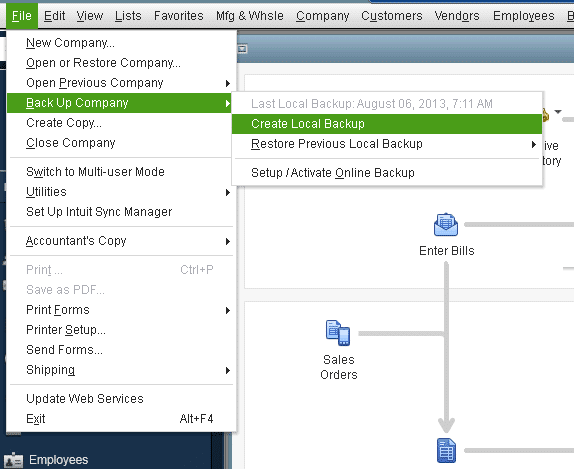
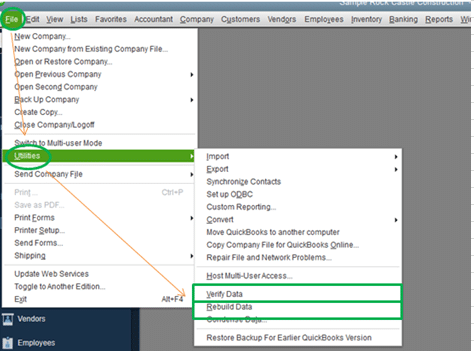
Move to File menu.
Hover to Utilities and select Verify Data option.
You need to allow QuickBooks to scan the company file.
Make sure there are no remaining data damage issues.
Solution 6: Run QuickBooks desktop as Admin
Just in case you are running QuickBooks desktop as admin, then it can stop the company file to get damaged.
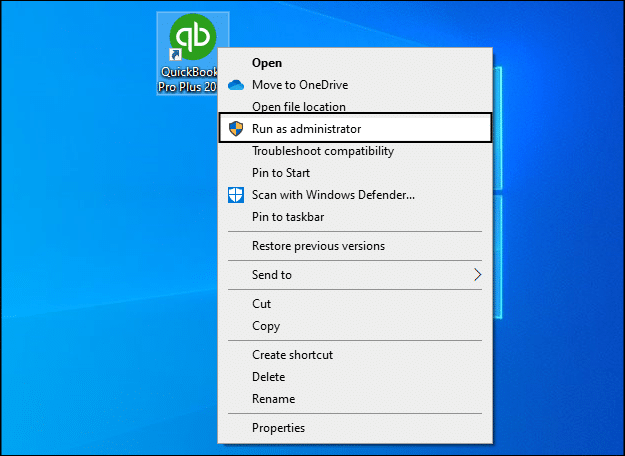
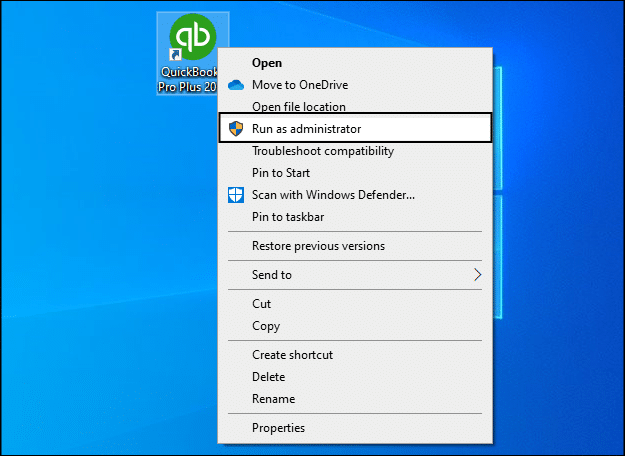
Close QuickBooks desktop
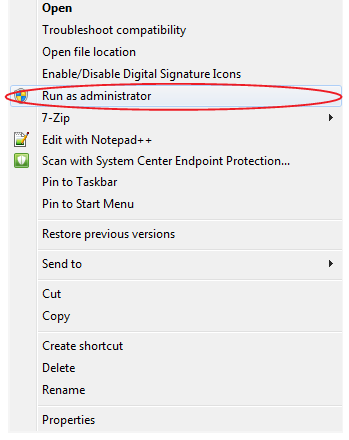
Hit a right click on QuickBooks desktop and also choose Run as admin
Choose Yes tab when the dialog box appears
Solution 7: Basic troubleshooting steps
It is required to copy the particular company file to your desktop.
Try to open the file in QuickBooks software.
Rename the .TLG file (to. TLG1 or anything else) and restart QuickBooks desktop.
We hope that the error code 6105 in QuickBooks got uprooted after following the steps given above.
The 7 troubleshooting methods mentioned in this post must have assisted you to fix QuickBooks error code 6105. On a rare occasion, if the issue exists even after performing all the steps provided here – contact us for more advanced solutions. We are available 24x7. Our team of QB professionals will ensure to provide you with the best possible accounting services and will fix the error on your behalf.
FAQ's
Is QuickBooks Error 6105 a company file corruption error?
Sometimes. The error may involve either company file corruption or network communication problems.
Why do I see Error 6105?
1. Your company file may be damaged. 2. The network server may be down. 3. Wrong folder or file settings can cause it.
Can I fix Error 6105 myself?
Yes, in many cases. Use the tools in QuickBooks, or try to restore a backup.
Will my data be safe?
Most times, yes. But if the file is badly damaged, you may need a backup to get all data back.
Should I delete the .ND and .TLG files?
You should rename them instead of deleting them. QuickBooks automatically creates fresh versions when reopening the file.