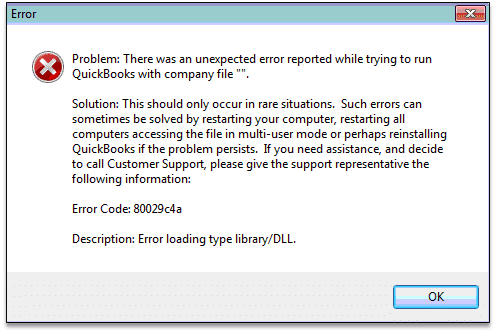
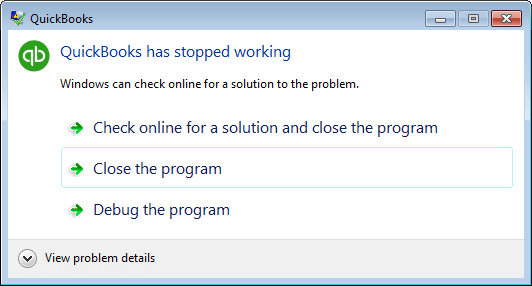
Have you already updated to Windows 10, or are you facing any sort of issue in QuickBooks with Windows 10? Well, as per the recent stats and observations, Windows 10 users, after upgrading to it, are facing some sort of issues with QuickBooks. Many users are reporting that it is crashing after the most recent Windows X updates were installed in the system. Different QB users reported different errors, a few of them reported the unrecoverable error, whereas the others reported QuickBooks error code 3371. Some of them even reported error code 80029c4a. In case you have also landed into any such error after installing Windows 10 updates, then this segment will surely be of some assistance to you.
Moreover, if you are unable to spot the common issues caused due to Windows 10 Updates or if you have any doubts, then do not think much about connecting with our accounting professionals right away. We are a team of tech-driven accounting experts who work round the clock to cater for the best possible services instantly.
Why QuickBooks fails to function normally on a Windows 10 system?
QuickBooks desktop pro for Windows is the most favoured small business accounting solution, which is used for keeping track of all financial transactions, tax, bills, and sales reports and quickly handles all the needed invoices and receipts with it's invoicing and expense management solution. The most important thing is that it is completely compatible with Windows 7, 8.1 and all the later introduced OS. Many users have reported issues with their QuickBooks while working on a Windows 10 system, especially when new Windows updates are installed. The reasons behind the incompatibility can be:
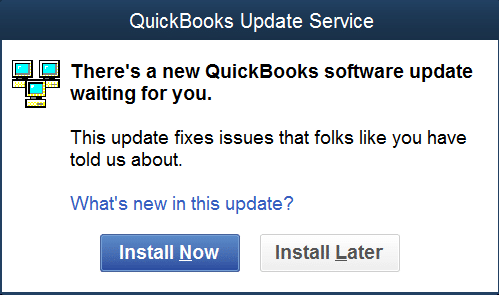
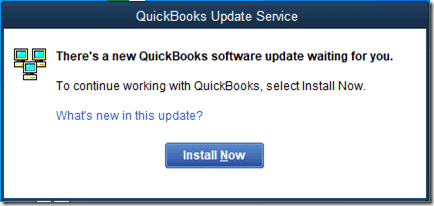
Installation of Windows updates, while QuickBooks is running, can be one of the factors.
Another factor can be not shutting down the system in the recommended way or leaving the computer ON for several days.
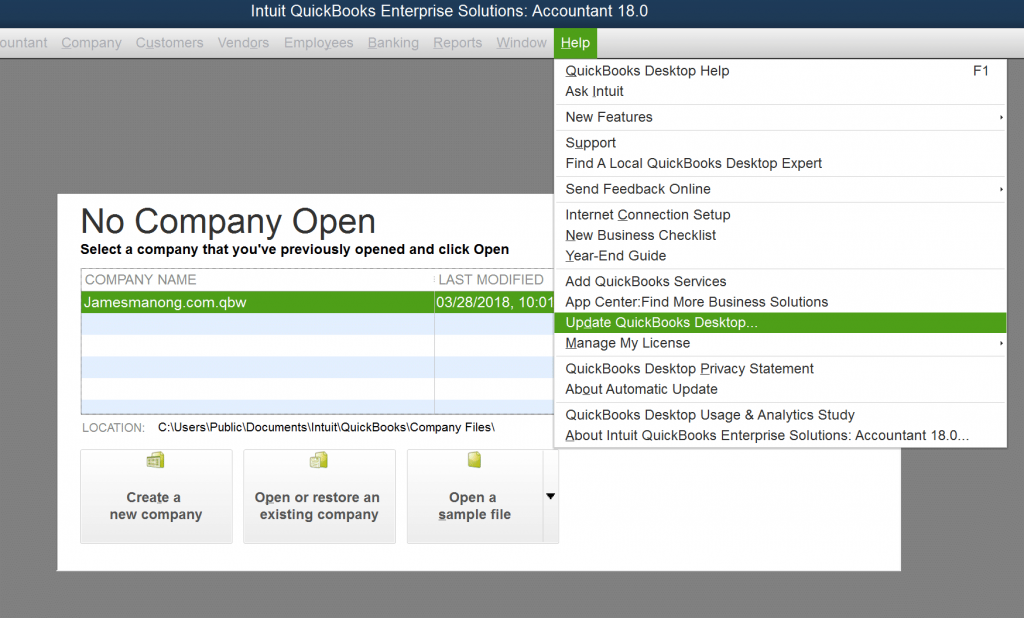
Moreover, using an older version of QuickBooks can be another reason.
List of Common QuickBooks Desktop Errors and their Effective Solutions
As we discussed earlier, there can be different errors that different set of users can come across. Let us explore some of the common errors that one can face with QuickBooks using Windows 10, along with their respective set of fixation methods:
1. QuickBooks error code 3371 after Windows 10 update
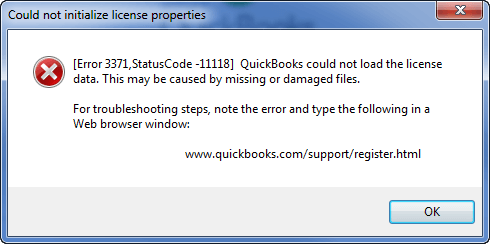
This error comes up with a warning message that states “QuickBooks could not load the license data. This may be caused by missing or damaged files”.
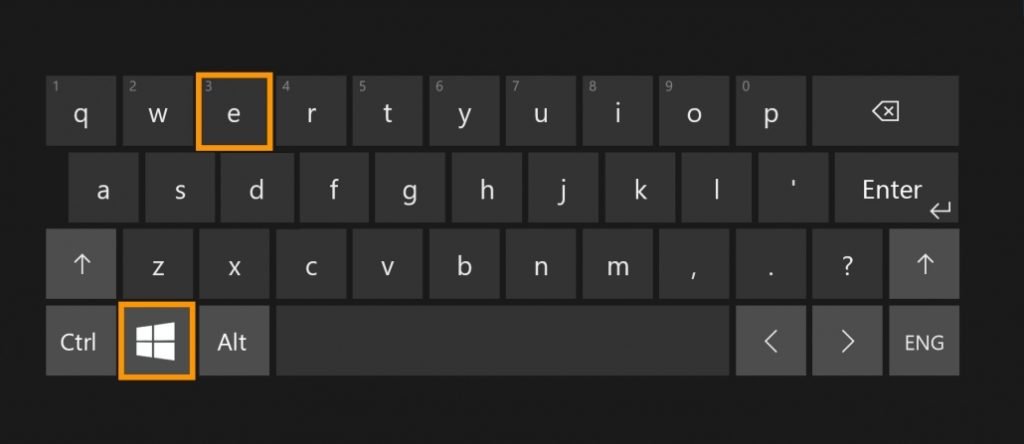
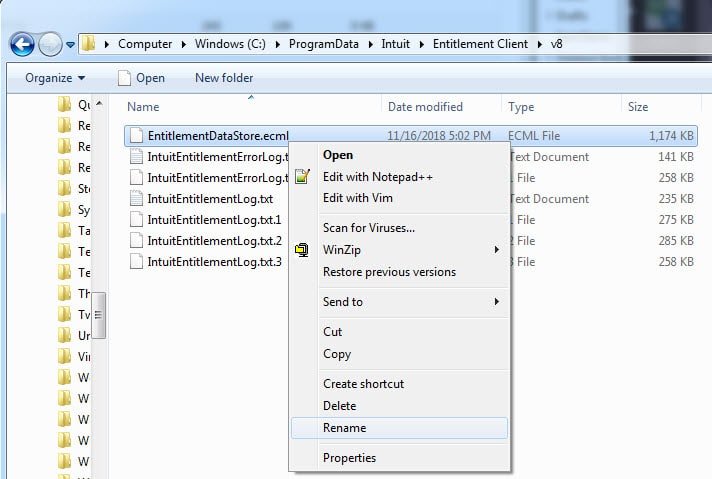
Herein, you are supposed to first press Windows + R keys.
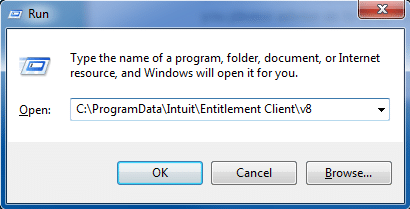
Later, enter this path C:\ProgramData\Intuit\Entitlement Client\v8 in the window.
Further, Windows Explorer will open up.
Delete the Ecml file and also close the window.
To end the process, you are required to run QuickBooks and register the item again.
2. QuickBooks Enterprise 2014 Crash with Win 10 update or QuickBooks Crashing
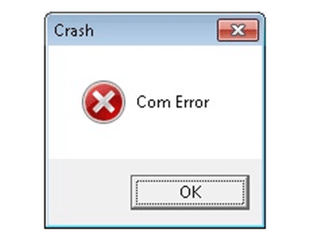
Another commonly reported error is QuickBooks desktop is crashing or QuickBooks Enterprise 2014 might crash with Windows 10 update. This is a common error, and you can resolve it using a few simple steps.
3. QuickBooks error 80029c4a after Windows 10 upgrade
This issue is seen with a warning message stating as “QuickBooks couldn’t load a system component. Restarting your computer might solve the problem”. This is a critical error and can damage your important company file data.
Solution:
QuickBooks error 80029c4a can be rectified by conducting Windows repair of QuickBooks. This can be done by performing the steps below:
Under this, you are supposed to close QuickBooks at first and then click on the Windows tab.
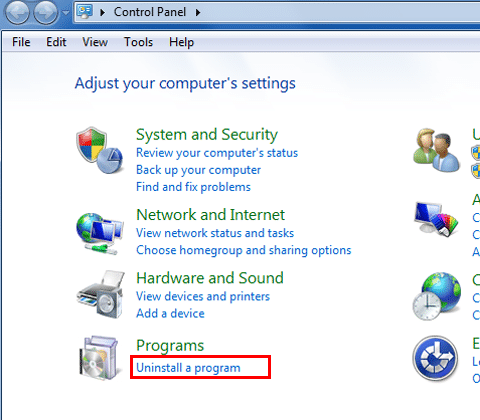
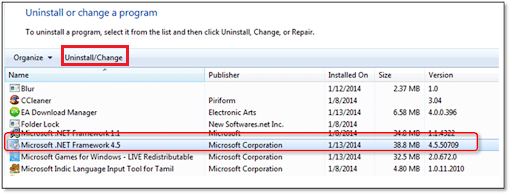
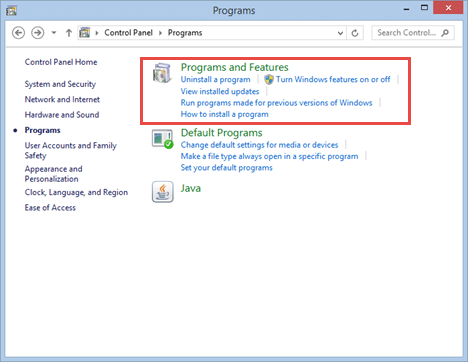
After that, open the Control panel and then Uninstall or change program.
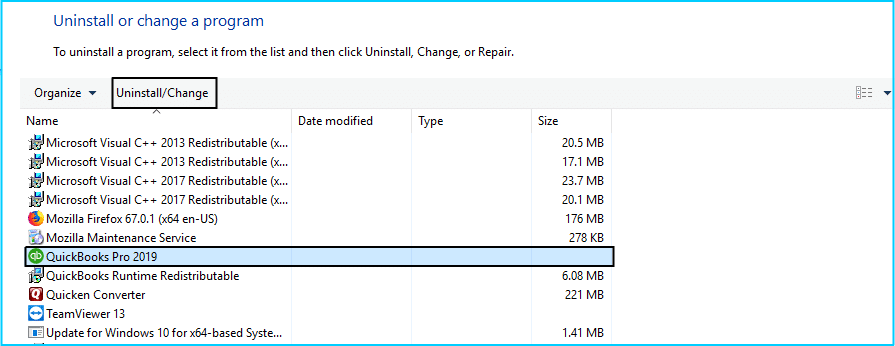
Select QuickBooks from the program list.
Click on the Uninstall/change tab and also hit Next tab.
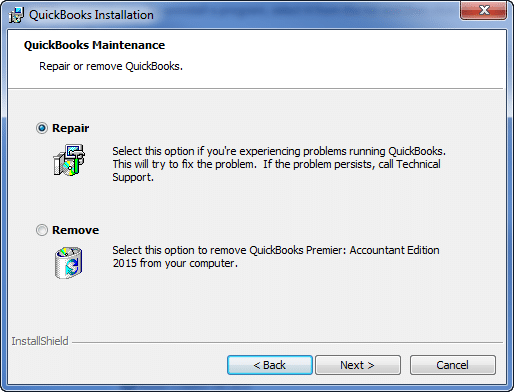
This will open the QuickBooks installation window, where you should click on Next once again.
Furthermore, you will have to opt for the Repair radio option and also click on Repair tab.
Now hit a click on the Finish tab after the repair process is complete.
Moreover, reboot the PC and open QuickBooks to check the issues.
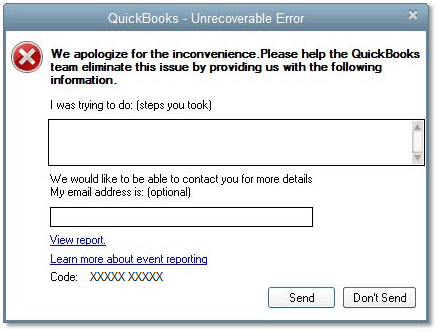
4. QuickBooks Unrecoverable Error after Windows 10 Update
QuickBooks unrecoverable error is a common problem that is seen with a warning message that indicates the error itself. The most appropriate method to rectify this error is to prevent QuickBooks from opening all the Windows and open in safe mode.
Solution:
The steps in order to troubleshoot the unrecoverable error in QuickBooks be undertaken as follows:
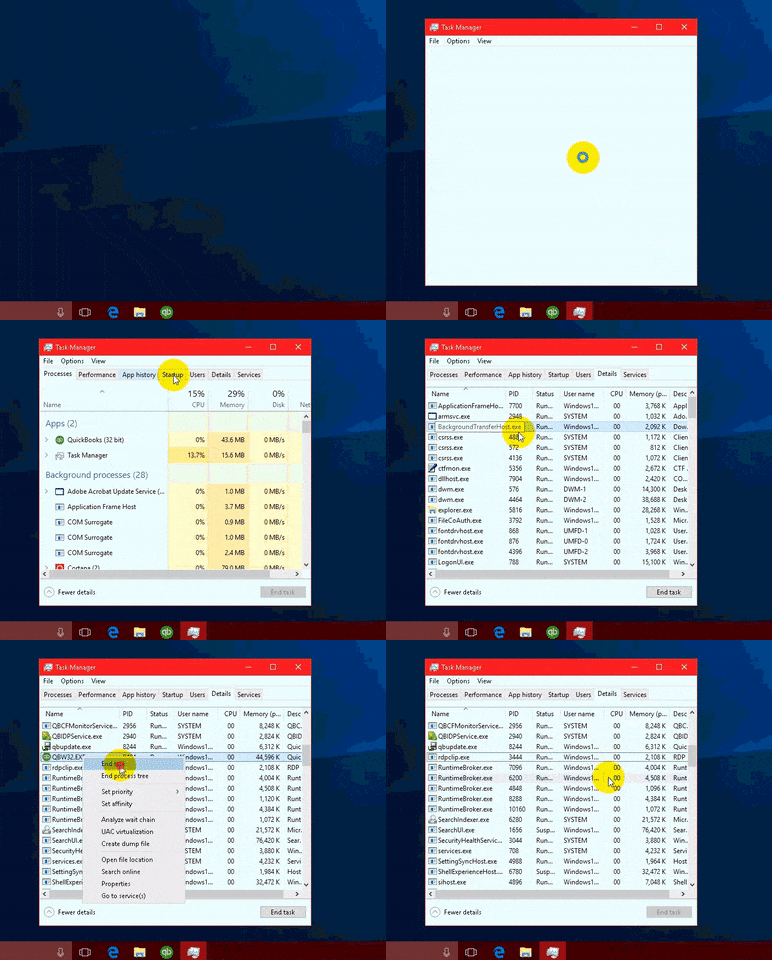
You should start off by pressing Alt + Ctrl + Del keys from the keyboard and then move to the Task Manager.
Further, close all QuickBooks Processes under the Processes tab.
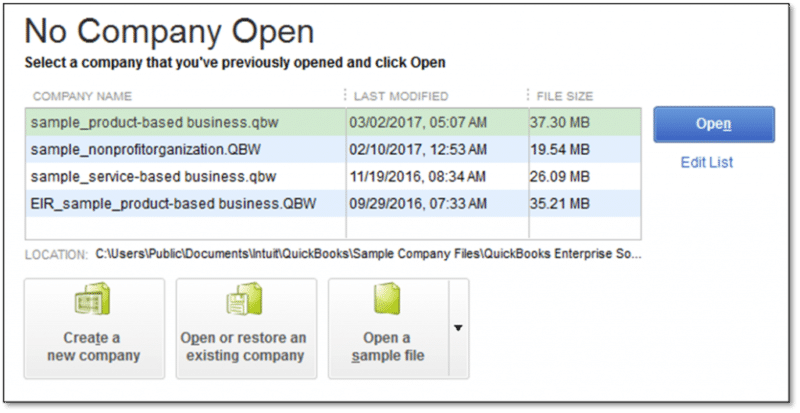
Moving ahead, press and Hold ctrl key to start QuickBooks in safe mode and then double-click the Program icon.
Now avoid leaving the Ctrl key till the time QuickBooks launches, and you see the No company file open screen. Release the key of the QuickBooks open file. You are supposed to close and open the application normally twice or thrice to ensure that the problem is resolved before trying to open the company file.
In case the application closes and opens fine, then it is suggested to open the company file by pressing and holding the ALT key and then close the open file two to three times and check if it is fixed or not.
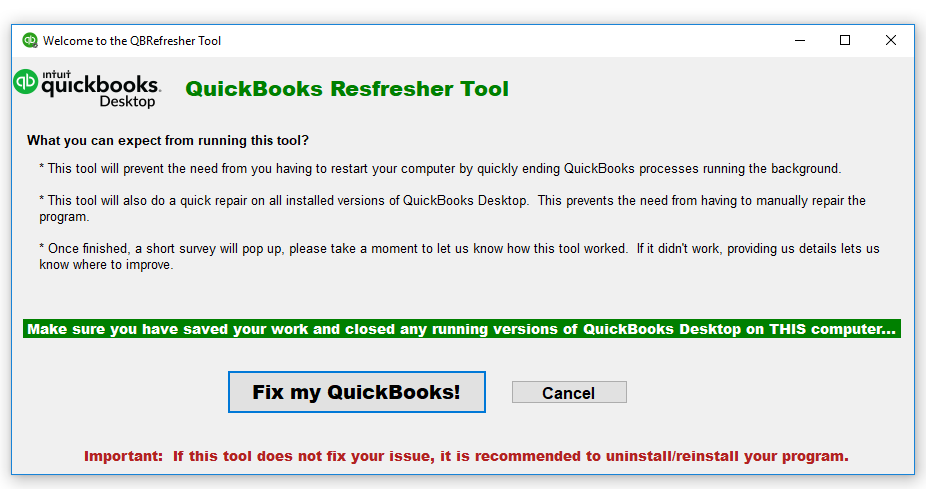
This particular error can be resolved by downloading and using the QuickBooks refresher tool. The steps involved are:
For this, firstly, close QuickBooks software.
And later on, Download the QuickBooks refresher tool.
Furthermore, Save the file on the PC
Now hit the Run tab to execute the QBRefresher tool.
Followed by, letting the tool to diagnose the running problem with QuickBooks and also wait for it to perform the necessary solutions.
Finally, open QuickBooks and check if the error is resolved or not.
Final verdict!
If you have updated to Windows 10, then any of the common QuickBooks issues after Windows 10 updates is probable to happen. In such a scenario, the above-stated set of steps are more than enough to fix each of the issue. This section is written with the intent to cater the best possible solutions for each of the errors respectively. However, if the error continues to create any sort of nuisance, then in that case, it is highly recommended to reach out to our XpertBooks Pro team. Our QB professionals are highly skilled and handle the situation on your behalf.
FAQs
Can I roll back a Windows 10 update if it causes issues with QuickBooks?
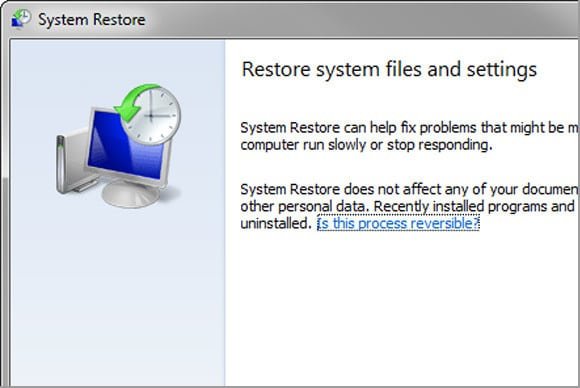
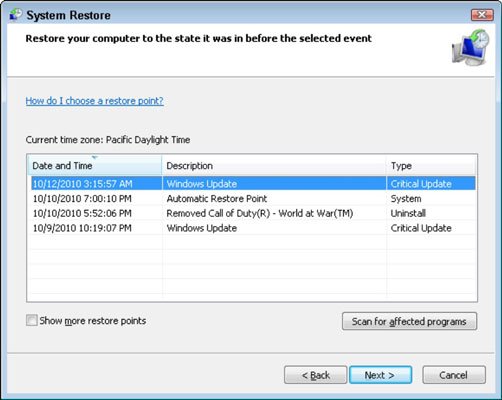
Yes! You can revert back to a system state existing before the Windows 10 update.
Is it possible to use QuickBooks in compatibility mode to resolve Windows 10 update issues?
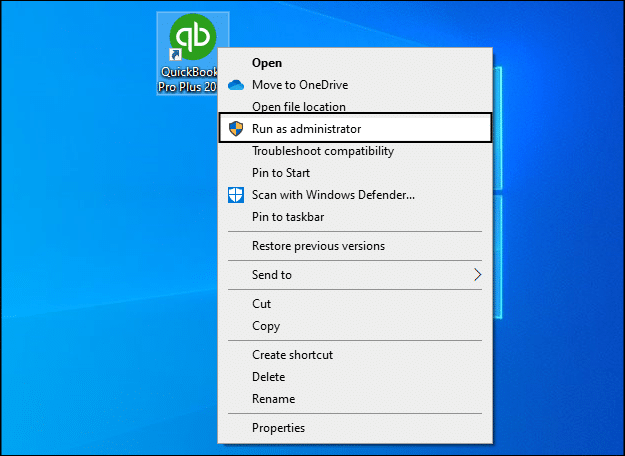
Yes! Switching to the compatibility mode can help in the resolution of Windows 10 update-related issues. To enable compatibility mode: 1. Right-click on the QuickBooks icon. 2. Opt for Properties, and advance to the Compatibility tab. 3. Finally, proceed by choosing a compatible operating system version.
Knocked into QuickBooks Error code 1327: Invalid drive letter error and unable to get through it? Well, we have got you covered. This error is basically an installation error that is usually encountered when installing the QuickBooks software or when the drive recorded is unapproachable. It usually appears with messages like: “Invalid Drive: [Drive Letter]”. In simple words, it is seen when the system disconnects with system drives and other portable storage drives. Such an error can be a bit tricky to tackle at times, considering which we have drafted this article, where we will be elaborating on the factors instigating the ongoing error, along with the possible troubleshooting steps. Thus, if you are interested in shunning the error on your own, then reading this piece of information till the end is suggested.
Moreover, if you don’t want to invest your precious time in fixing this QuickBooks error C= 1327 manually, then hook up with our accounting experts using our dedicated support helpline and let our error handling experts take over the situation.
Overview of QuickBooks Error Code 1327
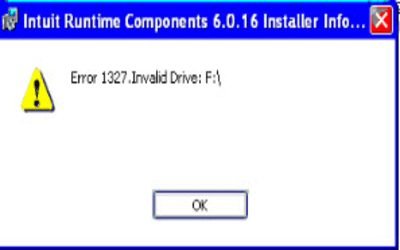
As we mentioned earlier, QuickBooks error code 1327 is basically an installation error that comes to light when installing the QuickBooks software on the system. This error usually occurs when QuickBooks is unable to access or locate a specific drive on your computer. In most cases, it encounters because the drive path is incorrect, the drive is disconnected or registry entries are damaged. When you insert the installation media and try installing, and then there is an error box with a warning message that states as:
Error 1327
The Drive is Invalid.
Invalid Drive: letter.
Well, it should be noted that installed programs and their components are stored in the computer in places called drives. In Windows, all the system files and folders are usually stored in the C drive. You can find the list of drives available on the system by checking in My Computer or this PC. Drives are actually partitions of the computer’s memory, which is quite similar to dividing the space of a house into rooms. Such an error is seen when the drive isn’t working properly.
What are the Causes of QuickBooks error message 1327?
There can be several reasons behind the occurrence of QuickBooks Error 1327, including:
Outdated Windows or issue with the Windows user
Incorrect or improper registry settings
Corrupted Microsoft .Net framework
Corrupted or moved storage devices
Any sort of connection issue with storage device/ cable
What are the Symptoms of QuickBooks Error 1327?
Some common symptoms of this install error are:
QuickBooks experiencing frequent crashing when installing updates
Windows stops responding when going for QuickBooks update
Input devices like the Mouse or keyboard take considerable time to process user inputs.
QuickBooks stops responding all of a sudden.
The error message "The Drive is Invalid" appears on the screen.
What are the solutions to fix QuickBooks error code 1327?
QuickBooks error code 1327 can be resolved with much ease once you are well-versed with the respective causes. Thus, below, we will be discussing each of the methods for fixing this issue in detail.
Solution 1: Create a new Windows user and install Windows
The steps might vary according to the version of Windows. Thus, check wisely before performing any of the steps.
On Windows 11
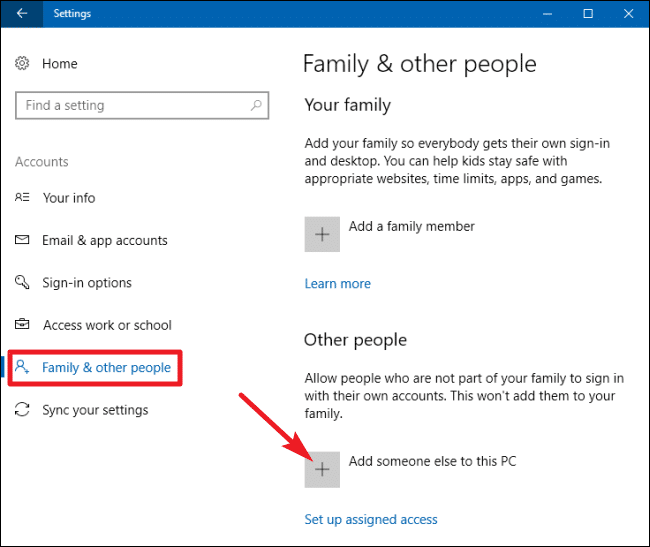
If you are a Windows 10 user, then start by hitting the Start tab and clicking on the Settings tab.
Hit on the Accounts and select Family and Other Users.
Now go for the Add someone else to this PC tab.
Complete the process by entering a New password, name, password hint and tap on the Next tab.
On Windows 8/10
Hit a click on Start tab and then hit a click on Control Panel.
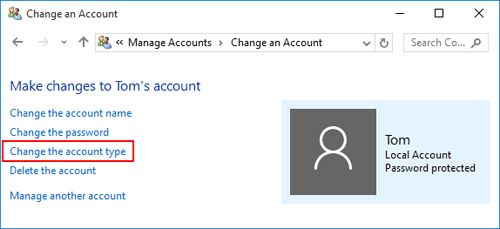
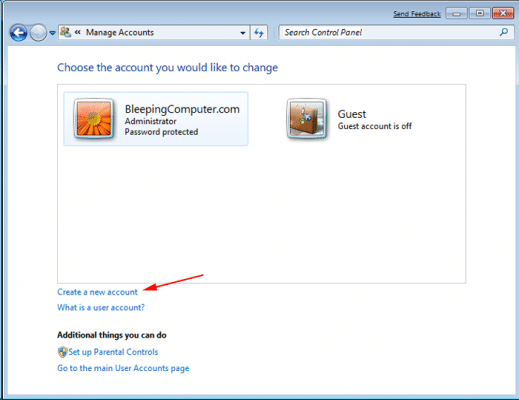
Then select the User accounts and opt for Manage another account.
Later, make a New account.
Next step is to assign a name and choose the Admin tab.
Moving ahead pick Create account option and reboot the system.
Log in the PC with admin credentials and try to install again.
On Windows 10
If you are a Windows 10 user, then start by hitting the Start tab and clicking on the Settings tab.
Hit on the Accounts and select Family and Other Users.
Now go for the Add someone else to this PC tab.
Complete the process by entering a New password, name, password hint and tap on the Next tab.
Solution 2: Fixing registry settings
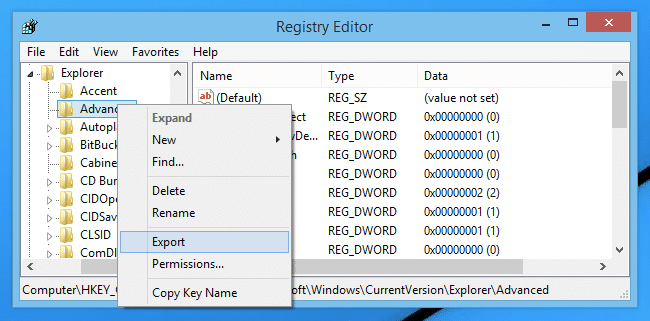
Start off by Backing up the system registry.
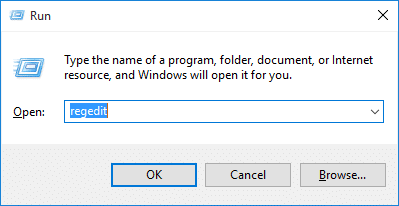
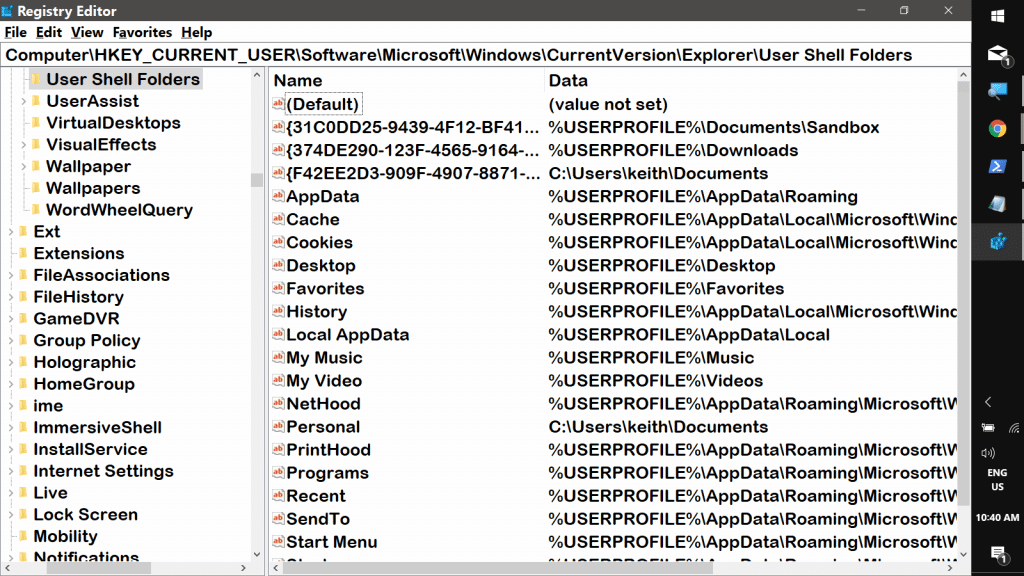
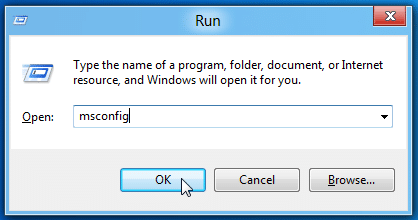
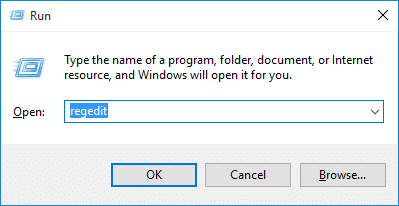
Press Windows + R tabs and then type in Regedit and also click on Run tab.
After that navigate to the specific key: HKEY_CURRENT_USER\Software\Microsoft\CurrentVersion\Explorer\Shell Folders.
Try to spot the entries that list the Drive letter mentioned in the message.
Fix the incorrect drive names to C:\
End the process by saving the settings, restarting the system, and reinstalling. After the installation process comes to an end, revert the changes that were made to the registry earlier.
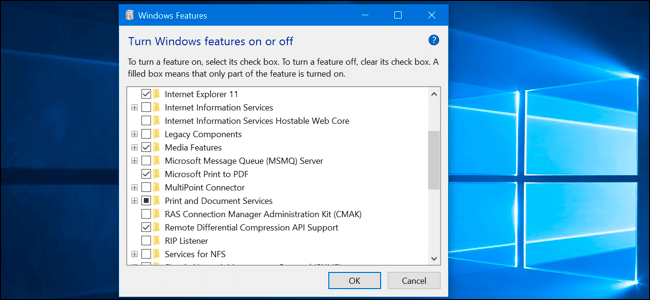
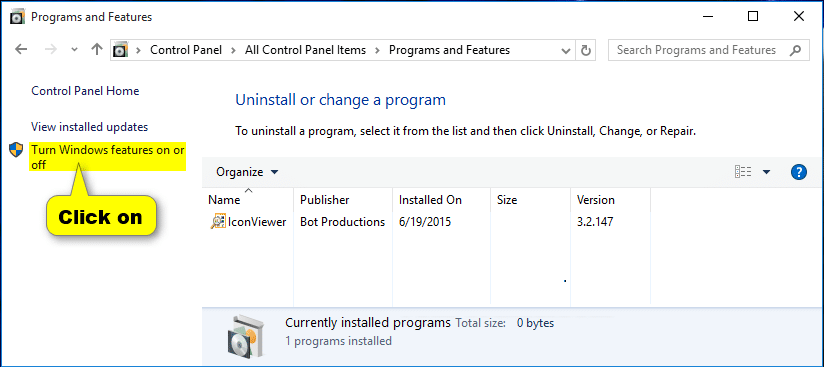
You are supposed to look for Programs in the control panel.
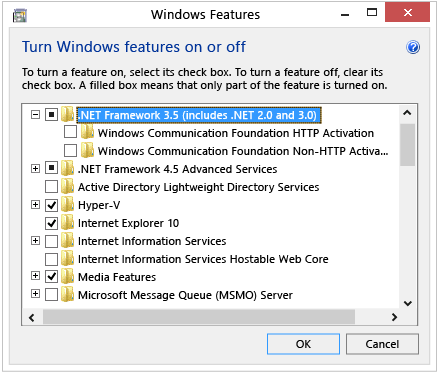
And choose Turn Windows features on/off.
Furthermore, confirm with the Admin password.
And uncheck the box next to the Microsoft .net framework and restart the system.
Last step is to open programs and follow the same steps and also check the box next to the Microsoft .net framework.
Solution 4: Delete the network drive
Start with selecting the Start tab itself and opt for Programs later on.
After that click on Windows Explorer tab.
And choose the Network drive on which the shell folder is available and hit the OK tab.
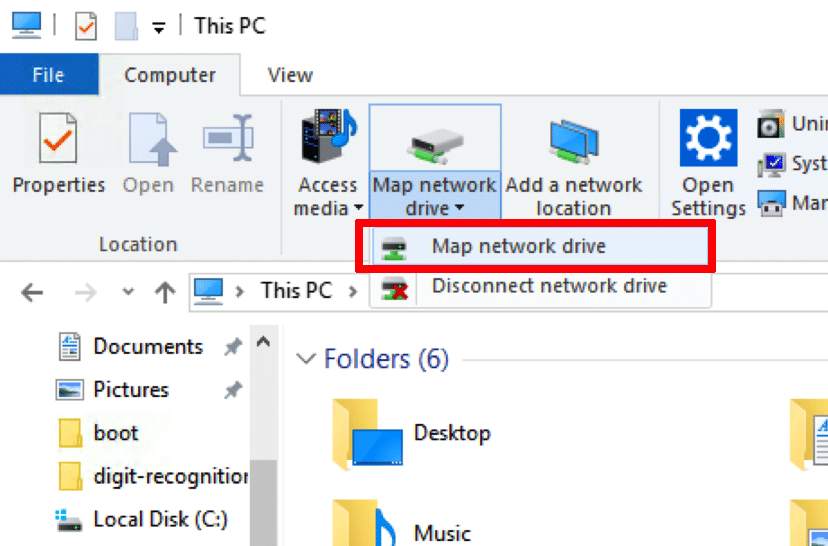
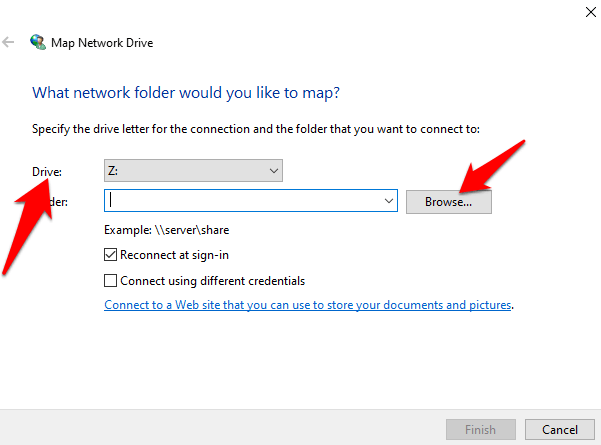
Now move ahead by selecting the Map network drive in the tool menu.
Next step is to Shell Folder uncheck reconnect at logon and write the path.
Tap on OK tab.
End the process by restarting Windows and installing the applications.
Solution 5: Ensure that storage devices have proper connection
At times, there can be issues due to connection problems. Thus, it is very much important to ensure that the cables and other related things are properly connected to the computer. And also, check if the USBs or Flash devices that are being used to install QuickBooks desktop are functioning properly and are also connected properly.
Coming to the end of this piece of writing, we now expect that the readers might be of successfully able to shun off the QuickBooks error code 1327 successfully. Anyhow, If the error stays in the same place or condition then the only choice that you have left is to connect with our accounting professionals directly using our helpline number i.e. 1.800.761.1787.
FAQ's
Why does QuickBooks show “Invalid Drive” error?
This happens due to disconnected external drives, corrupted registry entries, or wrong drive mapping.
Can I fix Error C=1327 by reconnecting the drive?
Yes. If the error is due to a removable or network drive, reconnecting or remapping it usually resolves the issue.
Does this error delete my company data?
No. QuickBooks Error C=1327 only affects installation or updates. Your company data remains safe.
Do I need to edit the Windows registry for this error?
Sometimes, yes. If registry entries point to invalid drives, editing them may be necessary, but it should only be done by advanced users or IT professionals.
Can a corrupted installer cause this error?
Yes. If the QuickBooks setup files are damaged or incomplete, it may trigger Error C=1327 with the invalid drive message.
Can reinstalling QuickBooks on a different drive solve the issue?
Yes. Installing QuickBooks on a valid local drive instead of a missing or invalid one can bypass the error.
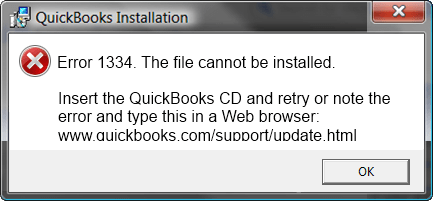
You might be hit by QuickBooks error 1334 in case the currently running program gets crashed. This error usually appears while installing, repairing or updating the QuickBooks desktop to latest. As a result of such an error, the system might freeze up or respond sluggishly to all the keyboard and mouse inputs. According to some users they have seen this error during software installation or Windows startup and at the time of shutdown. When this error encounters in QuickBooks, users may fail to install or open QuickBooks desktop properly. It is very much important for users to keep a track of when and where the error code has occurred, as it would largely impact the troubleshooting steps. You may see one of the following error messages on your screen when this error encounters in QuickBooks:
QuickBooks Installation
Error 1334. Error writing to file [file name]. Verify that you have access to that directory.
Error 1334. The file cannot be installed. Insert the QuickBooks CD and retry.
QuickBooks has encountered an unexpected error during installation
The required cabinet file is corrupt or missing
If you are also facing this problem, then this piece of writing would surely be of must assistance to you. We have tried to put together almost every information related to QuickBooks error code 1334. Thus, stick to this post till the end, or you can also catch up with our accounting professionals, and they will provide you with immediate accounting services.
What Causes QuickBooks Error 1334?
There can be several reasons behind the occurrence of QuickBooks Error Code 1334, including:
If there is incomplete installation of QuickBooks.
Any third party program maliciously deleted QB related files
In case of corrupted Windows registry
When damaged or corrupted QuickBooks installation files, it may lead to such an error.
If corrupted Microsoft .NET Framework components.
Early signs and symptoms of QuickBooks error 1334
Identifying this issue becomes easy with the help of below signs and symptoms. Let us have a look:
Now we all know that there are certain factors triggering to this error, and also each factor has it's respective solution. Here are some methods to troubleshoot QuickBooks error message 1334 when installing, updating or repairing the application:
Solution 1: Perform a Clean Installation of QuickBooks
Use QuickBooks Clean Install Tool
You can clean install QuickBooks desktop by uninstalling or reinstalling Windows. This erases the unsaved data from computer’s hard drive, and the system will be starting afresh.
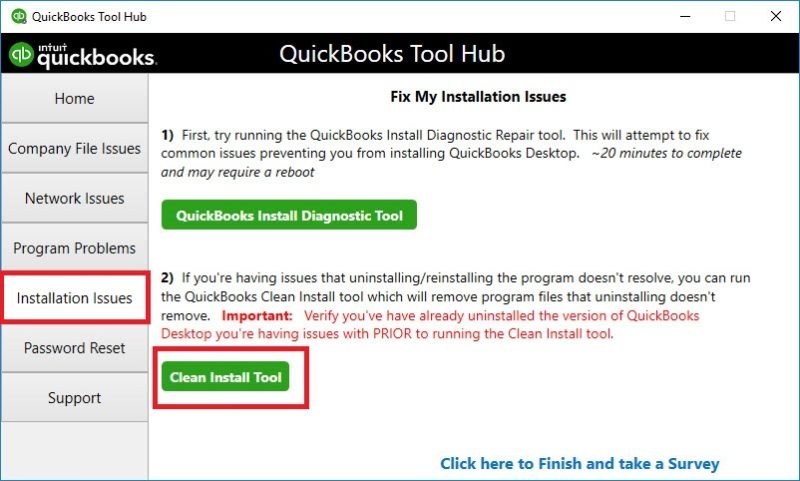
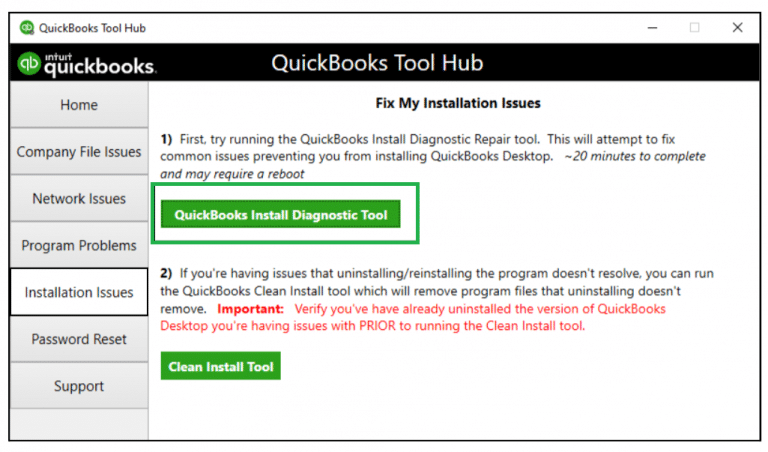
Download QuickBooks tool hub program and open it on your system.
After that go to Installation Issues tab.
Hit on Clean Install Tool to launch it.
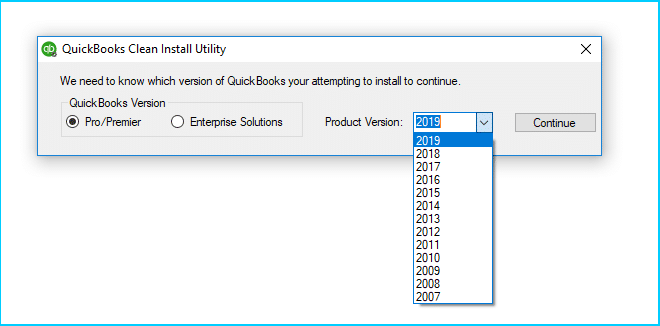
Now choose your QuickBooks version from the list.
Select the Product edition/version you are using and hit on Continue.
Now wait for the process to complete.
Once done with that, close the tool hub and reboot your system.
You can rather clean install Windows to clean out all the junk and unnecessary log files accumulated on the system over the time from web surfing and other usage.
Solution 2: Run QuickBooks Install Diagnostic Tool
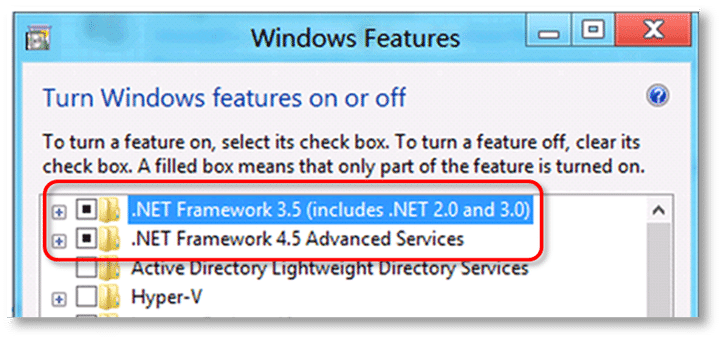
Tick on the checkbox to turn on .NET framework 4.5
Choose OK tab to save the changes.
Now restart your system.
If the .Net framework 4.5 checkbox is already checked:
In such a case, choose the checkbox to turn off .NET framework 4.5. Don’t turn it back on.
Choose OK tab to save the changes.
Now reboot the system.
When you have signed in back into Windows, then follow the steps to turn on .NET framework 4.5 again.
Now check .NET framework 3.5 SP1
Choose checkbox to turn off .NET framework 3.5 SP1. Do not turn it back on.
Further, select OK to save changes.
Reboot the system.
When signed in back to Windows, follow the steps to turn .NET framework 3.5 SP1 on again.
In case users identify an error when turning .Net framework ON or OFF, then reach out to an IT professional or Microsoft support team. This issue might be related to the operating system not QuickBooks.
I hope you have got the right solution for this error. It is a not a common error and it should be resolved as soon as possible. Considering the need of the hour, we have tried to sum up all the necessary information in this segment. We believe that reading this article would have helped you in getting rid of QuickBooks error code 1334. Whereas, if for some reason the error is prolonged or if you are facing the same error repeatedly, then reach out to our XpertBooks Pro team. We would be more than happy to help you.
FAQs
When does QuickBooks pro error 1334 occur?
There can be a handful of situations, when users might come across the error code 1334 in QuickBooks. This includes the following: 1. At the time of starting Windows. 2. While shutting down Windows. 3. When QuickBooks installation is going on. 4. Or when QuickBooks software is running.
What methods can be used for resolving Error 1334 in QuickBooks?
Users can conform to the following methods for ousting this error: 1. Clean Install QuickBooks 2. Repair Microsoft components like MSXML, and NET Framework. 3. Fixing the Registry issues.
What is the error message related to QuickBooks Error code 1334?
This error pops up in the form of a notification stating
"Error 1334. Error writing to file [file name]. Verify that you have access to that directory."
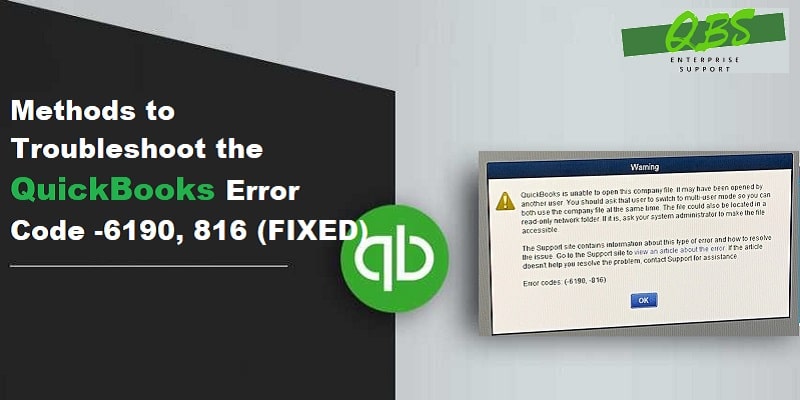
If you are a QuickBooks user, then you might be able to relate to this situation where, while working on the QuickBooks software, a warning error message suddenly pops up on the screen indicating “QuickBooks Error 6190 and 816.” Well, this is a frequently encountered error that may show up when multiple users attempt to open a company file in single-user mode. Another situation where you may bump into such an error is in case of there is any mismatch between the transaction log file and the company file. As a result of this error, it is possible that you may lose all important files stored within the QBW company file.
This write-up will provide you with a detailed understanding of the QuickBooks error 6190 and 816, along with the possible causes behind the error and the effective troubleshooting solutions to fix it. Moreover, getting in touch with our US. based accounting professionals team can also help you resolve the issue quickly. Feel free to connect with one of our expert and get your issue resolved in no time.
What is QuickBooks error code 6190 and 816?
QuickBooks error 6190, 816 is part of the 6000 series errors that occurs when a user attempt to open a company file in multi-user mode. This error generally encounters when the company file and transaction log file do not match or the company file becomes damaged. The main reason behind to this error is a discrepancy between the .QBW (company file) and .TLG (transaction log file). This mismatch prevents QuickBooks from syncing properly, which can disrupt the workflow.
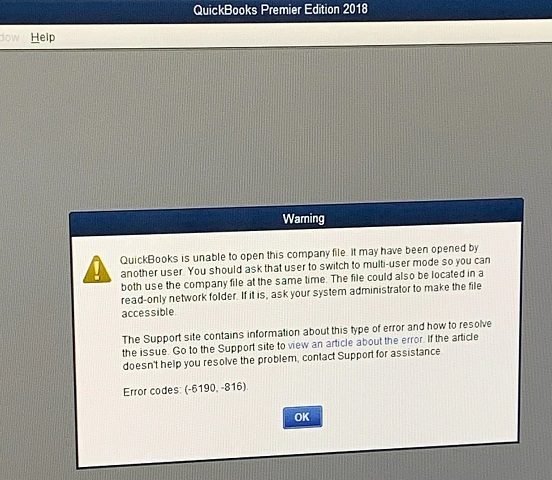
Before we dive in deep to unleash the strategies to troubleshoot this error, it is better to get familiar with this error code and related facts associated with this error. The following error pops up on the screen with a warning message that states as:
Warning
QuickBooks was unable to open the company file [path] on the hosted system.
Error Codes: (-6190, -816) - The transaction log file does not match the company file
This error can also be seen when you makes an attempt to log in the company file in a single-user mode. It is quite a technical snag that should be fixed asap.
What leads to QuickBooks error code 6190, 816?
There can be several reasons behind to the occurrence of QuickBooks error code 6190 and 816, including:
The TLG and QBW files doesn’t match the company file.
If company files may be updated on a different computer without updating the transaction log file.
Data corruption in the QuickBooks company file is another potential cause of this error.
Software installation is left incomplete or when the download becomes corrupt.
There is corruption in the Windows registry from a recent QuickBooks-related software change.
The error may also appear when accessing the company file in single-user mode.
Some virus or malware infection may have damaged your important QuickBooks company files.
Any other program maliciously deleted the QB-related files, thereby triggering such errors in QuickBooks.
Signs and symptoms of QuickBooks error 6190 and 816
Identifying the QuickBooks error 6190 and 816 is very much important, so as to work towards rectify it. So, here are a few of the signs and symptoms that can be considered:
The error code itself displays on the screen and crashes the active program window.
Windows runs sluggishly and responds very slowly to the keyboard and mouse inputs.
The company file and transaction log file don’t match with each other, and the company file becomes corrupt.
Methods to Resolve QuickBooks Error 6190 816
The fixes of this error largely depend upon the factors triggering the issue. Below, we will be exploring the quick fixes one by one. Let's know how to fix QuickBooks error 6190, 816 when QuickBooks was unable to open the file [path] on the host computer.
Method 1: Troubleshoot the mismatch
Often you might come across this error, when there is a mismatch between the transaction log file and the company file. In such a scenario, it becomes important for you to troubleshoot the mismatch. Perform the steps provided below
Initially, navigate to the company folder.
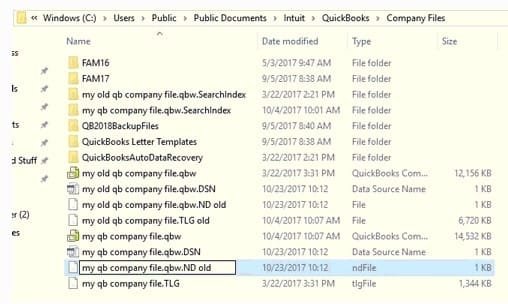
Search for the Transaction folder. The company folder and the transaction folder might have the same name, but their extensions might vary. You will have to identify the Two files by their extensions.
Head forward by right-clicking the Company files and also select to Rename option to change the name, but avoid changing the extension of the file.
Moreover, change the Transaction file name as well.
Lastly, close the software and then open it once again.
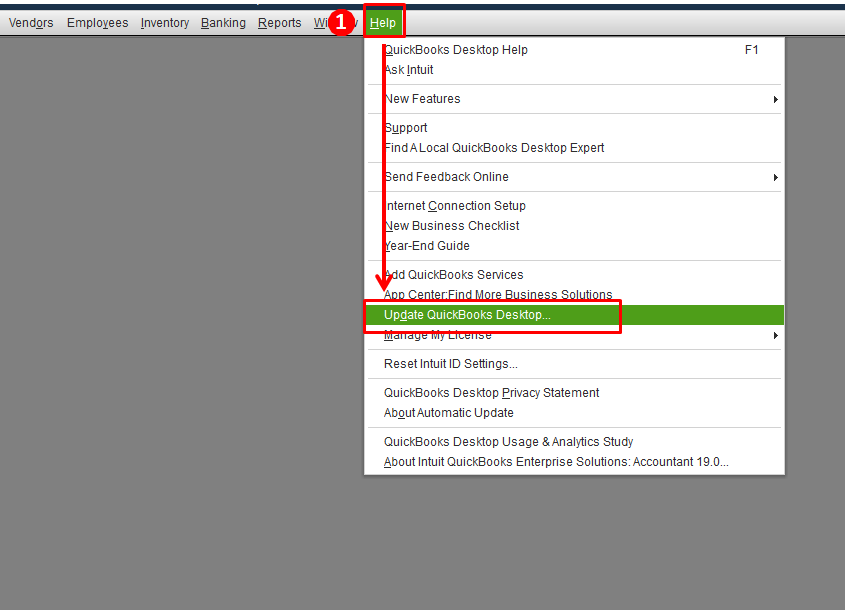
Method 2: Update QuickBooks desktop and the backup files
If you’re experiencing the problem because you’ve updated your company file using a different computer but not changing the transaction log file, then you should update your software of the backup files to fix the problem. The steps, in this case, are the following:
The QuickBooks refresher tool is designed in a way to fix the QuickBooks 6000 error series. One can easily download and run the diagnosis by using the below steps:
Start the process by closing the QuickBooks desktop on all the systems.
This error is a pretty common error that can cross your path while you try to log in to the company file in single-user mode. Incorporating the above stated set of strategies would surely help in rectifying the QuickBooks error 6190 and 816. Whereas, if for some reason the error prevailed or you are stuck at any point of time, then in that case getting in touch with our technically sound team of QB specialists is strongly recommended.
FAQ's
What is error 6190 816 in QuickBooks?
QuickBooks Error 6190 is a company file error that occurs when the transaction log file (.TLG) does not match the company file (.QBW). It prevents QuickBooks from opening the file, especially in multi-user mode.
Can QuickBooks File Doctor fix Error 6190?
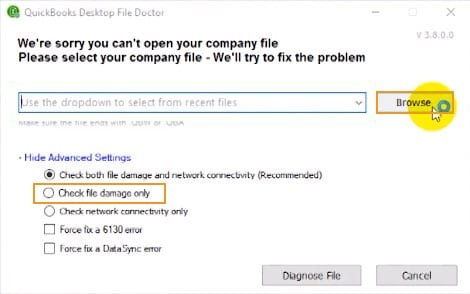
Yes. File Doctor is one of the most effective tools to scan and repair corrupted company files that trigger Error 6190.
What role do .ND and .TLG files play in this error?
If the .ND or .TLG files get corrupted or mismatched, QuickBooks may fail to open the company file and show Error 6190. Renaming these files often resolves the problem.
What error message appears when QuickBooks Error 6190 816 occurs?
When this error occurs, the following error message may appear on your screen:
"QuickBooks was unable to open the file [path][filename] on the host [hostname]. Please try again later. If the problem persists, contact Technical Support and provide them with the following error codes: (-6190,-816)".
Is my company data lost due to Error 6190?
No. Your company data is safe. This error is related to file access and synchronization, not data deletion. Once fixed, you can access your data normally.
Did QuickBooks update error 12007 has encountered on your system? Well, this error is common error that mostly seen when downloading the latest payroll updates or updating the QuickBooks software. This error can also be seen when users fail to download updates successfully and QuickBooks may stop responding during the update process. Another possible reason behind to this error is, your software is unable to connect to the internet. In this segment, we will discuss about this errors possible causes and DIY solutions.
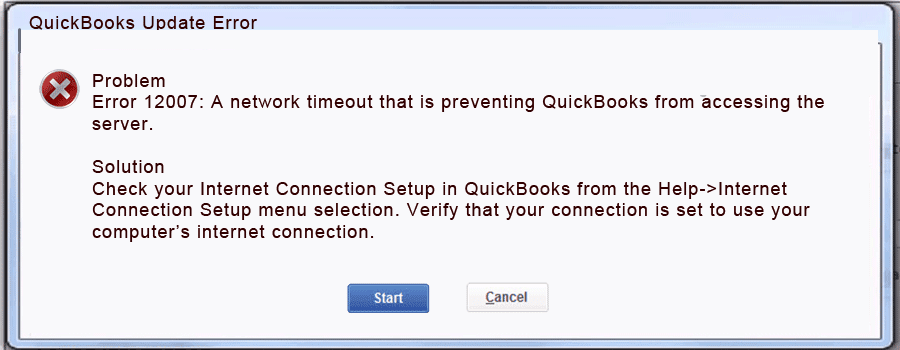
Moreover, you might also bump into this error due to browser issues, antivirus interference, or firewall restrictions. This error might seem to be daunting and unmanageable, but our team of experts has come up with a comprehensive guide to familiarize you with the various causes leading to this particular error. We have provided a complete guide explaining the effective troubleshooting methods that can shun off this error easily. If you are curious to learn about the QuickBooks payroll error 12007, then stay glued to this segment to develop a better understanding of this technical issue and its troubleshooting. You might see the following error message on your desktop screen:
Error
Description
QuickBooks Update Error
Error 12007: A network timeout that is preventing QuickBooks from accessing the server.
QuickBooks failed to connect to the internet.
Payroll update did not complete successfully
In case you don’t want to invest your time in fixing the error 12007 manually, then we are here to assist you. Don’t give a second thought to connecting with our U.S. based accounting experts. We will ensure to cater the best possible services tailored to your requirements.
Talking about the QuickBooks error code 12007, it is usually seen on the system due to QuickBooks desktop fails to connect to the internet while downloading software or due to a software update timeout. In case the software isn’t having the access to the server, this error is probable to occur. Moreover, at the time when a user tries to update QuickBooks desktop or tries to make changes to the QuickBooks payroll service function this error might also appear on the screen.
Using any software makes it necessary to update the software time to time, simply for availing the updated features. When you makes an attempt to download a payroll or update QuickBooks to the latest release, there are chances to appear such errors. Also, misconfigured systems files can also trigger registry errors within the operating system and accounting software. Tackling all such factors is possible, when you follow the below given steps. Let us head forward and explore the measures that can be taken to do away with this kind of error.
What may lead to QuickBooks error code 12007?
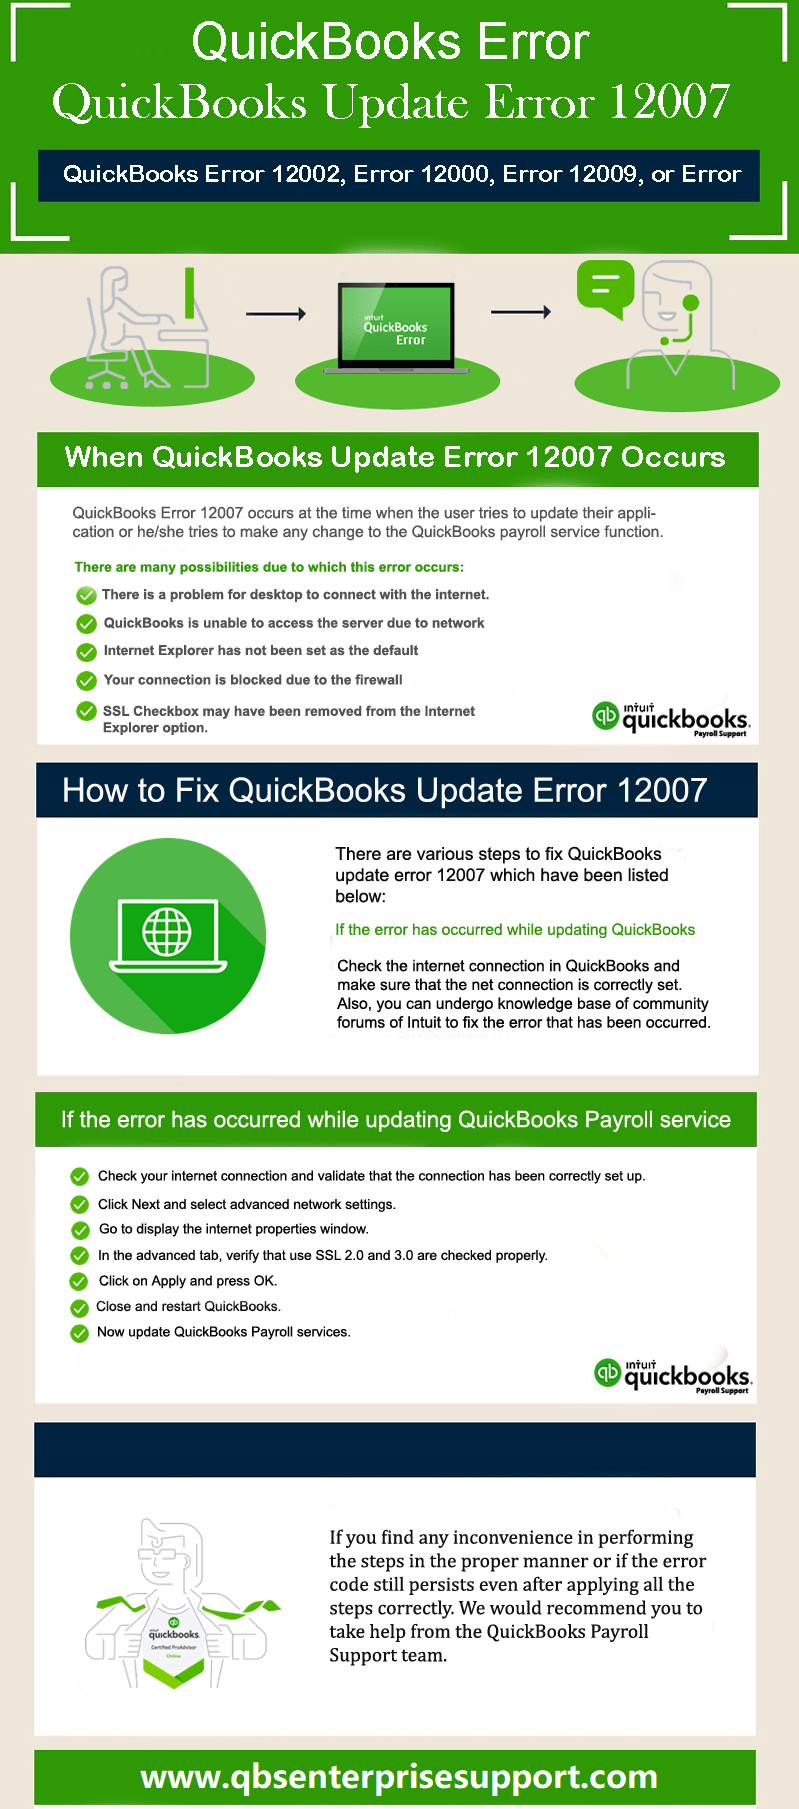
There can be several reasons behind the occurrence of QuickBooks error code 12007, including:
Internet security and firewall blocking QuickBooks to access the server.
Internet Explorer browser not the default browser may also lead to this error.
3rd party programs tampering with QuickBooks functionalities.
The previous QuickBooks update was incomplete.
Erroneous Connection Settings.
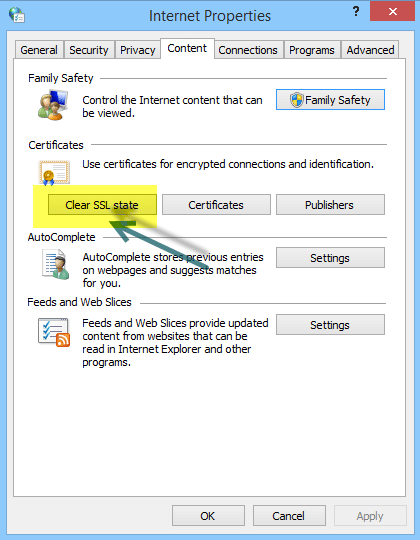
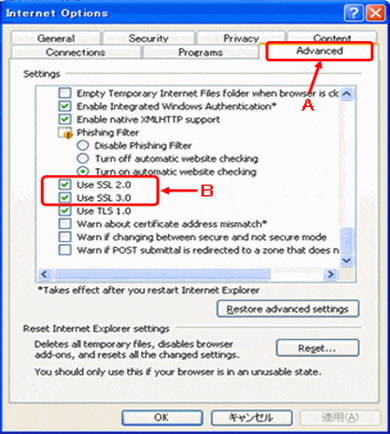
Incorrect SSL settings.
Signs and Symptoms for QuickBooks Error 12007
Some of the common signs that users can relate to such error are:
The user is unable to update QuickBooks and instead encounters an error message related to Error 12007.
Your system experiences frequent crashes, especially when updating QuickBooks.
Latest Methods to Rectify QuickBooks Error Code 12007
You can end up with QuickBooks payroll error 12007 due to a handful of factors that can be rectified by performing their respective solutions. Let us unleash each of the solutions one by one:
Solution 1: Add QuickBooks desktop as an exception in the Firewall
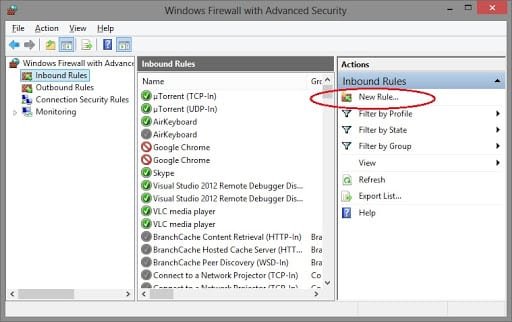
Press the Start menu and search for Windows Firewall and open the same.
Now visit Advanced Options and hit a right-click on Inbound Rules.
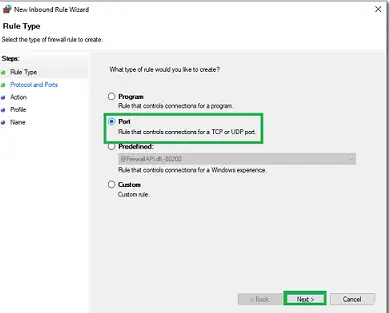
Next step is to hit on Port.
Followed by hitting on Next.
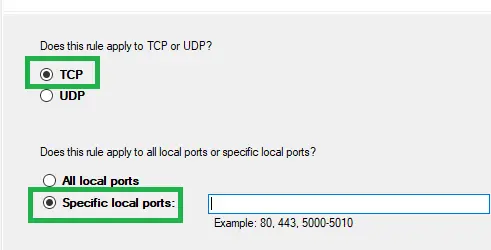
Ensure that TCP is chosen.
Use the correct port for the QuickBooks version installed on the computer.
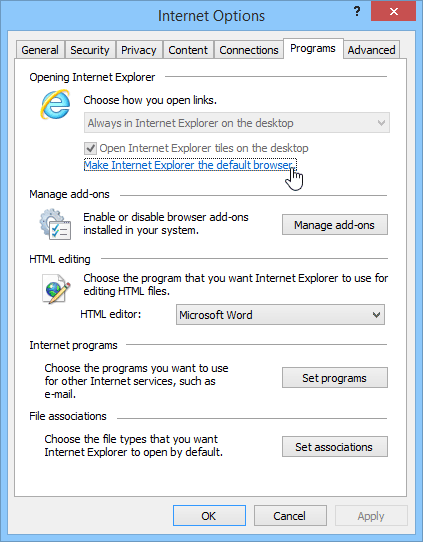
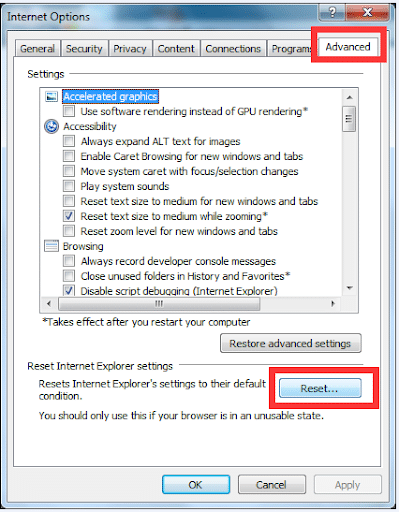
Solution 3: Make Internet Explorer the default browser
Open Internet Explorer.
Then, head to the Tools menu.
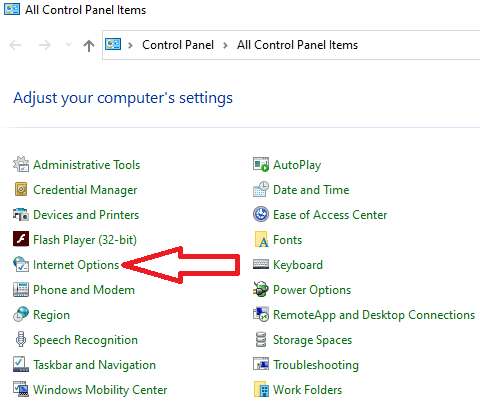
From there, hit a click on Internet Options.
Now click on Programs and click on Make Default option.
Once done with that, hit on Ok.
Solution 4: Open Windows in Safe Mode
This error can also be rectified by opening windows in safe mode. This will resolve the error up to certain extent. Moreover, opening windows in safe mode with networking will fix the issue.
Initially reboot your system.
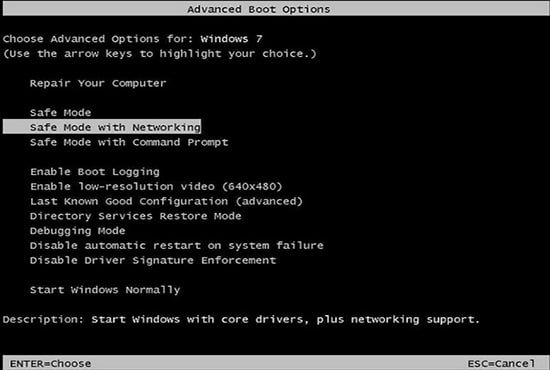
After that keep tapping on F8 key until the Advanced Boot options show up.
Now choose Safe Mode with Networking option and hit on Enter key.
Launch the QuickBooks software and attempt to update. Check if the error shows up.
If the error doesn't show up, it means that some software is interfering with the update process.
Proceed with the update process as usual and restart your PC.
QuickBooks error code 12007 can be resolved easily by implementing the above illustrated set of steps. Despite that, if you are still unable to rectify the error successfully, you need not worry, as our XpertBooks Pro experts team is there to rescue you. Our accounting and bookkeeping professionals will come up with the most relevant and feasible solutions for you. We are available 24/7 to resolve your QB-related queries and technical issues.
FAQ's
Can a problem with internet connectivity cause error 12007?
Yes! This problem can be caused by network connectivity issues. Users should ensure that their internet connection is stable and working properly.
How do I update Internet Explorer to resolve this error?
To update Internet Explorer, follow these steps: 1. Open Internet Explorer. 2. After that hit a click on the Gear icon (Settings) in the top-right corner. 3. Now hit on About Internet Explorer. 4. If there is an update available, it will prompt you to install it. 5. Follow the on-screen instructions to complete the update.
What are SSL settings in Internet Explorer?
SSL is known for Secure Sockets Layer in Internet Explorer (IE). These refer to the configuration options related to the security protocol, that are used to establish a secure and encrypted connection b/w the web browser and the website.