Have you ever found it difficult to update your QuickBooks subscription? Did you get a My subscription payment failed email? Well, this error is generally caused by incorrect or outdated billing details, and updating the payment method usually fixes it.
Updating QuickBooks subscription is an easy task, but this process may face few technical issues that can lead to 'QuickBooks Subscription Payment Failed Error' or other subscription related issues. However, if you are able to relate with it, then this means that Intuit is unable to charge the billing account for your subscription. Another possible reason why you came across my subscription payment failed error is that the card on file might be out of date, invalid, or the card issuer might have declined the payment.
Procedure to troubleshoot QuickBooks my subscription payment failed issue
A quick solution to this error is to update your billing information. Let us understand what steps can be performed to fix my subscription payment failed in QuickBooks:
Step 1: Update your billing information
Most of the times, incorrect billing info is the prime cause of this error. To sort out this issue, the steps to follow are:
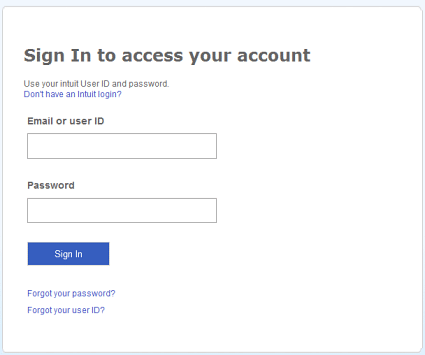
Under this process, you need to sign in to QuickBooks Online.
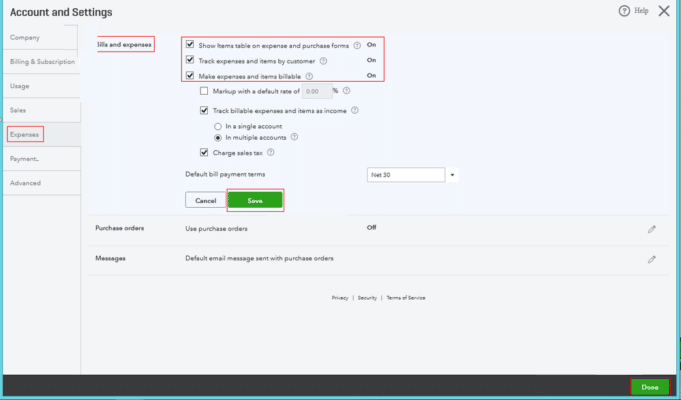
Furthermore, head to the settings tab and also move ahead to the Account and settings tab.
You are further required to choose the billing and subscription tab.
Heading forward, you need to choose the edit tab for the payment method.
Now, update the billing info.
And once done with that, choose the save tab.
After you update your billing information, this might take around 24 hours to reflect and activate your payroll subscription. In case you need any further assistance or if the error is still troubling you, then in that scenario, you simply have to proceed to the steps below.
Step 2: Review your billing information
Did you see my subscription payment failed issues in QuickBooks even after performing the set of steps above, then you simply need to head back and edit the payment method once again. Here is what you need to check:
Ascertain that you do not use any special characters or symbols (such as @ or *) in the billing address. Using any special characters will trigger some sort of error.
Moreover, you need to ensure that every field on the payment method screen contains information, including postal code type in “00000”.
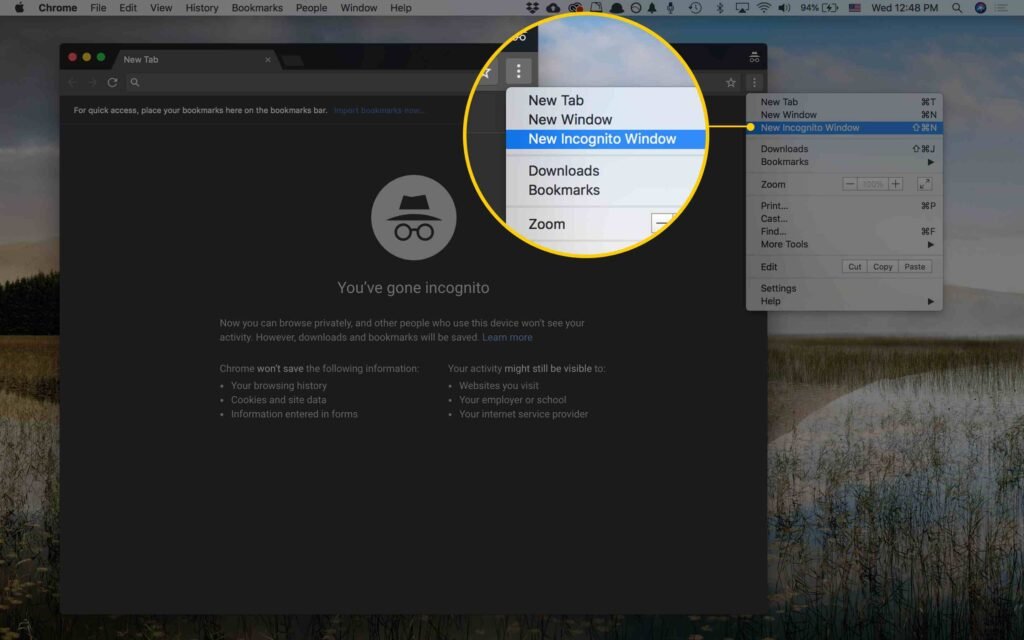
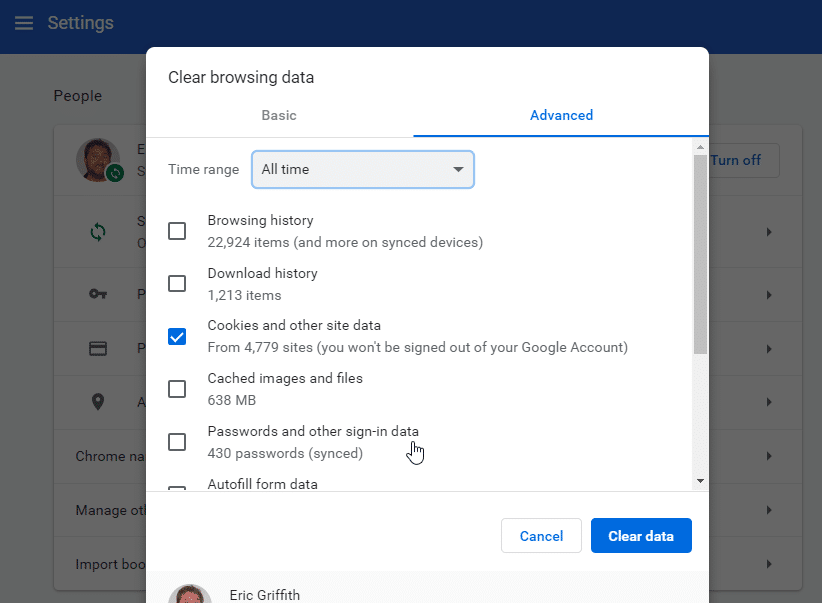
Carry out the step to update the billing info in the private web browser i.e., the incognito mode. In case you are unable to update the billing info, and the error isn’t present in the private web browser, then you will have to clear the web browser cache. You can perform the detailed steps to clear the browser cache.
You can also try a different card to make the payment because a different card may be having permissions to process the payment.
You should further check in the bank and ensure QuickBooks is approved to bill the account. In case you are using PayPal, make sure to contact PayPal or the banking institution that is linked to PayPal.
Step 3: Update the Billing info in Incognito mode
Open Google Chrome browser.
Press Ctrl + Shift + N keys to open Incognito mode.
Initially, you need to go to menu and choose settings.
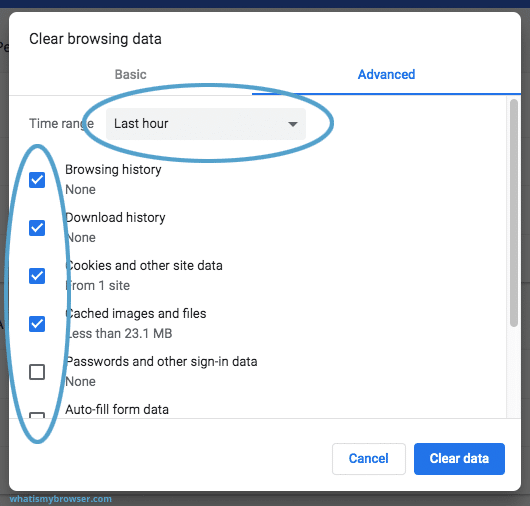
After that go for privacy and Settings, and then click clear browsing data.
Check-mark all the positive options such as Cookies and other site data, Browsing History, and Cached images and files.
Now select Clear data.
Once done, try to login to QBO and try to update the billing info.
Step 5: Contact Customer Support
Just in case you are unable to fix the payment issues, then simply reach out to customer support.
You need to sign in to the QuickBooks company file.
Further, choose help.
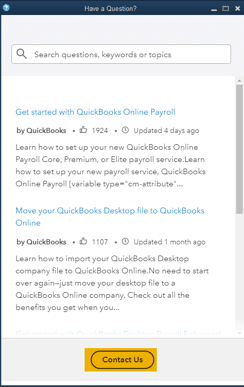
And go for the search tab, choose Contact Us, and perform the steps to further connect to professionals.
My subscription failed error in QuickBooks can be extremely devastating, especially when you try to access the software and fail to do so, ultimately affecting the overall work. Hopefully, reading this piece of writing might have helped you in some way to fix my QuickBooks subscription failed error. Just in case you come across similar issue again and again, then you simply have to connect with XpertBooks Pro, and our accounting consultants will ensure to answer all your queries immediately.
FAQ's
What does the “My Subscription Payment Failed” error mean in QuickBooks?
This error usually occurs when QuickBooks is unable to process your subscription renewal or payment transaction. It can happen due to incorrect billing details, expired card information, or issues with your bank/credit card provider.
What are the main causes behind this error?
1. Expired or outdated credit/debit card. 2. Incorrect billing address or payment details. 3. Insufficient funds in the linked account. 4. Issues with your bank’s payment gateway. 5. Internet connectivity or server glitches from QuickBooks’ end.
Can I use QuickBooks if my subscription payment has failed?
No, if the subscription payment fails repeatedly, QuickBooks may restrict access to certain features or stop working altogether until the payment is cleared. It is advisable to update your billing details immediately to avoid disruption.
What should I do if my payment still fails after updating my details?
If the issue persists even after updating billing details, try: 1. Using a different payment method. 2. Contacting your bank or card provider to check if transactions are being blocked. 3. Reaching out to QB support team for assistance.
Just in case you are seeking for refund for your QuickBooks product, note that if you purchased a QuickBooks and product and it is within 60 days of the purchase date, then you are eligible for a refund under the satisfaction guarantee. However, there are certain exceptions to this as well, for that you can check our return policy for details. Also note that if you have made a purchase through an app store, you will require to request a refund using the app store. To get a better insight into the steps for requesting a refund for QuickBooks product, make sure that to abide by this segment.
Option 1: Filling out the form to request a refund for QuickBooks Products
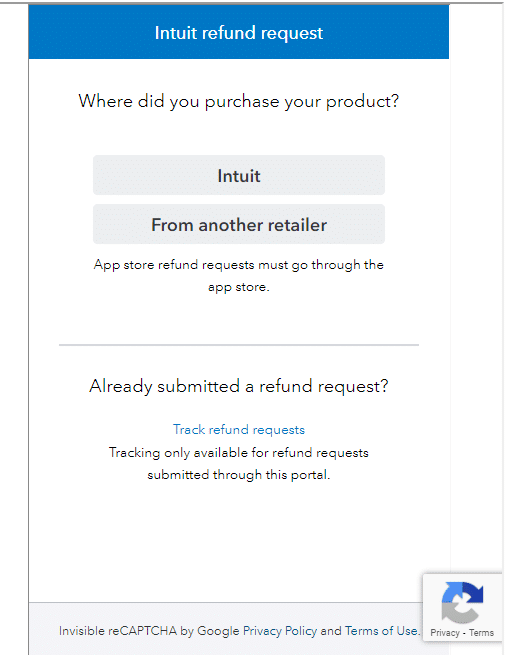
You can make use of the form to request a refund for the products:
You may make use of this option just in case you purchased the product from a retailer. After that go for the second option, to request refund for other QuickBooks products.
Option 2: Requesting a refund for other products and situations
You can perform the steps according to the product you use:
Steps for returning QuickBooks purchased direct from intuit
Just in case you purchased the software from intuit and it is within the 60 days of the ship, download or unlock date, then you are eligible for a refund.
For Software:
You will first have to login to the intuit account.
And in the Products and services applet, choose Products.
Further, look for the product you wish to return and choose return product link at the right.
Choose a cancel reason.
Now click on return product.
Wait for the confirmation that the product return was submitted successfully.
An email will be sent to you as your refund is processed.
At the time when you request the refund, the license will be deactivated and you will no longer be able to use the product.
For hardware:
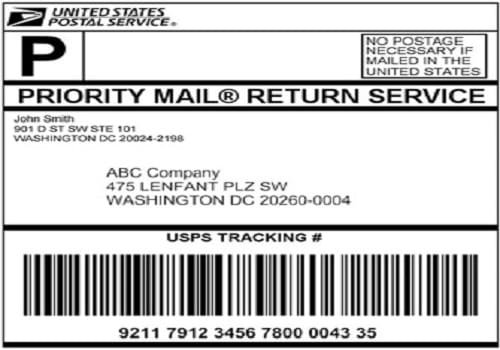
You can return your physical products within 60 days of purchase. Fill in the QuickBooks return form and send products to:
USPS-returns ATTN: Returns Department PO Box # 580926 Pleasant Prairie, WI 53158, US
Non-USPS-returns (To be used for all hardware returns) Intuit Inc. ATTN: Returns Department, Door 20 11500 80th Avenue Pleasant Prairie, WI 53158, US
You can return the Amazon product within 60 days of purchase. It is highly suggested to return the products using a traceable method. In case you are shipping using USPS, then try using registered or certified mail, or return receipt. Shipping fees for the initial order and product return will not be reimbursed.
You can send all the physical products returns with the original order number to:
USPS-returns ATTN: Returns Department POS Box # 580926 Pleasant Prairie, WI 53158, US
Non USPS-returns (To be used for all hardware returns) Intuit Inc. ATTN: Returns Department, Door 20 11500 80th Avenue Pleasant Prairie, WI 53158, US
Steps to return QuickBooks purchased from retailer, who won’t accept the product
In case you purchased from a retailer, then return the product within 60 days. The following things will be needed:
All the physical components that include the manual and CD if applicable
Copy of the retail purchase receipt
The name of the payee or your name
Mailing address to send the refund
Phone number
Email address
It is suggested to returning the product using a traceable method. In case the shipping is via USPS, then consider using registered or certified mail or a return receipt. Intuit is not responsible for the lost mail or products. Moreover, shipping fees for the initial order and product return won’t be reimbursed.
Physical products should be returned at:
USPS-returns Intuit Inc. PO Box # 580926 Pleasant Prairie, WI 53158, US
Non USPS-returns (To be used for all hardware returns)
Intuit Inc. ATTN: Returns Department. Door 20 11500 80th Avenue Pleasant Prairie, WI 53158, US
Once you are thorough with the segment and the steps mentioned in this for requesting refund for your QuickBooks products you purchased, it is time to implement the steps practically. If in case you get stuck somewhere, we can assist you. Connect with our accounting professionals right away and we will answer all your queries instantly.
QuickBooks Desktop 2024 is a new release version in the huge arena of accounting software which has set new trends in the market. The new version comes with numerous new and exciting features such as improved data protection, increased efficiency and a useful snapshot of the user’s current inventory. The efforts being made by the new QuickBooks Desktop comes with the features of better visibility and control.
This version helps with routine tasks which can be automated by its accounting software tools and improvements. This helps the users do much more for their clients. In this article, let’s understand in detail about QuickBooks desktop 2024 – it’s release date, pricing, latest features, download links and lot more. Thus, keep read on!
QuickBooks Desktop 2024, just like its earlier versions is an accounting management software which is compatible to business firms of all scales – be it small, medium or large. It is aptly customizable in the sense that the users can get various plans according to their needs, irrespective of the number of users.
With every new version of QuickBooks, comes along improvisations. This latest software comes with better security, vivid productivity and efficient growth. It enables the users’ financial records, makes the daily tasks automated and helps in making efficient decisions that promotes the growth of the business.
Quick Points to Note:
The software works with Windows 7 or versions on the higher side.
It requires Google Chrome along with a stable internet connection.
Users can buy the latest versions of QuickBooks Desktop software from the Pro, ProPlus, Premier, PremierPlus, Accountant and Enterprise product lines.
It has the ability to keep a check on inflows and outflows on a single dashboard. It does automated calculations and merge multiple reports into one.
The version comes with a quick installation option of both manual and automatic installation. Users can choose from different modes for installation of the QuickBooks Desktop software. Modification of the installation settings is also possible.
Transactions can be recorded easily and in a hassle-free manner.
When was QuickBooks Desktop 2024 released?
QuickBooks Desktop Version 2024 made its entry into markets on September 8, 2023. This release date was shocking for many as it came out way before the pre-determined date of release (Oct 2023).
The new features of this accounting program garnered astonishing popularity. Features such as efficient work system, user-friendly and delivery of productive experience to the user made QuickBooks Desktop 2024 gain a huge popularity.
New Features of QuickBooks Desktop 2024: New Features, Pricing & System Requirements
QuickBooks Desktop 2024 comes with better data security, more productivity and better view of inventory levels.
Price Table of QuickBooks Desktop
Purchase of license is a necessary pre-requisite for availing the new advanced features included in QuickBooks Desktop 2024. The following table portrays the prices for QuickBooks Desktop Pro Plus, Premier Plus and Mac Plus which took place on or after October 3, 2024.
Product - QuickBooks Desktop
Price - Pro Plus/ Mac Plus
Price - Premier Plus
Price - QuickBooks Enterprise
Current Annual Price (Based on 1 user)
$549
$799
New Annual Price (Based on 1 User)
$649 yearly
$949
$1830 yearly.
Let us now know in detail about the new features of QuickBooks Desktop 2024:
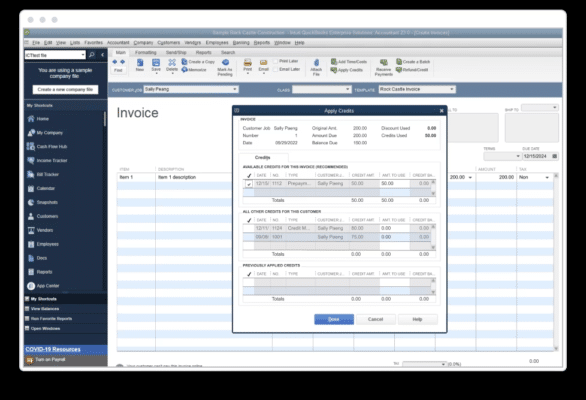
Track Customer Prepayments (Enterprise only)
It facilitates the tracking of customer deposits or prepayments. It also transfers credit when the sales order gets converted into an invoice.
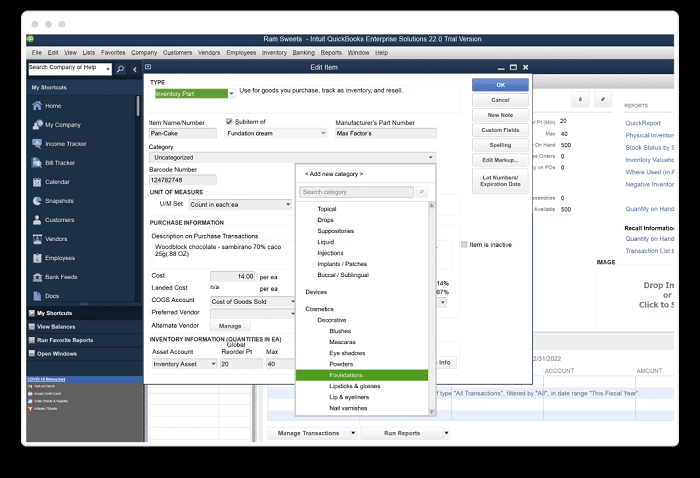
Enhanced Category Management (Enterprise only)
The user can track and categorize the inventory items for better management- set pricing rules for every category.
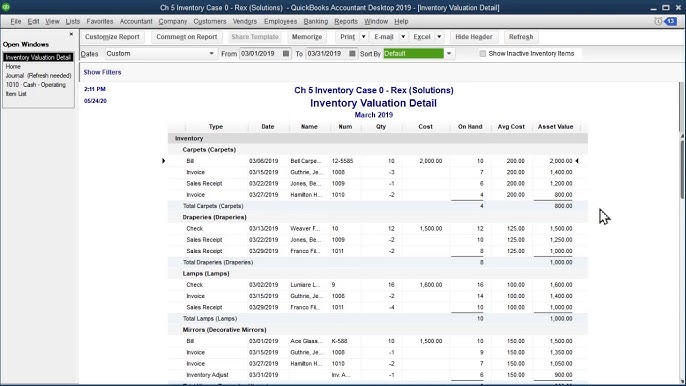
Detailed Inventory Reports (Enterprise only)
It helps the user with the provision of category-level reports, sales or inventory and informed and data-driven decisions. This version takes inventory management to the next level by keeping a track of the batches/lots with an Inventory Stock report and checking inventory status while in lots.
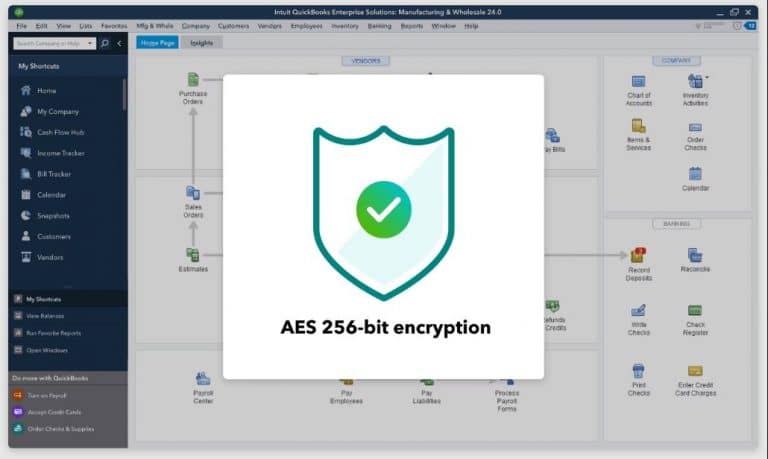
QuickBooks desktop 2024 and Enterprise solutions 24.0 employs 256-bit encryption to keep all the data safe. It is known to be best-in-class security protocols and keeps the data safe.
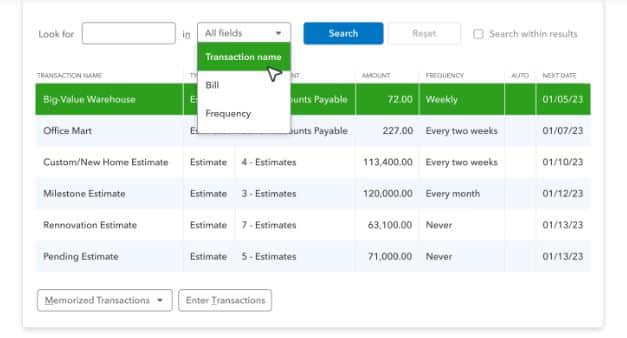
Search the item lists quickly
With its feature of enhanced search, it helps the user to find items quickly.
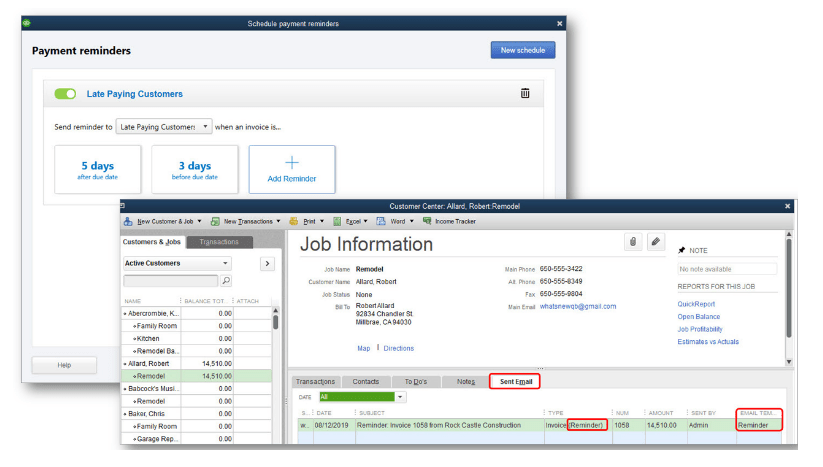
Automate Reminders and Get Paid Faster
It helps the users to send automatic reminders to the customers when the payments are due.
Build Brand and look professional with QuickBooks 2024
It also helps the users to communicate their brand and show them design templates offered by QuickBooks desktop 2024 and leverage the power of consistent style.
Do and Achieve More and Faster
This new version supports 64-bit processors for faster work. It generates reports, reconcile accounts and create invoices faster than any other traditional accounting software.
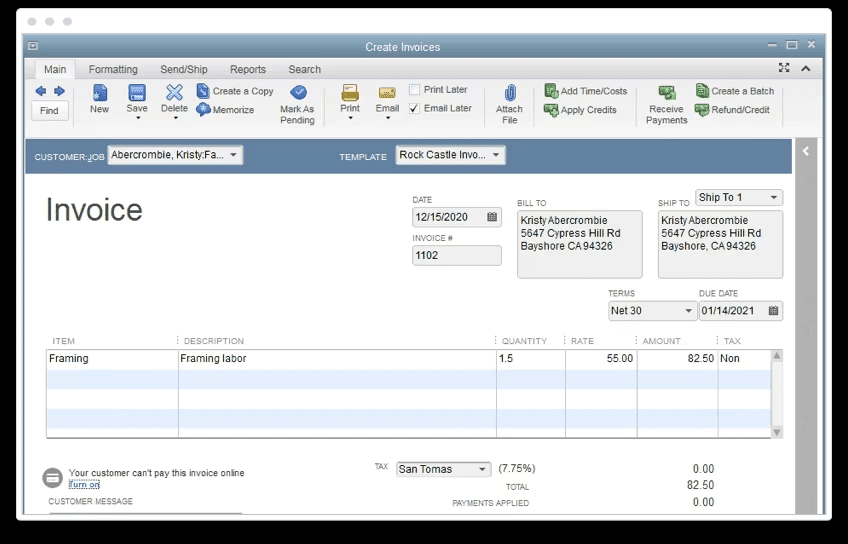
Generate Invoices and Maintain Sales Records
This version creates invoices and sales reports quickly to track who owes the user what they purchased and when they made payments.
It helps the user utilize easy analytics tools to maximize operational efficiency, enable quick access to comprehensive financial, tax and sales reports for in-depth business insights.
Match the Banking Statements
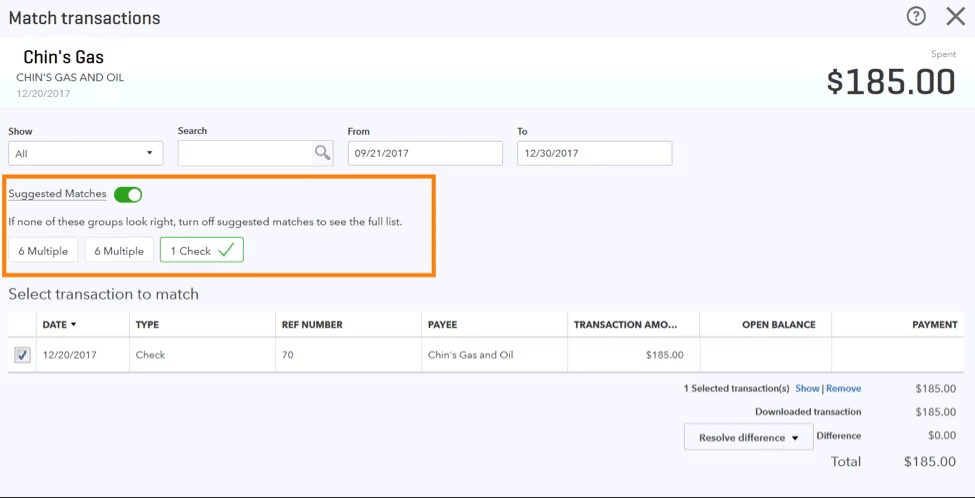
QuickBooks Desktop version 2024 helps the user to reduce complicated data input by effective integration and matching the online bank transactions with QuickBooks and improve reconciliation for accurate accounting.
Monitor the Expenses
It also helps simplify tracking, efficiently monitor cash inflows, consolidate payments and handle invoices that are still owed.
E-File GST/HST form and remain compliant with CRA2
This QuickBooks version helps the users to E-file the GST/HST forms as per CRA2 requirements and stay compliant with tax regulations with just a few clicks.
Remove Multiple Transactions at one-click
It improves efficiency by quickly deleting duplicate transactions in a single batch, improves data management and ensures the accuracy of financial records.
Seamless Product Updates
Now the product updates will not disturb you any more. All the updates will silently update in the background without interrupting your work flow. You can check what updates are important and allow them to install on your computer.
How to Download QuickBooks Desktop 2024 on your System?
Download links for QuickBooks are listed below. You should keep a record of the correct license and product details for QuickBooks Desktop 2024 (Pro, Premier and Enterprise). Hit on download link for the version of QuickBooks Desktop 2024 you wish to set up.
System Requirements for QuickBooks Desktop 2024 (Pro/Premier & Enterprise)
Before setting up the QuickBooks Desktop 2024 on the system, get all the information about the operating system, hardware, software and other system requirements to run your QuickBooks desktop all editions.
Hardware and Operating System Requirements
QuickBooks desktop 2024 needs a 64-bit operating system and won’t run on 32-bit. Here are the basic hardware and OS requirements for this version:
Operating System
No security updates shall be offered for Windows standard and essentials server 2012 and Server 2012 R2 after 10th of October, 2023. As such, QuickBooks desktop 2024 does not support Windows Server 2012. The Compatible Operating systems for QuickBooks desktop 2024 are:
Windows 11, 64-bit, natively installed
Windows 10, all 64-bit editions, natively installed
Windows Server 2022, Standard and Essentials
Windows Server 2019, Standard and Essentials
Windows Server 2016, Standard and Essentials
Windows 10 version supported by Microsoft 8.1 is the required operating system. The following Operating systems are not supported:
Windows 8.1,
Windows 10 S mode,
Windows 11 IOT
And Linux is not supported.
Database Servers
The compatible database servers to run QuickBooks Desktop 2024 include:
Windows (natively installed)
Windows Server 2022, Standard and Essentials
Windows Server 2019, Standard and Essentials
Windows Server 2016, Standard and Essentials
Windows
North American version of windows set to English Admin rights is supported.
Memory (RAM)
Workstation - Minimum 8 GB of RAM, and 16 GB is recommended.
Server:
For 1-5 users: 8 GB
For 10 Users: 12 GB
For 15 Users: 16 GB
For 20+ Users: 20+ GB
Screen Resolution for Optimized Performance
Display optimized for 1280 x 1024 screen resolution or higher with extended monitors for default DPI setting.
Browser Recommendation
QuickBooks Desktop 2024 supports different web browsers including Google Chrome. The user should make sure that the internet connection is uninterrupted.
Minimum Processor
2.4 GHz processor.
Disk Space
2.5 GB disk space for software files is recommended. Additional space is required for user data files.
DVD Drive
A 4X DVD-ROM drive needed for physical CD installations
Product Licensing and Licensing
Registration of product is needed.
Monitor Requirements
It supports one workstation monitor with two extended monitors.
Screen Resolution
Display optimized for 1280 x 1024 resolution or higher with extended monitors for default DPI setting.
Office 2016 (including Outlook 2016) both on 32 and 64-bit
Email estimates, invoices, and other forms with Microsoft Outlook 2016-2021, Microsoft Outlook with Microsoft 365, Gmail, Yahoo mail, Outlook.com, and other SMTP-supporting email clients.
Preparing letters needs Microsoft Word 2021, 2019, 2016, or Microsoft 365 (includes 64-bit)
Exporting reports requires Microsoft Excel 2021, 2019, 2016, or Microsoft 365 (includes 64-bit)
Contact synchronization with Microsoft Outlook needs Outlook 2021, 2019 (32 and 64-bit), or 2016.
Other Compatible Software include:
TurboTax 2023 Personal and TurboTax 2023 Business versions
Lacerte 2023
Pro-Series tax year 2023
Quicken 2023, 2022, 2021, 2020, 2019, 2018, 2017, and 2016
QuickBooks Desktop for Mac 2024, 2023, 2022, and 2021
Adobe Acrobat Reader. Payroll, forms and reports need Adobe Acrobat Reader 9.0 or later.
Payroll and other online features and services need Internet access with at least a 56 Kbps connection speed (1 Mbps recommended).
Anti-malware and antivirus software compatibility
The security software supported by QuickBooks Desktop 2024 are:
Most of the users are unaware about this launch of QuickBooks Desktop 2024. Now, after reading this segment, since you know all about this updated software including it's latest features and benefits, it is the right time to upgrade your QuickBooks desktop. However, if you get stuck anywhere during the process of downloading or installing the new version and have any kind of queries, you can simply reach out to our accounting consultants at XpertBooks Pro.
FAQs (Frequently Asked Questions)
What’s new about QuickBooks Desktop Version 2024?
This version of QuickBooks improves efficiency by increasing productivity with design templates and automated payment reminders. This version works with advanced 64-bit processors which helps in quicker processes, high-grade 256-bit encryption for better security and provides an improved list of features for better usability.
How many versions of QuickBooks 2024 are there?
Based on different business needs, QuickBooks desktop 2024 offers various product versions. There are three main versions: QuickBooks Pro 2024, QuickBooks Premier 2024 and QuickBooks Enterprise 2024. Each version comes with different features and functions that help simplify accounting and financial duties and caters to almost every kind of business sizes and requirements.
How can I download and install QuickBooks Desktop 2024?
You can download and install the QuickBooks desktop 2024 directly from the official Intuit website. Select the model which is best suited for you and complete the purchase process. Follow the Installation process, user licensing information and on-screen instructions. Lastly, open the application after installation and then configure it to meet your specific needs.
How can I upgrade my current QuickBooks version to QuickBooks 2024?
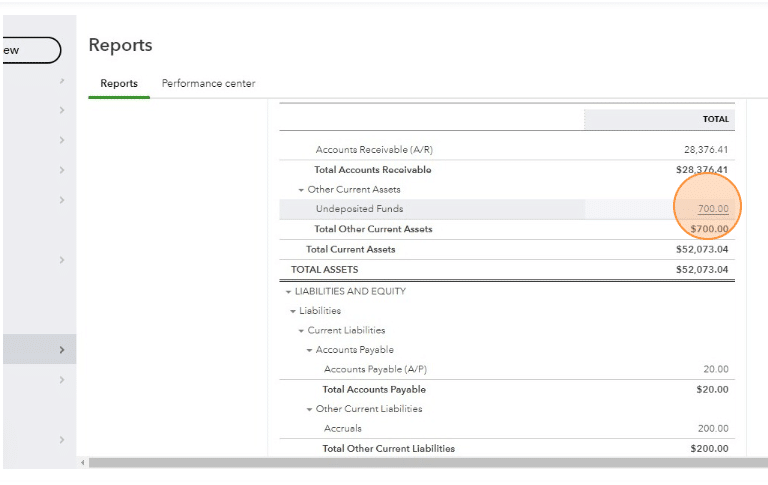
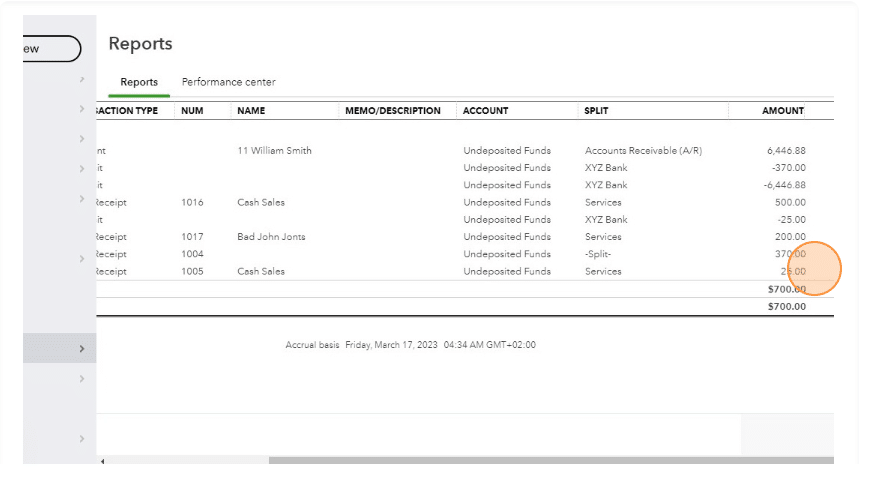
Looking for the exact process that is to be followed for clearing undeposited funds in QuickBooks? Well, we have got you covered. Talking about undeposited account, it acts as a hoarding account within the program. This will further serve as the default account that holds the payments. Whenever you get a payment, it gets transferred to an undeposited accounting within the QuickBooks accounting software. After the payment is deposited into the bank, you will have to clear off the undeposited account for the said amount.
Just in case you miss out clearing off the funds, then you might see a pile up within the program, which might lead a fuss later on. Thus, in order to make things easier for you later on, you would have to perform the steps discussed in later, so as to clear undeposited funds in QuickBooks. Thus, make sure that you stick around this piece of writing till the end.
The process isn’t a complicated one. It involves two basic steps:
First step involves depositing money within the undeposited account
Whereas, the other step is to clear off the same amount from the undeposited account, after the deposition of the amount in the bank
Steps for Clearing or Deleting the undeposited funds in QuickBooks Desktop
Well, you can carry out the below basic steps, so as to successfully clear undeposited funds in QuickBooks. Let us explore one by one:
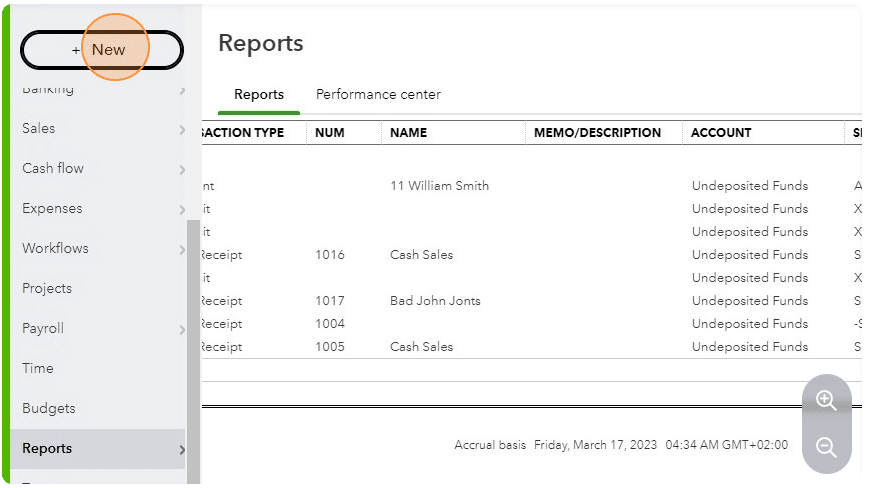
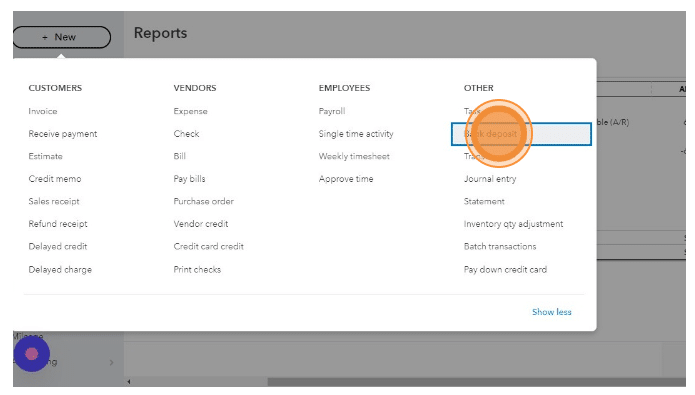
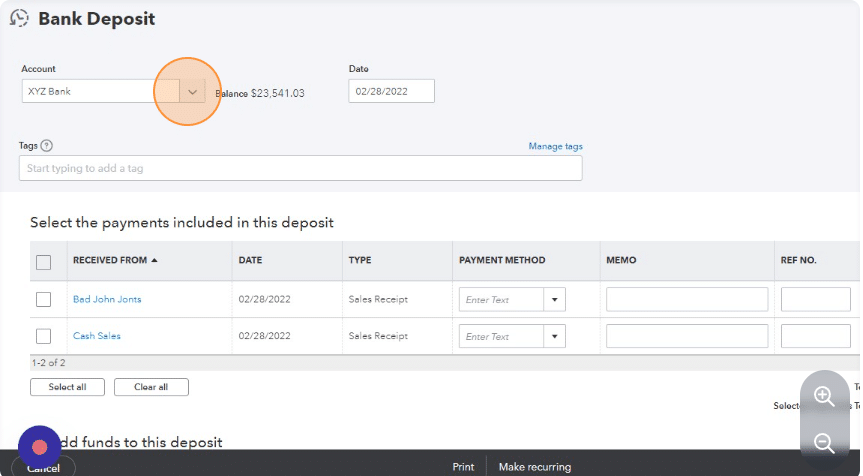
You would first have to login your QuickBooks, and then click on Banking.
Furthermore, pick the option to make deposits from the list present in front of you.
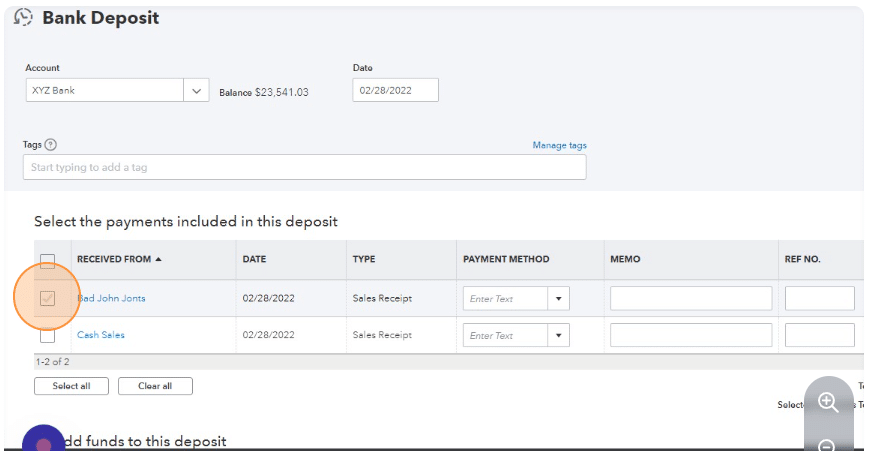
You need to now, locate the payment that you want to deposit within the undeposited account.
Choose the payment by navigating from the payments tab and selecting Make Deposits tab.
Later on, hit OK tab.
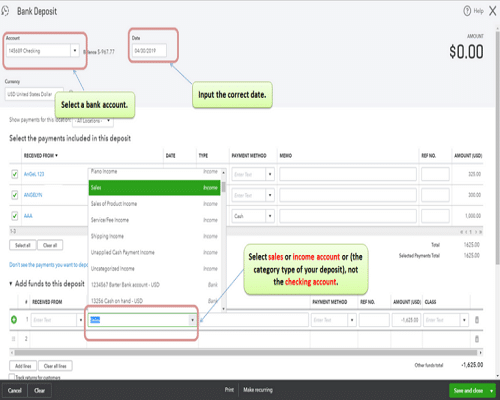
You might now be able to see the deposit window displaying on the screen, where you need to hit deposit to the button and choose the preferred bank from the list of the drop down options.
Further, pick the date of deposit and any other relevant information, that you would want to record.
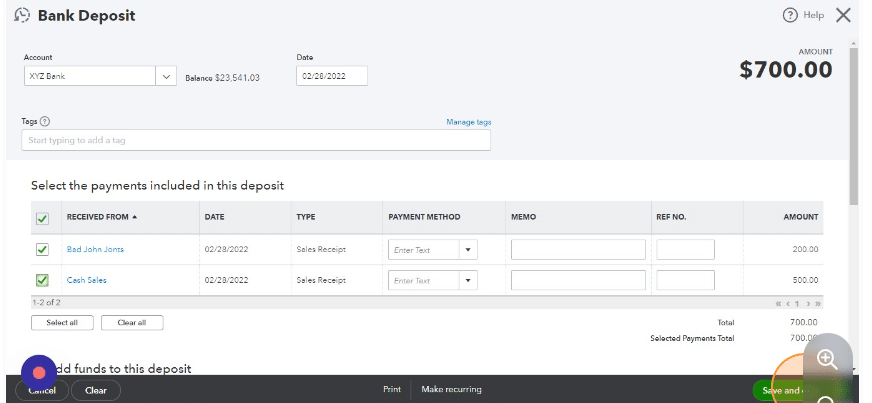
Now, if you want to print a deposit slip, for maintaining a physical record of all the deposits, you would simply have to click on print command and the slip will be printed.
Save the deposit by hitting OK and your funds will get cleared from the undeposited account.
Steps to Clear Undeposited Funds in QuickBooks Online
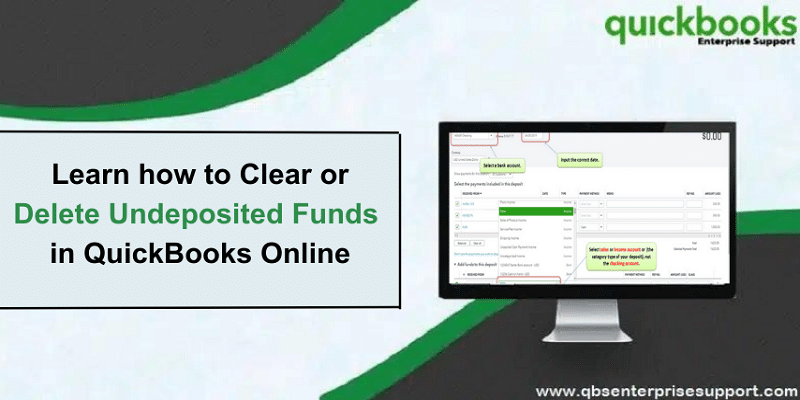
Understanding how to clear or delete undeposited funds in QuickBooks Online (QBO) can assist you to keep your records in better way and also ensures your financial records are accurate and correct.
Well, for entering the funds in undeposited accounts, the below steps can be implemented.
Under this process,, you would first have to launch the QuickBooks software.
Further, click on the List from the menu.
This will lead you to a drop down menu, where you need to pick the Items tab.
Select the type of payment you want.
Furthermore, cater the details required.
Choose the Accounts tab.
Pick the account type as an undeposited account.
Hit OK tab.
And this will create an entry in undeposited account.
Winding Up!
Reading the above steps might have helped you to delete or clear undeposited funds in QuickBooks Online. However, if for some reason you aren’t able to, then as always, contact our XpertBooks Pro team, and all your queries would be answered immediately. Our team will help you get out of this chaos instantly without affecting your operations and data.
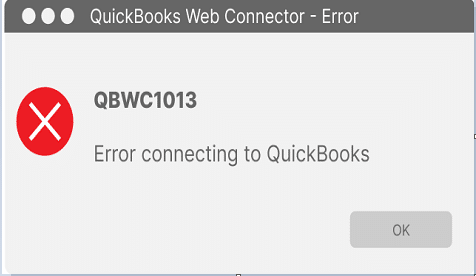
Trying to deploy a Webconnector to QuickBooks and getting the error QBWC1013? Well, a QuickBooks web connector error might show up when you try to connect a third-party application with QuickBooks using the QuickBooks web connector tool. The tool enables data sharing between QuickBooks and other business applications. There can be other errors that fall under the QBWCxxxx errors such as QBWC 1000, QBWC1001, QBWC 1002, so on till QBWC 10048. The QBWC1013 error usually appears on the screen with a warning message:
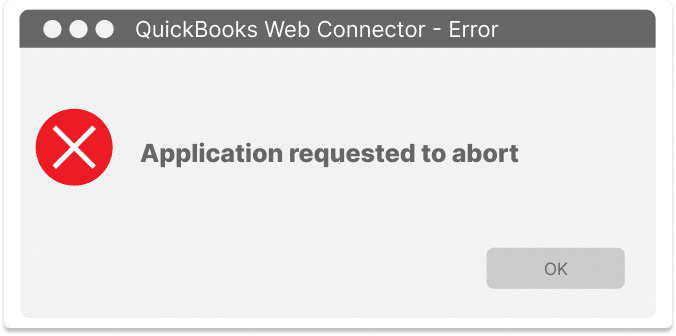
QuickBooks Web Connector - Error
QBWC1013: Error connecting to QuickBooks. Returning error message to application. Could not start QuickBooks
Or you may get another error message on your computer screen stating as:
QuickBooks Web Connector - Error
QBWC 1013 - Error Connecting to QuickBooks or Application Requested to Abort
Today, we have crafted this article about QuickBooks error QBWC1013 with it’s possible cause’s and DIY solution methods. This Web Connector error has been encountered by users who try to connect third-party applications with QuickBooks using the Web Connector Tool. The error message appears stating as:
A bunch of factors can be responsible for the occurrence of QuickBooks Web connector error QBWC1013. Let us evaluate the causes one by one:
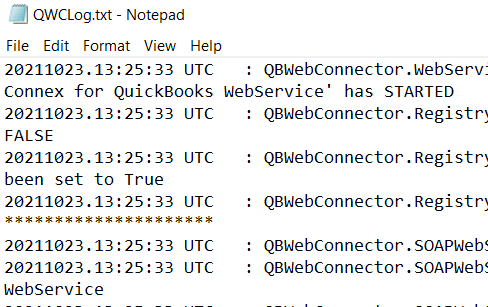
Damaged QBWCLOG.TX file can be a major trigger behind QBWC1013 error.
Incorrect web connector tool configuration or installation.
You can land upon a similar issue if the antivirus or firewall settings are blocking the connection.
Moreover, using an outdated version of the Web connector tool can also be a common reason.
QuickBooks Web Connector Not Responsive.
Poor Internet Connection can also lead to this error.
Symptoms of QBWC1013: Could not start QuickBooks
Not just the causes, but it is crucial to understand the signs and symptoms of the error to avoid it in future. Here are some symptoms of QBWC1013 error.
Irresponsive Web Connector
Error message related to QBWC1013
System and QuickBooks Crash all of a sudden
Important points before troubleshooting
Before you jump on to the solution steps, it is essential to jot down the essential points, so as to understand things a little better.
Methods to Fix QuickBooks Error QBWC1013 Error when Connecting to QuickBooks
Fixing the web connector error in QuickBooks is possible using the steps and solutions discussed below. Let us have a look:
Solution 1: Configure Internet Speed
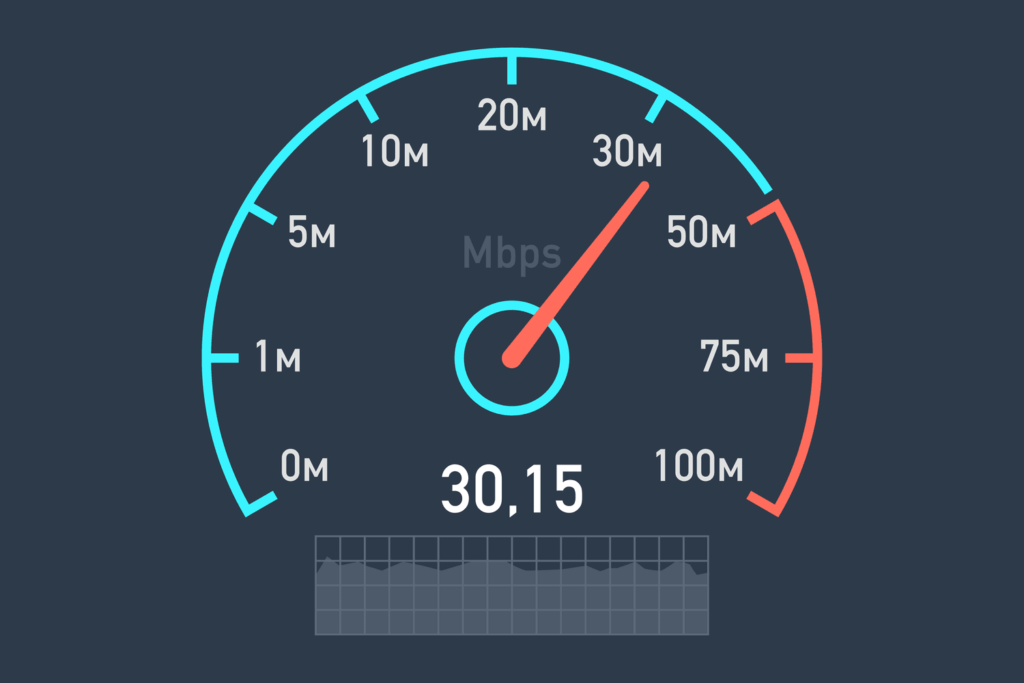
Slow internet connection can be a reason behind the occurrence of such an error. Thus, if you use ethernet connections, then simply contact your IT support professionals for assistance. And if your system uses WIFI, then check your connection status. If you find out that the internet connection isn’t working properly, then you can start the troubleshooting locally.
Solution 2: Review the third-party applications
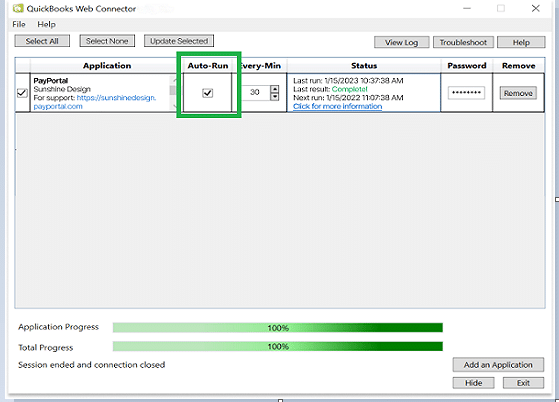
Just in case you have more than one third-party software or application installed, make sure to review them inside QBWC. You will also have to disable them temporarily. For that, you simply have to uncheck the box in the column for auto-run. This will prevent the web connector from updating.
Solution 3: Update Web Connector Tool
Ensuring that your QuickBooks software and web connector are updated to the latest release is a must to tackle this unwanted error.
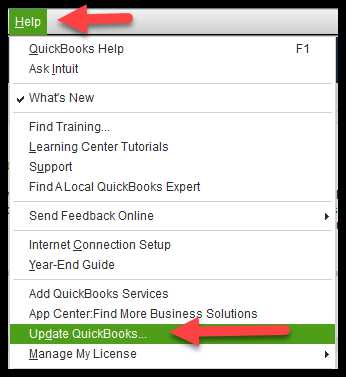
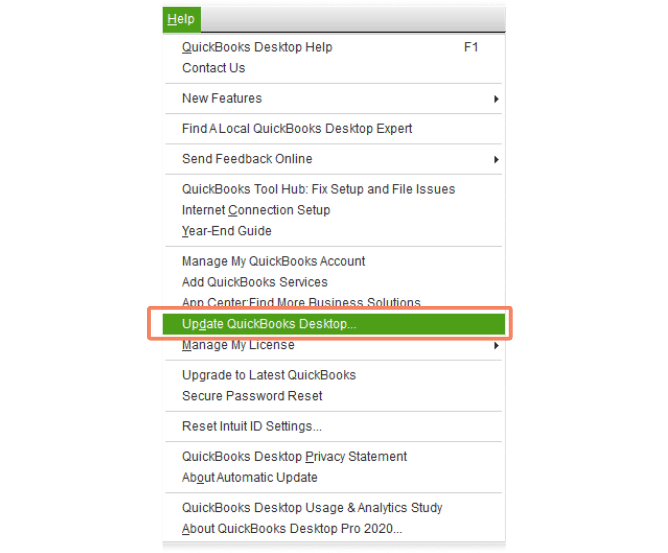
You can open your QuickBooks software and head to the help menu to check for updates available.
Moreover, you can also check for the web connector updates available to ascertain that your web connector tool is updated to the latest release.
When this is done, install QBWC again (Explained below).
And further install QuickBooks web connector from the installation files.
Lastly, carry out the onscreen prompts to complete the process.
Some other quick fixes that you can try
If you still come across the same error, then simply try out the following:
You should log in to your online banking, in order to ascertain using the right credentials.
If you haven’t already, try updating the Internet Explorer, and don’t skip to set it as a default browser.
Using QuickBooks in single-user mode is also crucial, make sure you do that.
Solution 6: Grant Web Connector Permissions
If none of the above methods worked for you, then you should allow Access option when connecting the Web Connector Tool to the third-party applications. This can be done as:
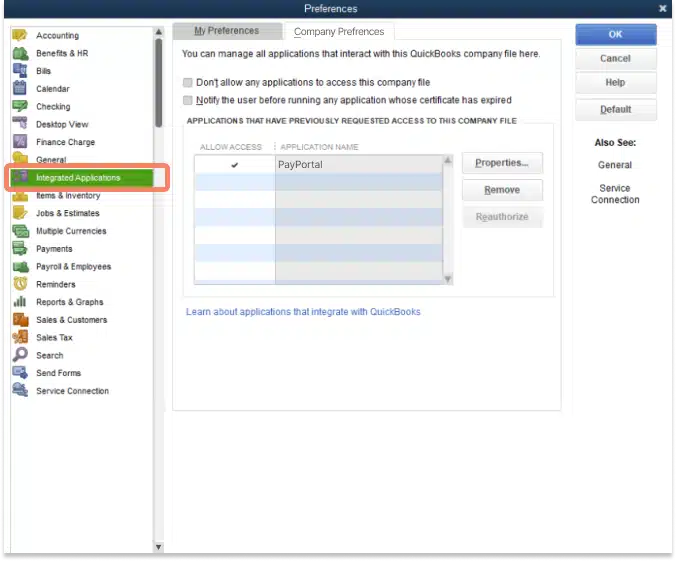
Open the QuickBooks and then go for preferences and select Integrated Applications.
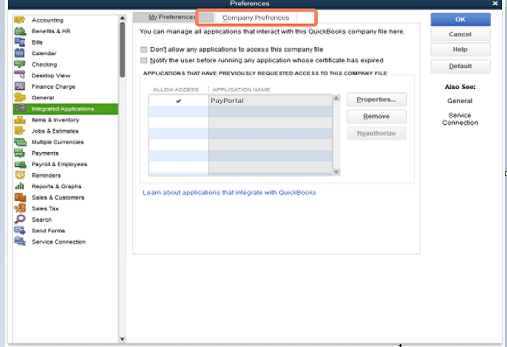
After that hit a click on the company preferences tab.
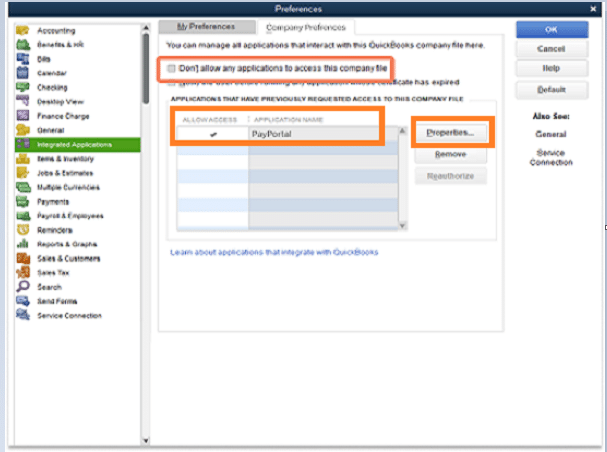
Now uncheck the box "Don't allow any applications to access this company file"
Also mark allow Access Colum besides the PayPortal application name. Also verify that there is a check on it.
In next step hit a click on properties, then mark the box besides “Allow this application to read and modify this company file”.
Now go for File > App Management > Manage Web Apps in your QuickBooks.
Next, you need to access to web connector tool and connect the application after making a choice for it.
Lastly. click on ok then again click on done on the confirmation screen.
Errors like QBWC1013 can be extremely annoying, especially when it comes to QuickBooks web connector error QBWC1013. However, dealing with them becomes much easier, if you implement the right set of steps discussed above. Just in case you come across the same issue even after performing the set of steps we mentioned earlier in this segment, then you need our assistance for sure. You can talk to our XpertBooks Pro team and get assistance from qualified professionals.