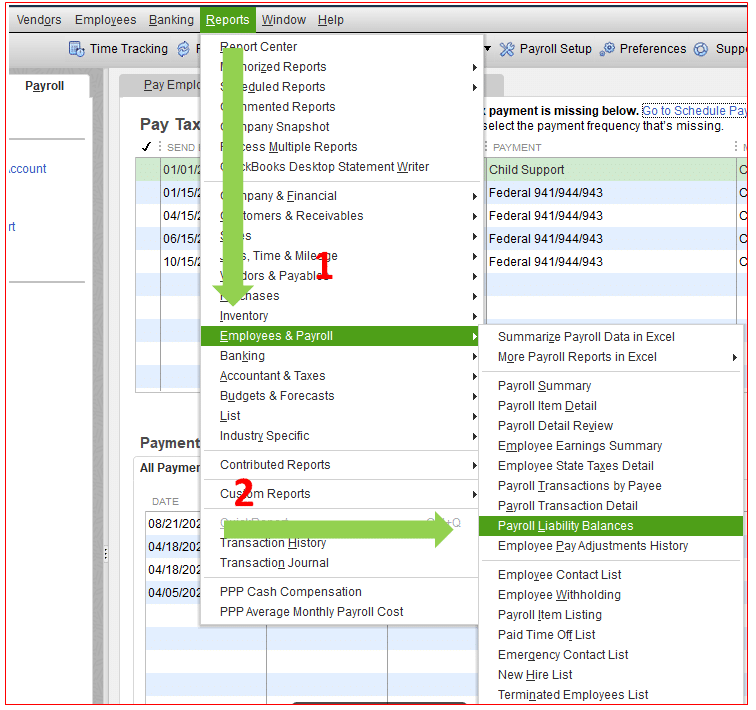
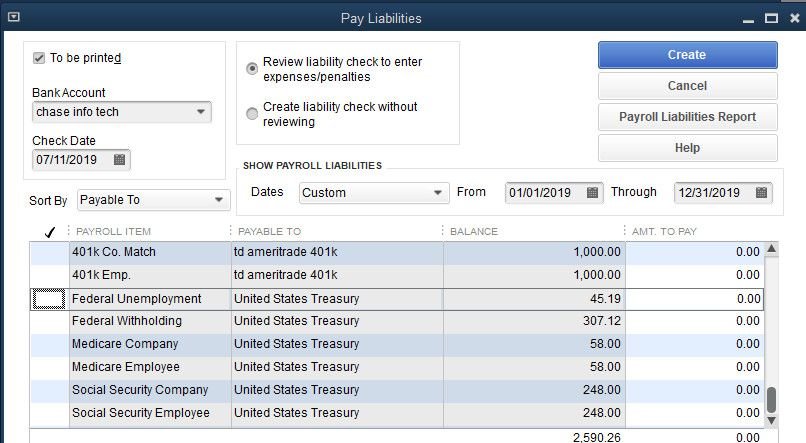
Want to learn some easy steps to zero out payroll liabilities in QuickBooks? Your payroll liabilities balance report carries certain information that relates to the payroll items allocated to the deductions, liability account, and others. In certain scenarios, you are supposed to zero out your payroll liabilities in QuickBooks, such as when the report shows a wrong account. Not just that, but as we all know that the liabilities are something that you need to pay, and once you have a paid a liability, it becomes crucial to zero it out, to ensure that your accounts stay valid. To help you understand the process to zero out payroll liabilities in QuickBooks, here we are with this piece of writing. Let us together understand the concept of payroll liabilities.
What is a payroll liability?
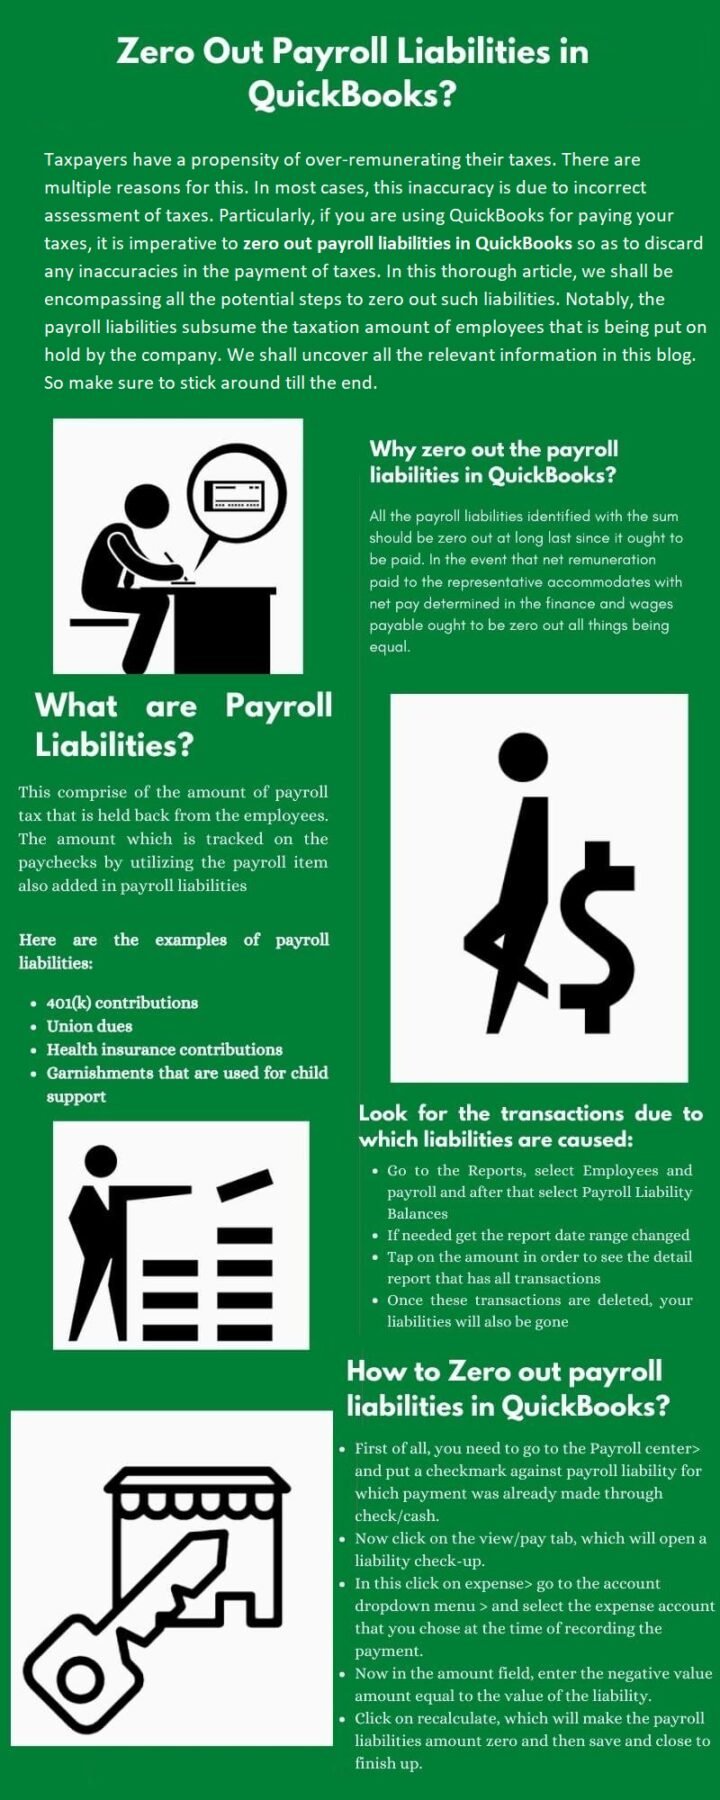
Just like other liabilities, payroll liabilities are the amount that you are supposed to pay, as they are the amount that you owe to your employees. It can be the payroll tax that you have held back from the employees. Here are a few examples showing payroll liabilities:
Health insurance contributions
Union dues
401(K) contributions
What is the necessity to zero out Payroll Liabilities in QuickBooks?
The major factors that necessitate zeroing of payroll liabilities in QuickBooks are given below:
You might need to zero out liabilities if the workers are no longer receiving checks.
When you plan to make adjustments to the Health Savings Account covered by the commitments of the company to its employees.
Zeroing out is also important when the employee compensation equals the net estimated compensation.
Quick Steps to Zero Out Payroll Liabilities in QuickBooks
Here are the steps that you need to follow in order to zero out your payroll Liabilities in QuickBooks.
Step 1: You simply have to first open your QuickBooks Account.
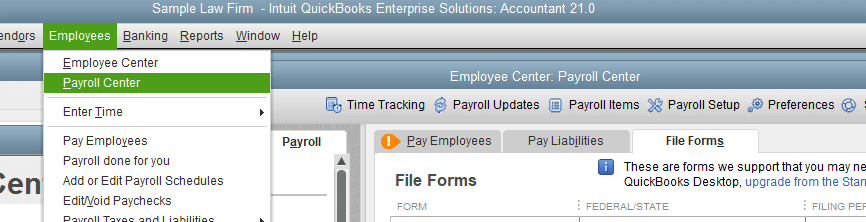
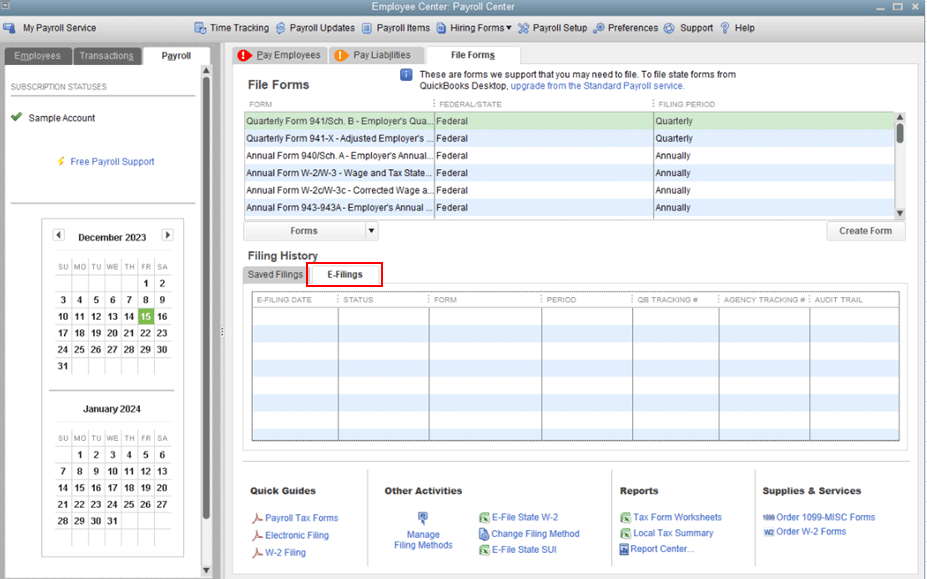
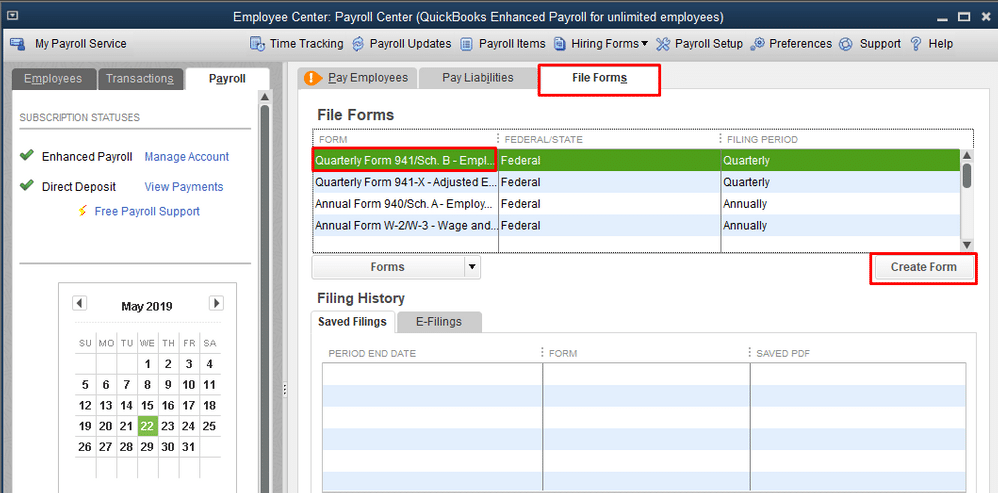
Step 2: Furthermore, head to the Employees and choose Payroll center.
Step 3: You are then supposed to add a checkmark against the Payroll liability that the particular payment was made for.
Step 4: Once don with that, you need to choose the View tab or the Pay tab. This will show up the liability check-up for you.
Step 5: You now have to choose the Expense and then head to the Account drop-down menu.
Step 6: In this step, you need to choose the Expense account that you opted for when the payment was recorded.
Step 7: The next step is to head to the Particular amount section and choose the Negative value sum that is same as the liability value.
Step 8: Go for the Recalculate option which will turn the payroll liabilities to zero.
Step 9: You are now required to hit Save and Close to complete the process.
Alterations to be done by the Company
To start off, you need to open QuickBooks.
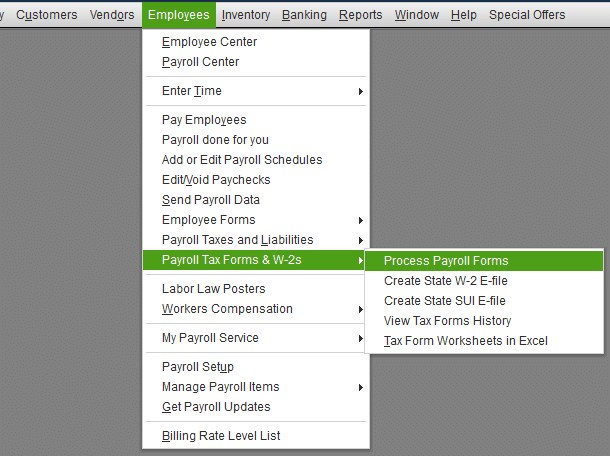
After that, click on Employees tab.
You then need to select the Payroll Taxes and Liabilities option.
Go ahead with the opt to modify payroll taxes and liabilities.
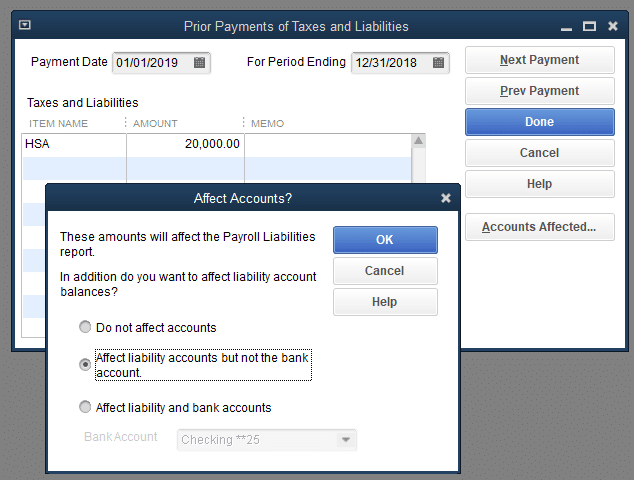
You are supposed to choose Adjust Payroll Liabilities option.
Also, select correct modification date.
Now, select the Company from the Adjustment option.
Then click on Edit option from Item name drop-down.
Enter the negative value sum.
Choose Affected Accounts option and select affect Accounts for Liabilities and Expenses.
Also, make sure to click on Not Affect Accounts.
Lastly, click on Ok.
Alterations to be done by the Employee
Select an Employee from the Adjustment for Fragment list.
Now select Employees whose names you want to change.
Make sure the payroll item must be selected from the Taxes and Liabilities section, and the negative amount needs to be entered.
Follow the on-screen directions for modifying the company plan in order to save the changes.
Steps to pay payroll liabilities in QuickBooks Online
You are supposed to select the right section in order to record the payment, especially when you use QuickBooks Online to pay your payroll liabilities. You need to first sign in your QuickBooks dashboard. And then continue with the steps ahead:
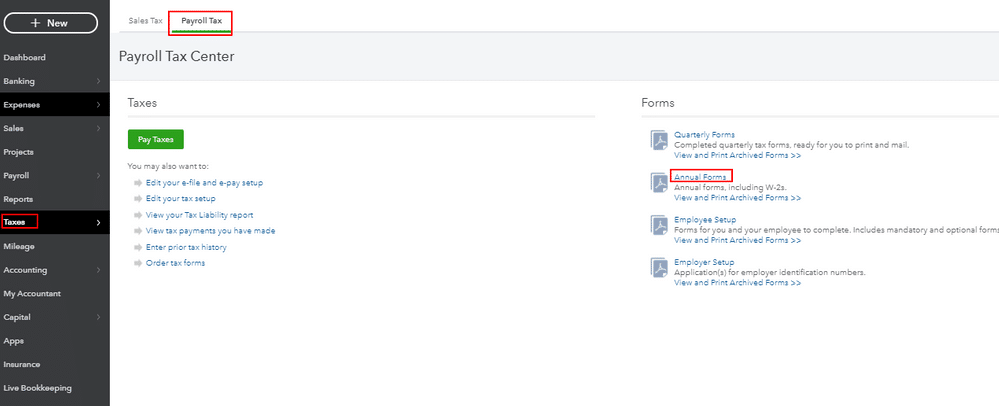
To start off with, simply head to the Payroll tax center and then choose Taxes from the left hand tab.
You will see two tabs, one is for the Sales tax whereas the other is for Payroll tax. You need to go for the Payroll tax.
Now, head to the Tax you wish to pay from the tax type column.
You might see different options depending upon the geographic location that is registered for payment. In case you aren’t, then you can submit and pay using a government website.
In certain scenarios, you might come across some errors while reconciling payroll liabilities in QuickBooks, which can be due to employee received more than the original payment amount. Or if the error shows file cannot be installed, or few other scenarios. In that case, you will have to connect with some professional for better assistance.
In order to Zero Out payroll liabilities in QuickBooks, the above steps and solutions might work wonders. If still you have some doubts and confusions, then you can connect with XpertBooks Pro team and they will surely clear all your clouds of confusion. Our experts team is dedicatedly providing professional assistance to all users round the clock.
FAQs
Why do I have payroll liabilities in QuickBooks?
Payroll liabilities in QuickBooks remain due to unpaid wages or any amount which has been withheld from payroll.
How do I Create employer liability categories in QuickBooks?
The procedure to create employer liability categories in QB is: 1. Go to Payroll > Payroll Settings tab. 2. Now, go with the Pay Run Settings, then Pay Categories, followed by Add. 3. Provide a name to the category, and then click on Save. 4. Associate an external ID for this is optional category.
What is the difference between payroll liabilities and payroll expenses in QuickBooks?
Payroll expenses include costs for running a business, while Payroll liabilities include costs that the employer pays for hiring new workers.
Printing W-3 forms in QuickBooks Desktop and Online isn’t that difficult, especially when you have the right steps in handy. You might require to print W-3 form in QuickBooks desktop and online if you send paper copies to your accountant. The print process of W-3 forms involves some basic set of steps, which we will be discussing later in this piece of writing. To find out the steps to print W-3 forms in QuickBooks desktop and Online, make sure to keep scrolling this piece of writing.
Steps to print W-3 form in QuickBooks Desktop and Online
The steps for QuickBooks desktop and online differ. Thus, you need to choose the steps accordingly.
Steps to print W-3 form in QuickBooks Online Payroll
There are two different scenarios that you can expect. Let us evaluate each of the situations and the steps to be followed accordingly.
Condition 1: When Intuit Payer and file W-3 form for you
Here, the form will be emailed to your employees starting January 16-31. You will have to reprint them. The steps shown below are for the current year:
Start by heading to the Taxes option in QuickBooks online account.
Now, you need to click on Payroll tax.
The next step is to choose Filings.
Once done with that, you need to go for Print both Employer and Employee copies of W-3 form.
After which, you need to select Transmittal wage and tax statements.
Later on, you will have to click on View tab.
If you see a question asking if you or your employees contributed to a retirement plan outside of QuickBooks, then go for Yes or No.
Lastly, you need to click on print tab on the adobe reader toolbar and also select Print tab.
Condition 2: If you pay and file manually or electronically
In this condition, you need to first head to Taxes menu.
After that, click on Payroll tax.
The next step is to choose Filings.
Go for print both Employer and employee copies of W-3.
Now, you need to select Archive or View on transmittal of wage and tax statement.
You will see a question about your employees or your contribution to a retirement plan outside of QBO, then you need to select Yes or No tab.
Towards the end, you need to select Print icon on the adobe reader toolbar and go for Print again tab.
Condition 3: If Print W-3 forms in the automated method of Tax filing
The first step is to go to Taxes and choose Payroll Tax option.
After that, select Filings.
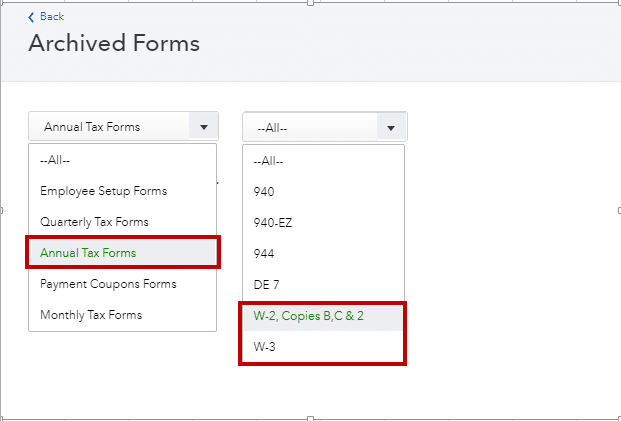
Subsequently, hit on Annual Forms option.
At this point, you need to choose whether to print W-3 forms copies for both the employee and the employer.
Now select Filing period.
Once done, click on the opt to View the Form in Adobe Reader.
You are then required to click on Print.
After that, you need to hit on Print one more time.
This process will print W3 Form.
Ensure to type REISSUED STATEMENT the next time to try to reprint the W3 Form.
Condition 4: Printing W-3 forms if automated Taxes and Forms feature is turned off
Go to Taxes and choose the Payroll Tax option.
After that hit a click on Filings.
Then click on Archived Forms.
Now, use Select the Period against the correct year.
Here select a opt between Employee Copies and Employer Copies.
Then, hit on View to open form in Adobe Reader.
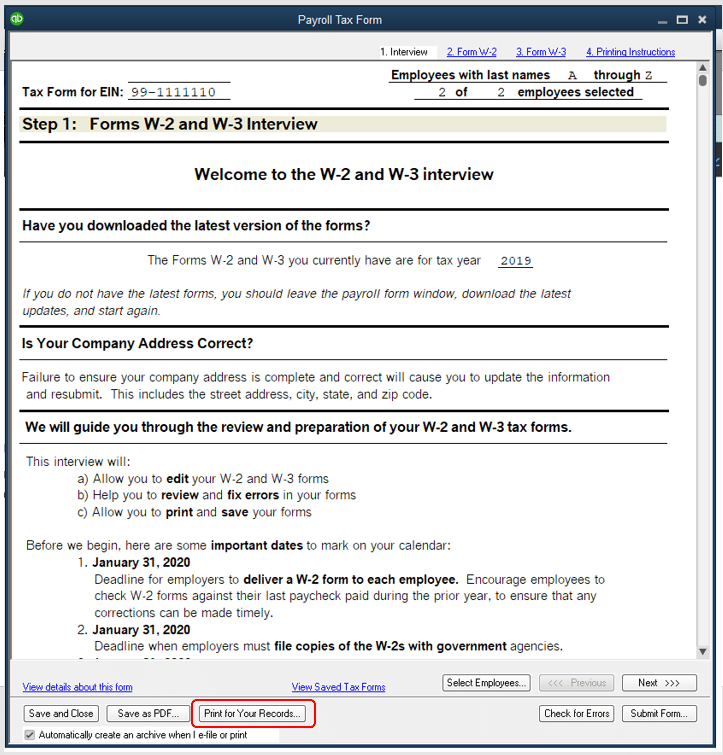
Lastly, click on Print, and then again click on Print to start the printing process.
Printing W-3 forms in QuickBooks desktop and QuickBooks online isn’t that difficult, all you need is the right knowledge. Hopefully, reading the steps above might have helped you in printing the W-3 forms successfully. On the contrary, if you require any technical assistance in dealing with the W-3 forms in QuickBooks desktop and Online, then all you need is to consult with XpertBooks Pro team, and your queries will be immediately taken care. Get answers to all your queries right away with our accounting experts team.
FAQs
What is W3 form?
Form W3 is a tax form for reporting employee income to the Internal Revenue Service (IRS) and Social Security Administration.
What is the cause of W3 form not printing in QuickBooks?
Printing problems may pop up when installing W3 forms due to incorrect driver installation, printer not set up properly or some corruption in the driver files of the printer.
How to fix data overlapping issues when printing W3 forms in QuickBooks?
This issue can be rectified by making changes to the printer layout settings, and by checking the margins and scaling in Printer Setup.
Can System Restore help in the resolution of the W3 form printing issues?
Yes! In certain cases, the printing issues can be resolved by rolling back the changes being made to the files by going for a System Restore.
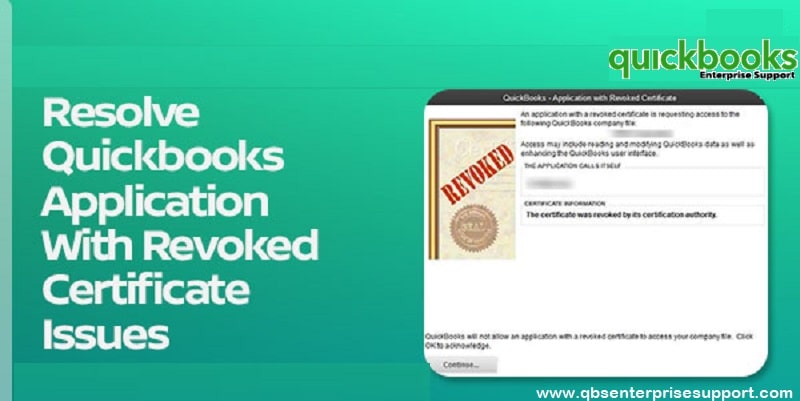
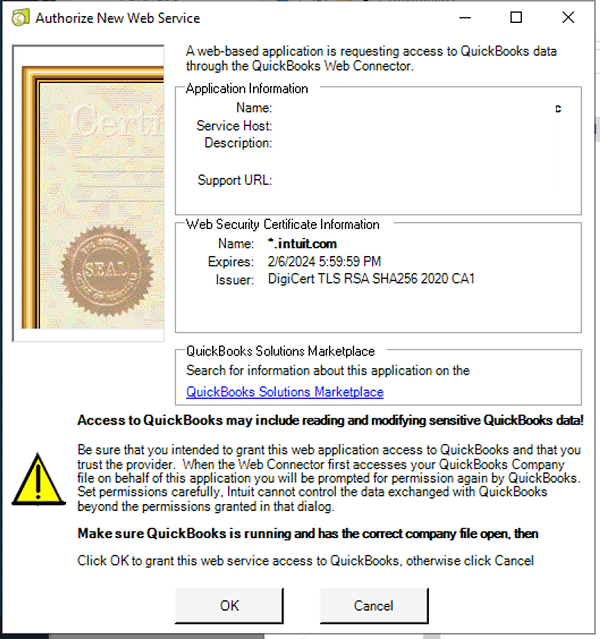
Are you stuck on QuickBooks error - Application with revoked certificate problem and don't understand what to do? Don't worry, your search ends here. Getting through errors in QuickBooks isn’t that challenging, especially when you know the error in detail. An outdated or expired digital signature certificate could lead to the various errors in QuickBooks program. When you try to sync QuickBooks with Intuit apps or with third party app, a digital certificate is basically used to show the apps are secure. In case you get a certificate error, then you might fail to sync the data or open the file. This basically happens when there is a Symantec root certificate was revoked that made some certificates show up as invalid.
Most of the time, this error encounters due to expired certificate or there might some compatibility issues with the operating system. Microsoft might agree to re-enable these certificates temporarily, so you can sync the data or open the file. However, this might take some time to automatically take effect on the system. You might get similar error messages on your desktop screen when this error takes place:
The application is signed with a revoked certificate.
Or QuickBooks certificate validation failed.
Today, through this article, we are going to discuss about QuickBooks Application with Revoked Certificate Error, why it occurs and what are the updated methods to fix it. Thus, make sure to scroll through the article carefully and you will be able to get back your QuickBooks in active mode.
What is QuickBooks Application with Revoked Certificate Error?
QuickBooks application with revoked certificate error usually occurs when opening the software or trying to sync QuickBooks desktop with third-party applications, including Intuit applications like Field Service Management or Statement Writer. This error generally appears when Windows no longer trusts the digital certificate to QuickBooks files or services. It directly indicates issues with the digital signature certificate. In simple terms, a revoked certificate means that the digital signature is linked to QuickBooks or one of its components that has either expired, become invalid or has been blocked by Windows security verification.
According to experts, revoked certificate problem is usually encountered while syncing QuickBooks with 3rd party applications or QuickBooks Web Connector digital certificate is expired. In order to remove this revoked certificate warning, we have come up with this post. Keep read on!
What causes QuickBooks Application with Revoked Certificate Problem?
You can see the QuickBooks application with revoked certificate due to the following reasons:
If the signature certificate of the application is having an old digital signature certificate set up.
When the Symantec root certificate is cancelled or revoked.
If there is an old digital signature certificate for QuickBooks present.
Methods to Fix QuickBooks Application with Revoked Certificate Error
Checkout these DIY methods in order to resolve error “QuickBooks - Application with Revoked Certificate warning”.
Method 1: Set up digital signature certificates for 3rd party application and QuickBooks
Set up digital signature certificates for third-party application and QuickBooks. You need to create digital signature certificate for QuickBooks using the steps below:
Setting up digital signature certificate for QuickBooks
Head to QuickBooks icon.
And then click on Open file location.
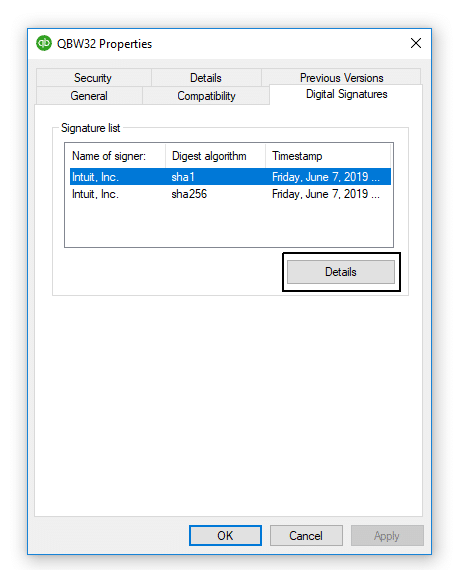
Hit a right-click on other applicationname.exe extension or the QBW32 option.
After that choose the option and then go for Properties.
In the properties tab, right-click on the Digital signature tab.
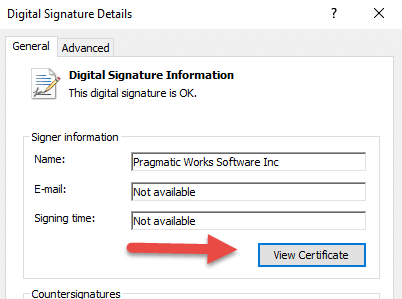
In the signature list, highlight the Signer and choose Details tab.
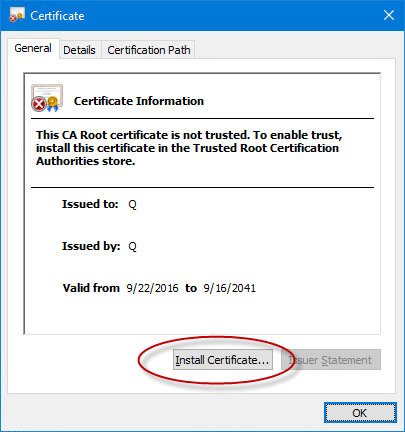
Also press the View certificate option. And then head to General tab.
Click on the Install certificate option.
Lastly, hit a click on Finish tab and then go for OK tab.
Create digital signature certificate of the application
After QuickBooks is installed, you need to install the current digital signature certificate for third-party program.
Head to the Installation directory of the application.
Right-click on the available .exe icon.
Now choose Properties and then click on the Digital signature tab.
Press the Name of the signer option and also click on Details tab.
Next step is to click on the opt stating View certificate, from General tab.
And then review the Valid from dates.
In case the digital signature date expires, get the current certification for any particular third-party application.
The last step here is to hit OK tab and close the screen.
Method 2: Check QuickBooks Web Connector version
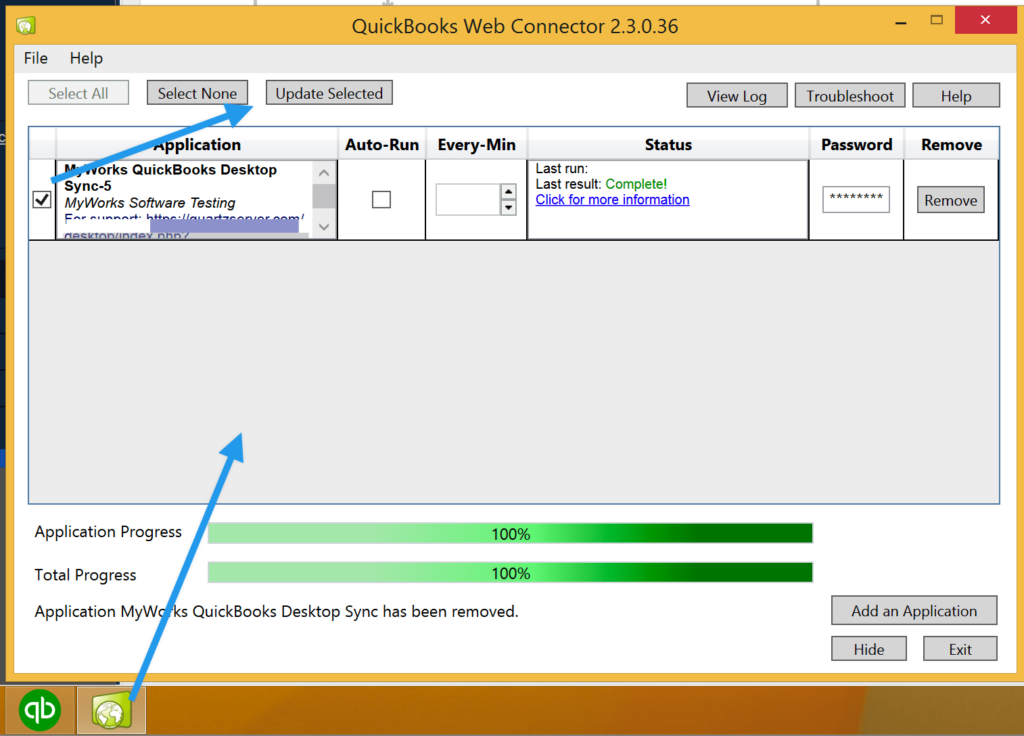
Press the Windows start button and search Web Connector in the search bar.
After that click on Help and navigate to About QuickBooks Web Connector option.
This will show the version of web connector.
If the program is not updated to the latest version, you should set up the latest updates for the program.
Method 3: Fixing the error while syncing with and without Web Connector
Case 1: Sync QuickBooks without Web Connector
Well, in case you find the issue when trying to sync QuickBooks with a third party app without using web connector, then simply try to update the third-party app and further sync with QuickBooks.
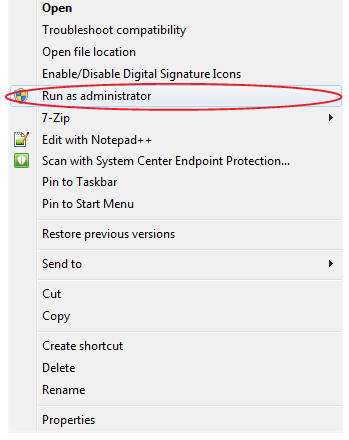
Then proceed to the downloads folder or the zip file saved location and further extract the certSync.bat file.
Hit a right-click on certSync.bat and choose Run as administrator.
Next step is to wait for a few minutes to let it run.
And avoid closing the command prompt window till the certutil: - verifyCTL command completed successfully shows up.
Once all this is complete, close the window and further start using the third-party app with QuickBooks.
Also: Note that if you continue to face the issue, then you need to contact your third-party app developer.
Case 2: Sync QuickBooks with Web Connector
Just in case you see the error when trying to sync QuickBooks with a third-party app with web connector, then all you need is to update QuickBooks to the latest release.
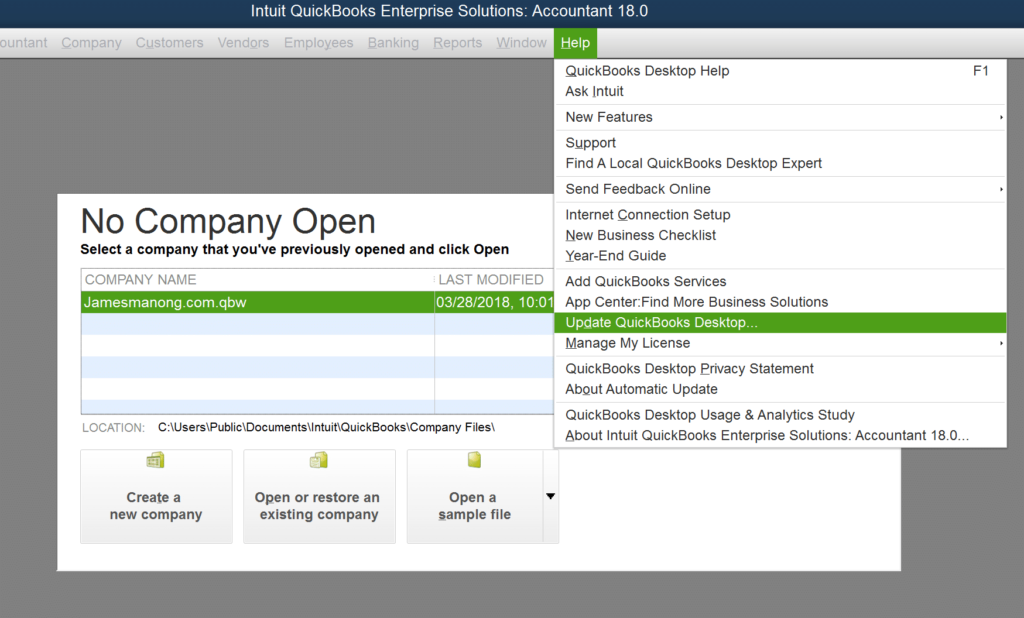
Open QuickBooks and head to Help menu.
Then choose Update QuickBooks desktop.
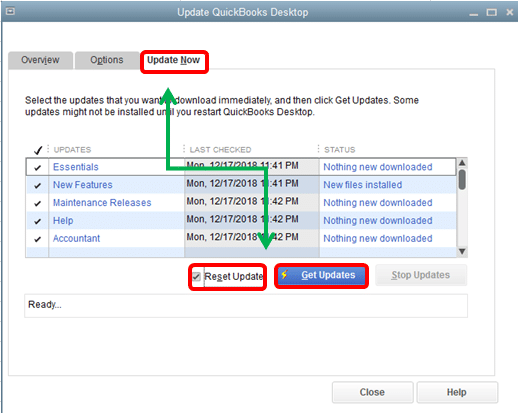
And also, choose Update now tab and also opt for Get updates.
Close and reopen QuickBooks to install the update again.
Now try to sync QuickBooks with the 3-rd party application again.
In the next step choose your version to download the QBWebConnector.exe.
If in case there are more than one installed version then download for the latest version.
How to Fix Revoked Certificate Error with Intuit Field Service Management (IFSM)?
To fix this error with Intuit Field Service Management, go with the following steps:
Close your QuickBooks first.
Then download the QbEventsShim.exe file.
Make sure to get it replaced in C:\Program Files (x86)\Intuit Field Svc. Integration or C:\Program Files (x86)\Corrigo Integration folder
Once done, run QuickBooks again and try using the IFSM again.
Final Words!
QuickBooks Application with Revoked Certificate error can be a bit too complicated for someone who isn’t a dedicated user. If that is the case with you, then you can simply seek for professional assistance by our XpertBooks Pro team who will ensure that your issue gets resolved in no time.
Trying to send emails in QuickBooks, but the software crashed suddenly? Well, QuickBooks crashing error while sending emails can be one of most annoying issue a user might come across. This error especially appears when emailing an invoice, report or other important accounting document directly from QuickBooks. In such situation, the QuickBooks may get freezes, stop responding or crashes completely whenever the user tries to send an Email using the Outlook or other webmail services. There might be some other unwanted reasons, your software might crash when sending emails. And to help you tackle through this error, here we are with this segment sharing the quick fixes of this crashing error.
Why QuickBooks Desktop Crashing when Sending Emails?
According to the experts, QuickBooks crashing error when sending emails is a random issue and any user can get due to various reasons. This error generally encounters when there is a conflict between QuickBooks and your email configuration. Another reason can be if there is any permission problem or damaged file. Mostly, this error usually appears at the time you are trying to send invoices, reports or any transactions.
Situations when QuickBooks may crash while sending Emails
You may experience the QuickBooks crashing issue while you attempt to send your invoices and transactions over email. However, this error may also come up in the following instances:
When attaching a company file to your email
You attempt to use the Send Forms function in QuickBooks.
What factors lead to QuickBooks desktop crashing when sending email?
Here are a few factors that can trigger QuickBooks desktop crashing when sending email. Let’s understand the exact reasons behind it.
In case QuickBooks is showing a connection issue with the email server, you might come across crashing issue.
If there are any conflicts with Windows or Email Settings.
Any damaged Microsoft Windows components.
If there are third-party applications causing the connection breakage to the email server.
Also, if the firewall or antivirus running the background is disturbing the connection.
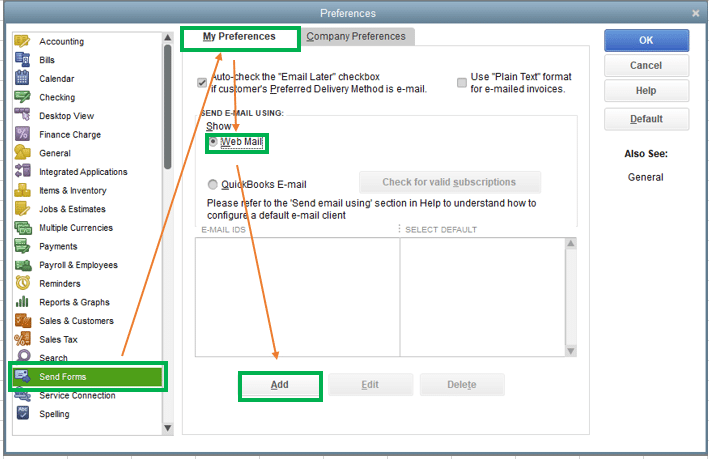
You need to use secure webmail within QuickBooks using the steps below to ensure that the error gets resolved.
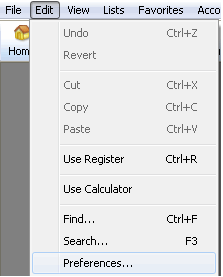
Open QuickBooks and move to Edit menu.
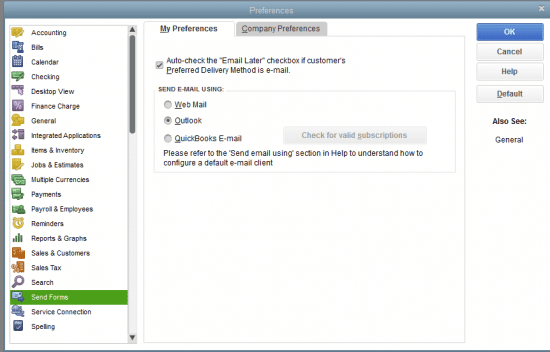
Go to the Preferences tab and then proceed to Send forms.
Next step is to choose Webmail.
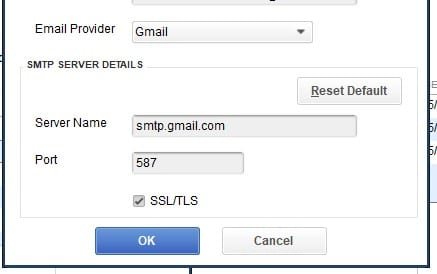
Once done, hit a click on Add tab and further choose Email service provider from the list.
Next step is to enter the Email address carefully.
Ascertain to select Use Enhanced security and maintain Secure email configuration.
Now hit on OK tab.
The last step is to reopen QuickBooks and further log in with the correct email credentials.
Fix 4: Configure Firewall settings
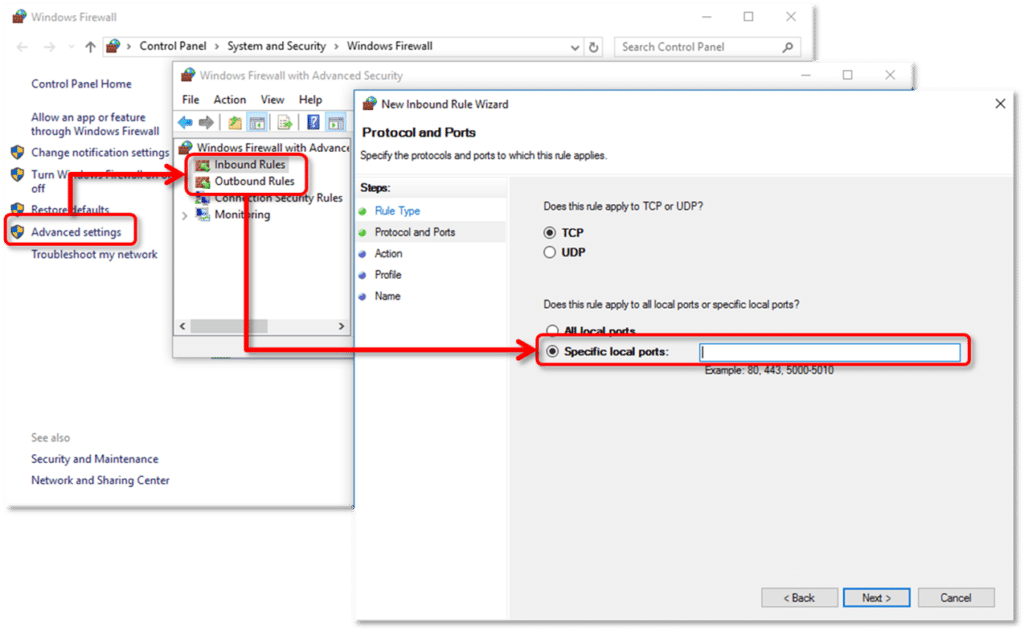
You need to configure the Firewall to make sure that it is not causing the crashing of QuickBooks desktop. The procedure for the same is given as follows:
First of all, Add QuickBooks in the Firewall Exceptions.
Then set up QuickBooks and Add QuickBooks port exceptions in the Firewall.
If the above steps didn't fixed the issue, try to Temporarily disable the Firewall.
Close all open programs that are running on the background.
Head to the Windows Start menu and further enter File explorer to open it.
Now go to C:\Windows\System32 folder.
Next step is to find and rename the current MAPI32.dll file to .old.
Also rename the file and reboot the system.
Your Windows will automatically detect the missing file and further try repairing it and creating a new MAPI32.dll file.
Once the system restarts, open QuickBooks and also try to send an email to test.
In case the issue continues, you will have to reinstall the MAPI32.dll from the original source or restore it from the installation disk.
Fix 6: Work on QuickBooks Repair
If none of the above steps helped in fixing the QuickBooks crashing error when sending emails, you can try fixing the error using the steps to repair QuickBooks.
Start by login to Windows as System admin.
Then backup the QuickBooks data files.
Once done, enter Control panel and find Program and features there.
Move to QuickBooks in the list of programs.
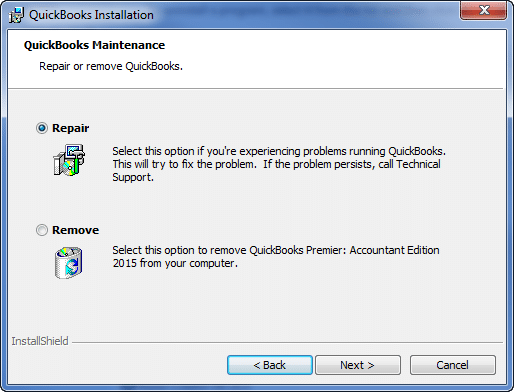
Hit a click on Uninstall/change and then go for Continue tab.
The next step is to choose Repair tab and also click on Next to begin the repair process.
The last step here is to reboot the system.
Final Words
We hope that, by using the methods shared above helped you in fixing QuickBooks crashing error when sending emails. But if not, then in that scenario, you need assistance from someone who understand the core of the QuickBooks software. And thus, you can simply reach out to XpertBooks Pro team and get assistance from our accounting professionals immediately. Our experts will ensure that your issue gets resolved easily and immediately.
Your internet connection isn’t working properly in QuickBooks payments? Well, we are here with all the information you need to change your internet connection settings so QuickBooks payments work properly for QuickBooks desktop for Windows. Often when you see blank pages, missing data, or errors when you sign, create invoices, or process payments, it indicates that there is some issue with the internet connection in QuickBooks payments.
You need to fix the internet connection problems in QuickBooks payments so that QuickBooks payments can connect to our services online. To learn the troubleshooting steps, stick to this segment till the end.
Quick Note: In case you find the same error in other areas of QuickBooks and not just the payments, then you need to check for other connection issues.
Effective Solutions to fix Internet Connection Problems in QuickBooks Payments
Fixing the internet connection problems while processing the payments in QuickBooks isn’t that tricky, all you need is to perform some quick solutions enumerated below. So, keep stick to the solution steps in the same order as discussed.
Method 1: Clear cookies and cache
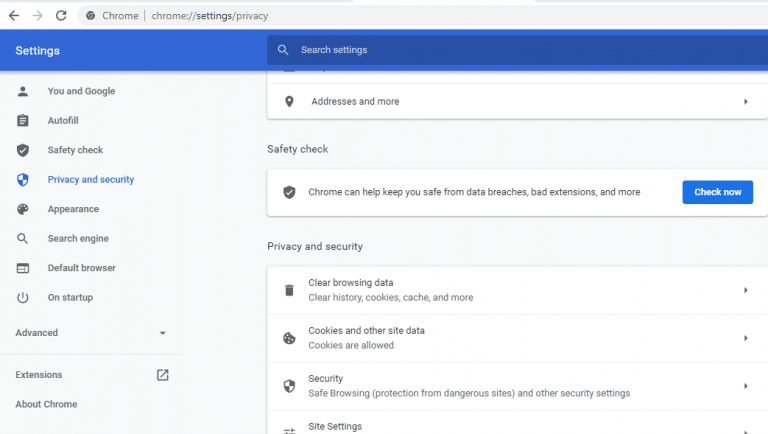
You need to clear cache and cookies in the internet explorer to ensure that there isn’t any issue due to accumulated cache.
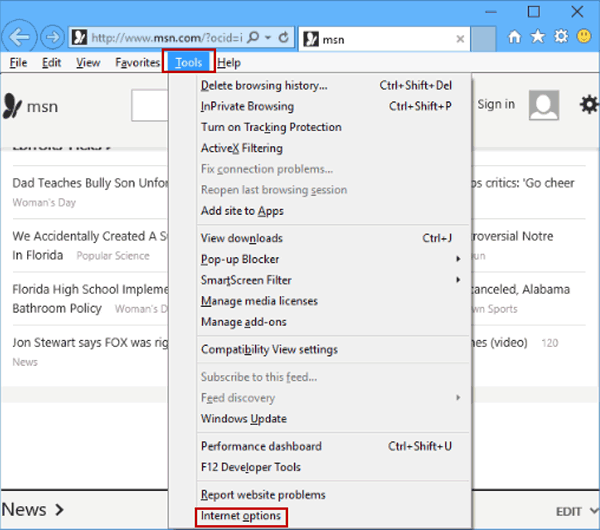
Open the Internet explorer.
Then go to the Tools icon.
Next step is to press the Alt tab on the system to bring up the menu bar.
And also, choose Tools menu.
The next step is to go for the Internet options from the menu.
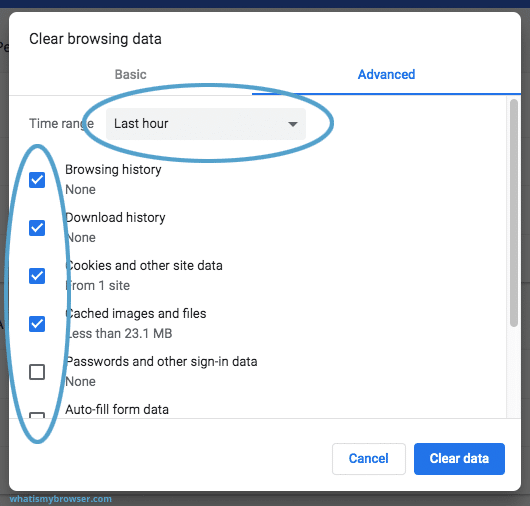
Heading to the General tab and from the browsing history, select the Delete option.
You also have to choose the following to delete:
Choose temporary internet files and website files.
Delete cookies and website data.
Clear history
Go for passwords
Now choose Delete or Clear data tab.
And then close the internet options window.
You also have to close internet explorer.
Try accessing QuickBooks payments again.
In case you do not see Internet Explorer in Windows 10:
You will have to perform the steps through Microsoft Edge.
To start off with, open Microsoft Edge.
Also choose the tab with Three dots.
Choose open with Internet explorer.
And perform the steps to Clear cookies and cache.
Lastly, restart QuickBooks and try to process your payments once again.
Method 2: Changing compatibility view settings in Internet Explorer
Another option is to change the compatibility view settings in Internet Explorer, as the settings will help web pages to display properly. You can change the settings for internet explorer using the steps below:
To begin with, you need to open Internet explorer.
Then go to the Tools icon.
Press Alt key on the system to bring up the menu bar.
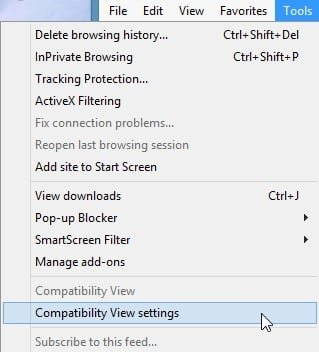
Once done with that, go for the Tools menu.
Also opt for the Compatibility view settings from the menu.
Hit a click on Add this website.
The next step is to enter *.intuit.com and choose Add tab
Repeat the same steps for both intuit.net and quickbooks.com and click on Add.
Now go for Close tab to save the changes.
And find out if the error continues to trouble you.
Well, you can change these settings directly in internet explorer, but it is often recommended to do it in QuickBooks desktop. This ensures that the new settings work properly in QuickBooks. The steps you have to follow to configure internet connection settings are as follows:
To start off with, all you need is to open QuickBooks desktop.
Furthermore, you will have to head to the Help menu.
And then, you need to choose the Internet connection setup.
Followed by, opting for Use my computer’s internet connection settings and further choose Next tab.
You now have to go for Advanced connection settings and this will open the Internet options window where you can change the settings mentioned below:
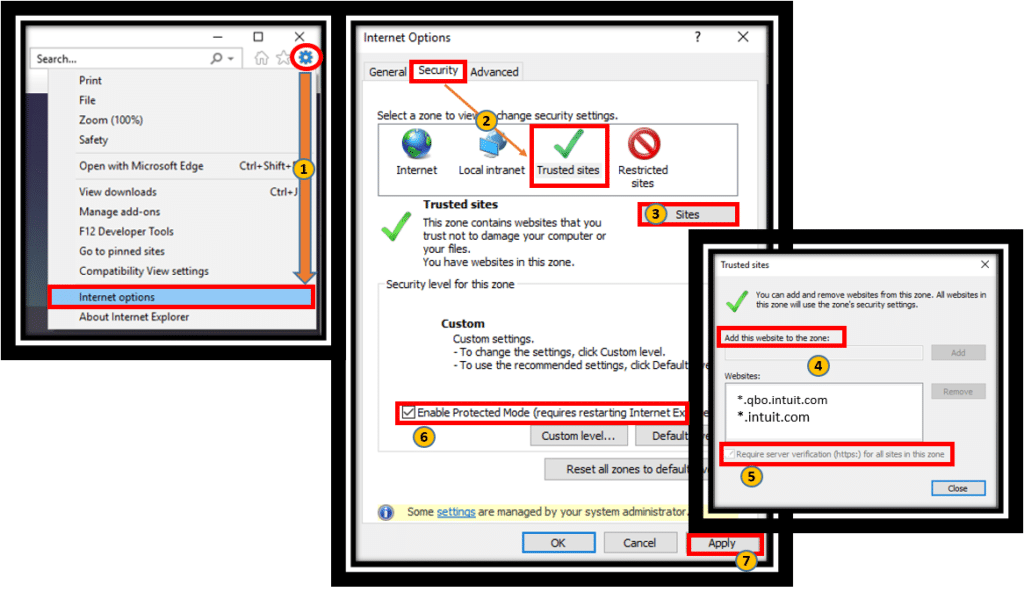
You need to add Intuit as a Trusted site.
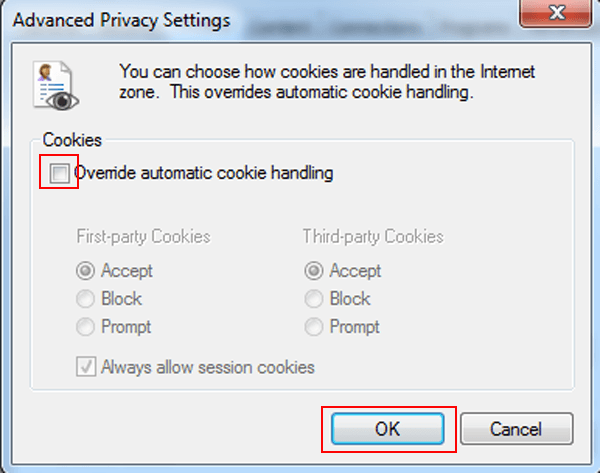
Furthermore, change Cookie settings.
And then, change ActiveX control settings.
Also, update Trusted sites settings.
You also have to change the Advanced security settings.
And further go for changing pop-up blocking settings.
Lastly, choose restart.
Method 6: Change the settings related to Trusted Sites
At first, go to Security tab and then move to Trusted Sites section.
After that go to Security level and select Custom level option.
Open your browser and go to Internet ConnectionSetup from the Help menu.
After then click on Advanced Connection Setup.
Make sure to uncheck the opt to Do not save encrypted pages to disk box option.
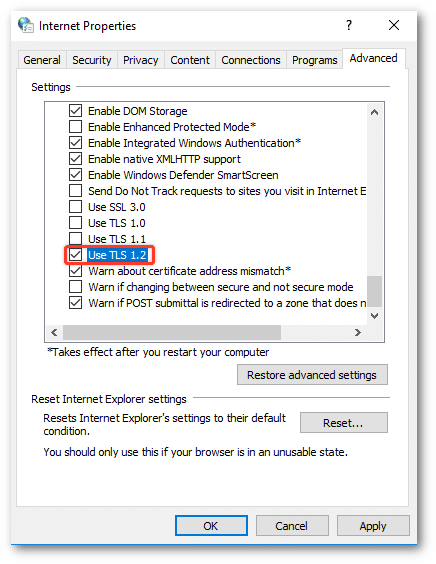
Now select Use TLS 1.2 box.
Then hit on Apply and then Ok to save the changes.
Method 8: Disable the pop-up blocker
Start the process by visiting to the Privacy tab and select Advanced Connection Setup.
After that, click on Privacy.
Now un-check the box net to Turn OFF the pop-up blocker.
Lastly, click on Ok to save changes.
Method 9: Change firewall and security software settings
You are required to changing the settings for firewall or security. And similar to other web-based credit card processing software, QuickBooks payments will need a secure, uninterrupted connection to send and receive data.
Fixing to the internet connection problems in QuickBooks payments can be a bit challenging, especially if you aren’t that versed with QuickBooks technicalities. Therefore, it becomes crucial for you to get through the issue by simply connecting with XpertBooks Pro professionals. Your issue will be resolved by our experts within a few minutes. Our goal is to help users resolve problems efficiently while minimizing disruptions to their daily workflow.
FAQs
What are some common internet connection problems that can affect QuickBooks Payments?
QuickBooks payments can be severely impacted due to the following reasons: 1. Slow internet connectivity 2. Network-related disruptions. 3. Firewall or antivirus may be preventing QuickBooks Payments
Are there any specific ports or protocols that need to be allowed for QuickBooks Payments?
Yes! QuickBooks Payments requires port 443 (HTTPS) corresponding to outbound connections.
Can temporary network disruptions or maintenance affect internet connectivity in QuickBooks Payments?
Yes! Temporary network disruptions can instigate internet connectivity issues in QuickBooks Payments.
How can I check if my internet connection is causing the issue?
1. Open a web browser and try visiting several websites. 2. If you can't access other sites, the problem is likely with your internet connection. 3. Restart your router or modem and reconnect to the internet.
Are there specific ports or settings QuickBooks Payments needs to access the internet?
1. Yes, QuickBooks requires access to certain ports and websites. Make sure the following ports are open: 80 (HTTP) 443 (HTTPS) 2. Add QuickBooks and its components as exceptions in your firewall and antivirus settings.
Can browser settings affect QuickBooks Payments?
Yes, if you are using QuickBooks Online, browser settings, cache, or extensions can interfere. 1. Clear your browser’s cache and cookies. 2. Try accessing QuickBooks Payments in a private/incognito window or a different browser.