Oops! Did you just make a mistake on your federal tax return? That definitely has to be fixed immediately. Or just want to correct important tax entries? This is surely possible by filing an amended tax form for both Federal 941 and 940. This is possible because QuickBooks enhanced desktop payroll lets you file an amended tax return. In case you have QuickBooks payroll assisted, then Intuit helps you file taxes and pay.
Filing a corrected federal form 941 and 940 in QuickBooks desktop payroll involves a bunch of steps, which we will be elaborating in this segment. Make sure to abide by the steps enumerated in this segment for better results.
Steps to File a Corrected Federal Form 941 and 940 in QuickBooks Desktop Payroll
If you need to file a corrected Form 941 or 940 in QuickBooks payroll for your business, you can do so in QuickBooks Desktop Payroll. Here are the steps to file a corrected federal form 941 and 940 in QuickBooks payroll:
Step 1: Find out what form to use
You need to file an amendment form at the very moment when you find any sort of error on a previously filed federal form. This can be fixed by filing the following forms:
Form 941-X in the case of federal form 941
For federal form 940, there is no X form. You will have to use the same federal form 940 from the year it was originally filed.
Step 2: Understand the amendment forms
What can be corrected:
Form 941-X - You can use this to correct the following
Wages, tips, and other compensation
Income tax withheld from wages, tips, and other compensation
You can also correct taxable Social Security wages
Taxable social security tips
Taxable Medicare wages and tips
Taxable Social Security tips
You can check page 5 of the Form 941-X instructions.
Note: There is a due date to file the form, which entirely depends upon when you discovered the issue and if you underreported or overreported the tax.
Form 940 - When to use
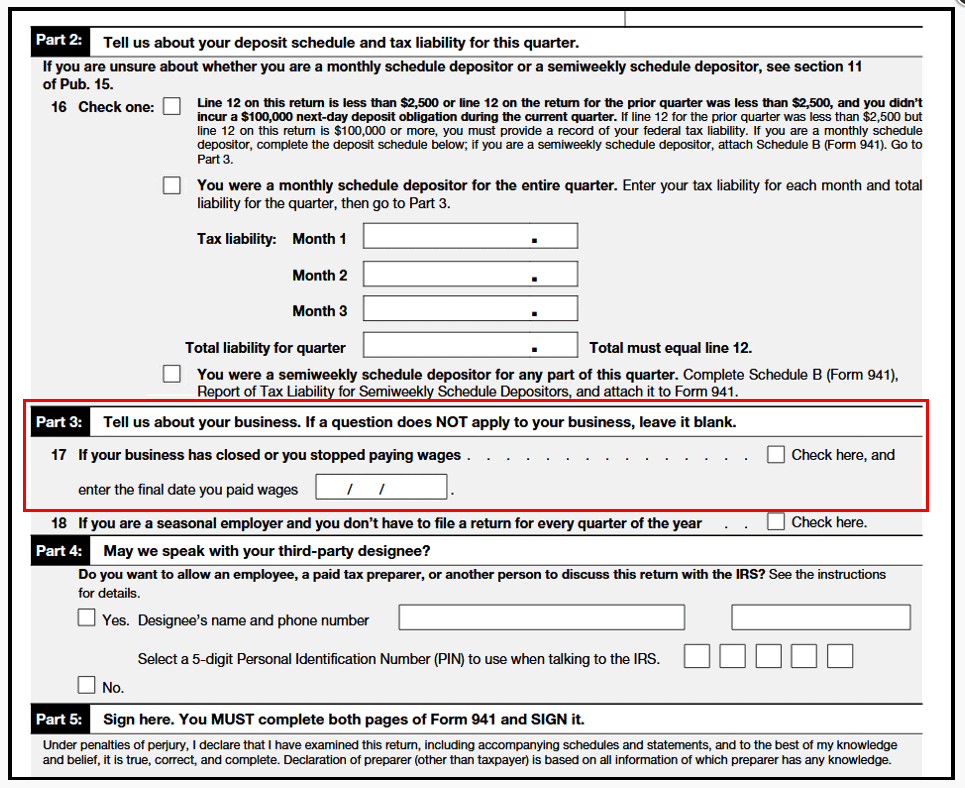
You can use the same federal Form 940 from the same year it was filed. And furthermore, check the amended return box present in form 940, page 1, box a. Fill in the amounts that were supposed to be on the original form.
When you file an amendment form, make sure you use a paper return even if you e-filed the original form. Also, ascertain that you enter the necessary liability adjustments before creating an amended return.
Note: You may be required to file your corrected form electronically or by mail depending on your filing method and the type of correction made.
Form 941- X – Prepare form using the steps below
The steps for the preparation and filing of Form 941-X in QuickBooks Desktop Payroll are as follows:
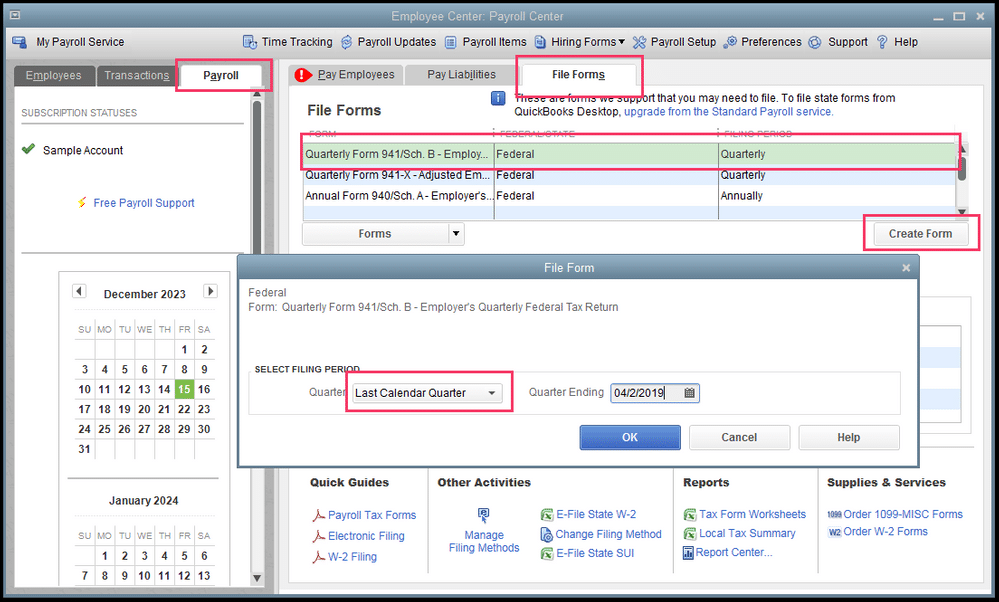
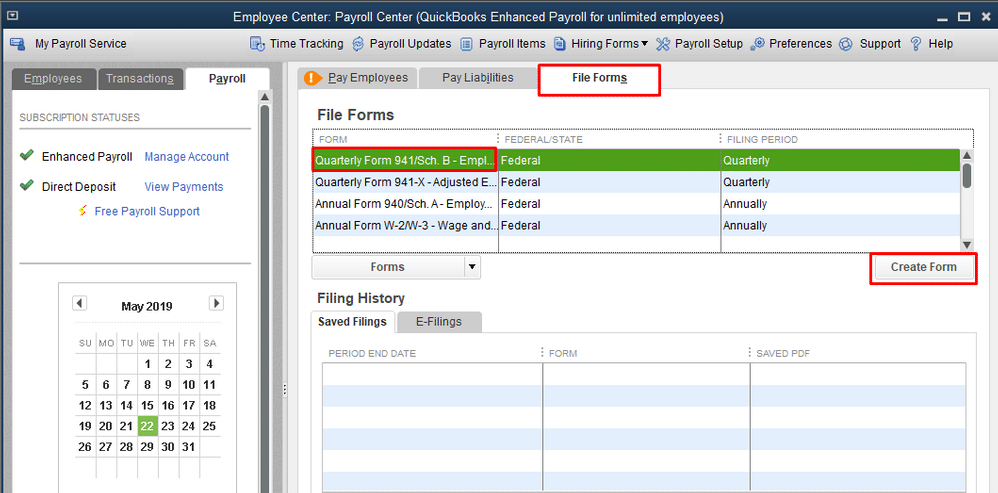
Here, navigate to the employees tab and further choose payroll tax forms and W-2s.
You now have to choose process payroll forms.
The next step is to choose a quarterly form 941-X adjusted employer’s quarterly federal tax return or claim for a refund from the file forms section.
Now, choose create form.
And then, go for the filing period you wish to correct and hit ok tab.
The next step is to choose the return you are fixing and also select the quarter.
The user will then have to enter the calendar year that is being corrected.
Once done with that, enter the date you found the errors.
Choose the process for fixing the employment tax.
Underreported amounts only.
Overreported amounts only, using the adjustment process or claim process.
Combining both under and over-reported amounts on one 941-X.
You are then required to choose the next tab and also enter the date you discovered the issue.
Under part 1: You need to choose only one process. Ensure that the process is the same as the interview part of the form.
Under part 2: Complete the certification. Ensure that at least one box or select all that apply and hit next.
Under part 3: You need to enter the corrections for the quarter. And if any line doesn’t apply, then leave it blank and hit next. You should check the IRS Instructions in the case of Form 941-X to get any doubts cleared about form filling.
Under part 4: describe each of the corrections in detail. Also, attach any notices if needed.
The last step is to print and mail the form account to the IRD instructions.
Steps to Amend Form 940
In order to fix the form 940 in QuickBooks, try performing the steps below:
Start by heading to the employees tab and then choose payroll tax forms and W-2s forms.
Now, choose process payroll forms.
And then, select annual form 940/Sch.A- Employer’s Annual Federal Unemployment Tax Return in the file forms section.
After that, choose create form.
You are then required to enter the year of the filing period you wish to correct and also click on ok tab.
Once done with that, you need to choose the amended return box and also choose the next tab.
After that, review the amounts on page 2 and verify these are the amounts that have to be on the actual form.
Also, attach the explanation and print as well as sign the form and check out the mailing guidelines.
You should also provide all the relevant details regarding the reason behind amending the Federal form. That’s it!
Towards the end of this segment, we hope that you will be able to file a corrected federal form 941 and 940 in QuickBooks desktop payroll,even though this can be a bit too technical for many users. However, if you are stuck at any point in time, or need any sort of technical guidance from our accounting experts, then feel free to contact XpertBooks Pro and your queries will definitely be answered immediately. Our goal is to help users resolve problems efficiently while minimizing disruptions to their daily workflow.
Converting an accountant’s copy to a regular company file doesn’t involve any rocket science. An accountant’s company is a sort of company file that lets your accountant to review the file and further make certain changes that are required. After your accountant has made the necessary changes, you can merge the changes without letting it overwrite the data. However, the point to be noted here is that the accountant’s copy is a .QBA or .QBX extension format file that has to be converted to a regular file to make it accessible.
And to help you in this conversion process about to convert an accountant’s copy to a regular QuickBooks company file, here we are with this piece of writing. Sharing the complete information that you need to make this conversion process, a smooth one.
What is an Accountant’s copy in QuickBooks?
Accountant’s copy allows for a seamless collaboration of the clients to the accountants and facilitates both clients and the accountants to work on the same company file simultaneously. It also discards the necessity for emailing bulk files, thereby reducing any confusion created due to several copies. However, the accountant’s copy has .QBX extension instead of a regular company file has .QBW extension.
Steps to convert an accountant’s copy to a regular QuickBooks company file
Converting an accountant’s copy involves some basic steps. Let us understand each of the steps and procedures in detail:
Step 1: To change your accountant’s copy to a company file
You simply have to double-click the Accountant’s copy and open the same.
Once done with that, save the data and prevent Data loss.
Furthermore, make a backup of the file before heading forward.
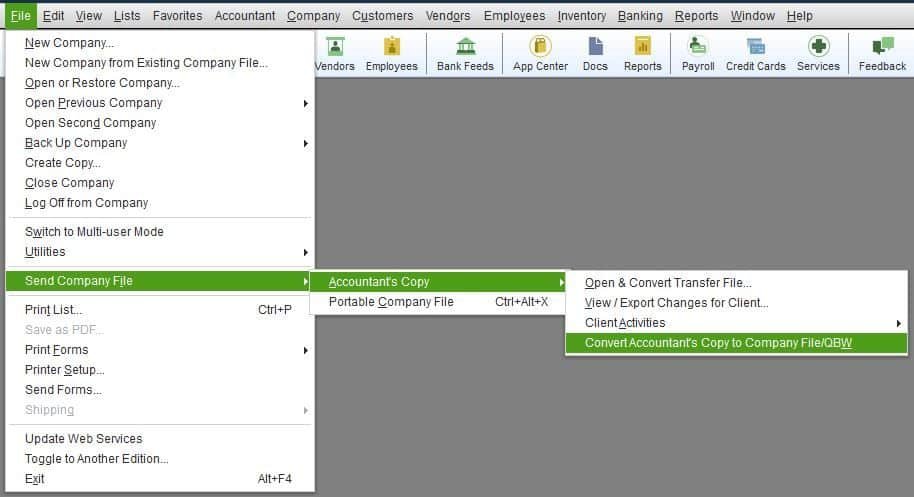
You now have to choose Send company file from the File menu.
The next step is to choose Accountant’s copy and further Convert accountant’s copy to company file/QBW from the dropdown menu.
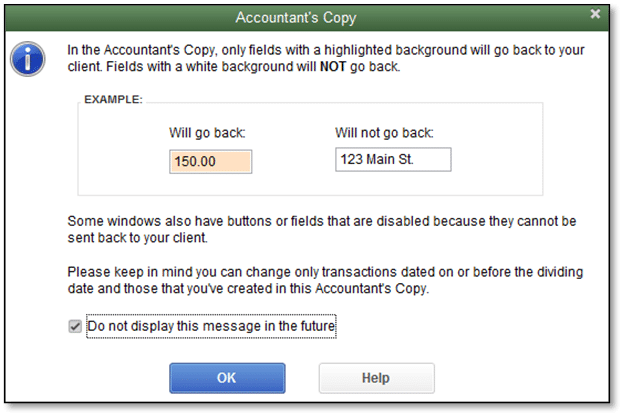
Heading forward, you need to confirm the procedure by clicking on the OK tab.
Followed by, selecting a location for the file to be saved.
After that, choose a folder and further rename the file depending upon your preferences.
The next step is to select the Save your file option.
And also click on OK tab.
A new file will be created and you can make necessary changes to it according to your convenience.
While converting the accountant’s copy to a regular company file, you should make sure to enter the changes that were made to the original company file while creating the accountant’s copy.
Step 2: Change the accountant’s copy to a normal file
Under this process, you need to choose the Accountant’s copy from the File menu.
Furthermore, choose Convert the accountant’s copy to a company file.
After that, a new window will open after you go for the Convertor option.
You now have to spot and Open accountant’s copy file you want to convert.
Followed by, clicking on ok after ensuring you have opted for the right file.
The next step is to select a Location where you want to save the newly converted file and further Rename the chosen file.
After that, under the save as type option, you need to choose QBW as the file extension.
Followed by, clicking on Save.
After the file gets converted, you will receive a notification regarding the same.
Now, click on the OK tab.
Moreover, you will have a QBW file that you can use normally.
Step 3: Changing the accountant’s copy as Accountant’s changes .qby
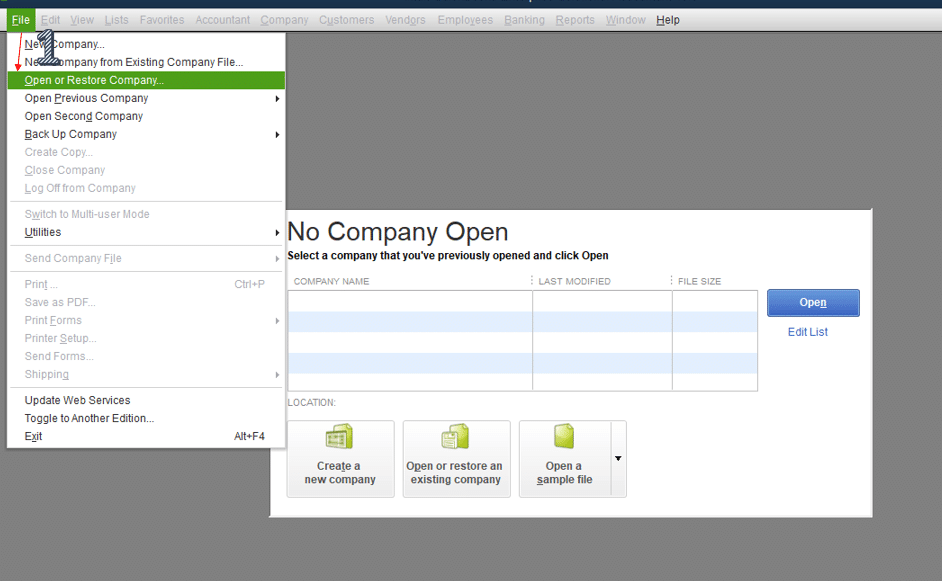
Here you need to head to File menu.
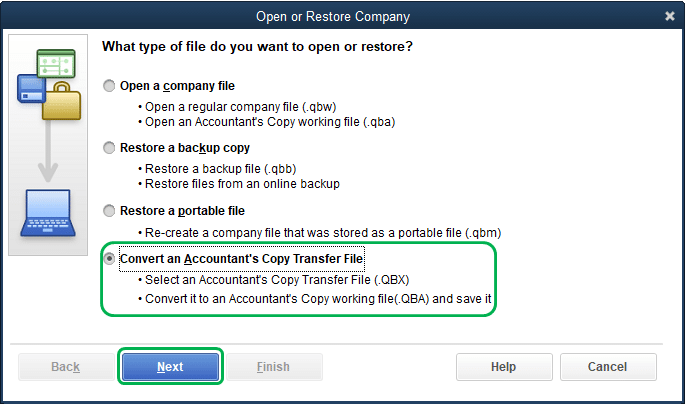
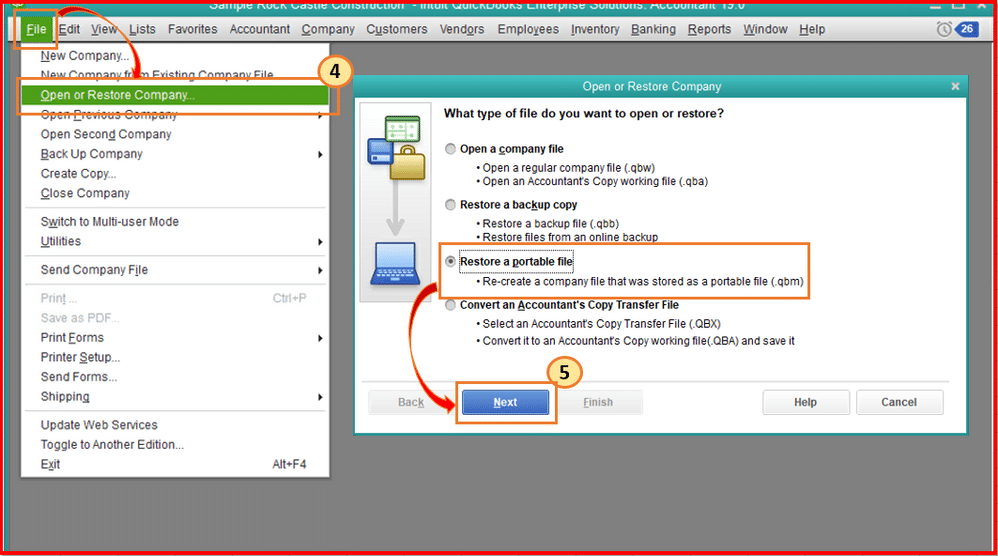
Followed by, selecting Open or restore company from the dropdown.
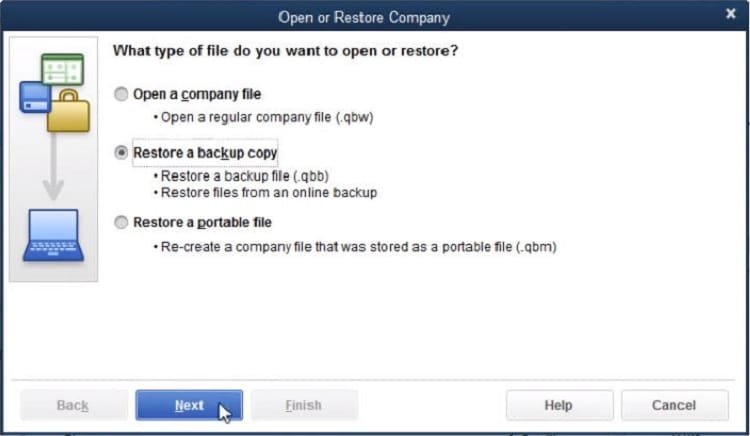
The next step is to choose Next tab after selecting Convert an accountant’s copy transfer file.
You now have to choose the Convert accountant’s copy transfer file option.
And then, click on Next.
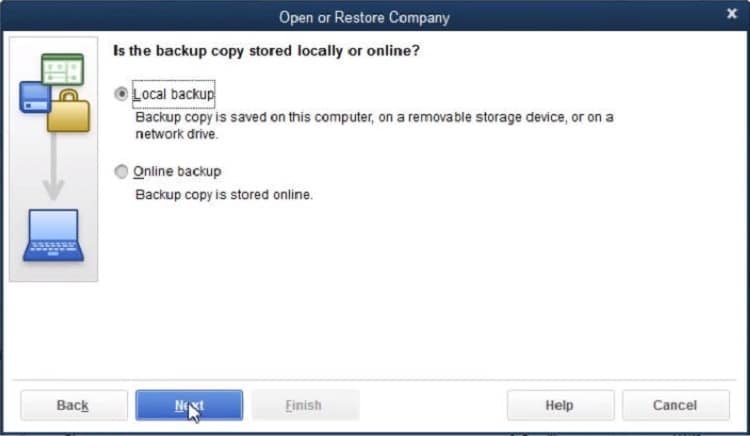
This will give you an overview of the file you opted to ensure you made the right decision.
Furthermore, click on Next tab.
And also, find the Accountant’s copy file.
After the accountant’s copy file is opened, click on Confirm and further assign a name to the file.
Now, it is time to Save the file.
And you can make use of the qby file after the conversion ends.
Conclusion!
Converting QuickBooks accountant’s copy to company file might seem to be quite a tedious task but in actual it isn’t. However, if you still find it a bit difficult and need any sort of technical guidance, then reaching out to our XpertBooks Pro professionals is what we recommend. We are a team of independent accounting consultants who ensure that all your queries are addressed immediately and resolved in the best possible way.
Are you trying to open the QuickBooks desktop company file and stumbled upon 'Missing Name List Problem'? Well, this isn’t a commonly faced problem. The QuickBooks missing name list problem is an internal database error that causes failure to open a file in QuickBooks. As a result of this issue, you might notice that the names, items, or accounts can be missing or you can see a blank space in various places in the company file such as, company reports, business transactions, centers predefined reports, etc. Dealing with the this error is definitely possible and to help you with that, here we are with this segment sharing the complete details on how to do that.
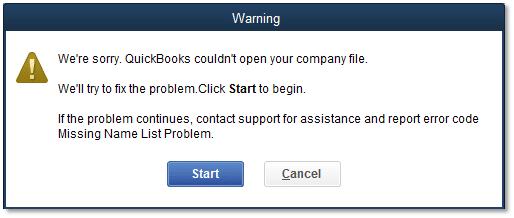
You may stumbled upon the following warning message, when this error encounters in the software:
We’re sorry. QuickBooks couldn’t open your company file. We’ll try to fix the problem. Click start to begin. If the problem continues, contact support for assistance and report the error code Missing Name List problem.
Major causes leading to QuickBooks Missing Name List Problem
Some of the important causes that may cause this error are as:
Important files related to the Windows registry, Microsoft components, or QuickBooks desktop might be damaged.
Now, send the damaged company file to the data recovery team.
After that, finally finish repairing the data of the tool and this will fix the issue.
You will further have to verify the information being restored. Check the address details of vendors, employees, customers, and so on. And then, try resolving the data damage on the company file.
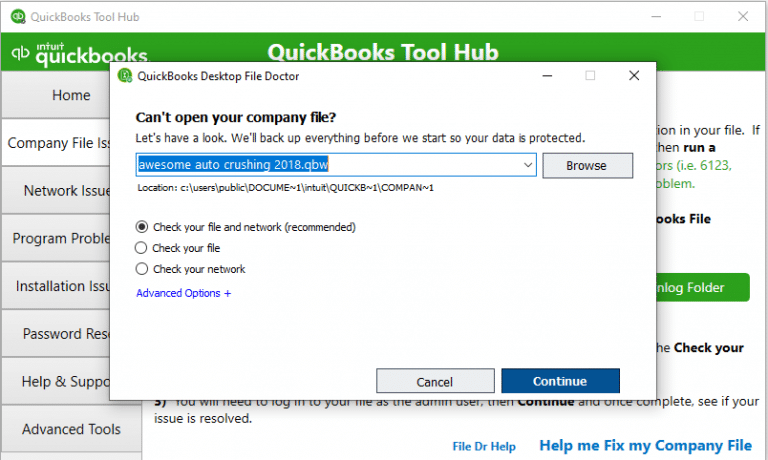
Solution 2: Use the QuickBooks File Doctor from tools hub program
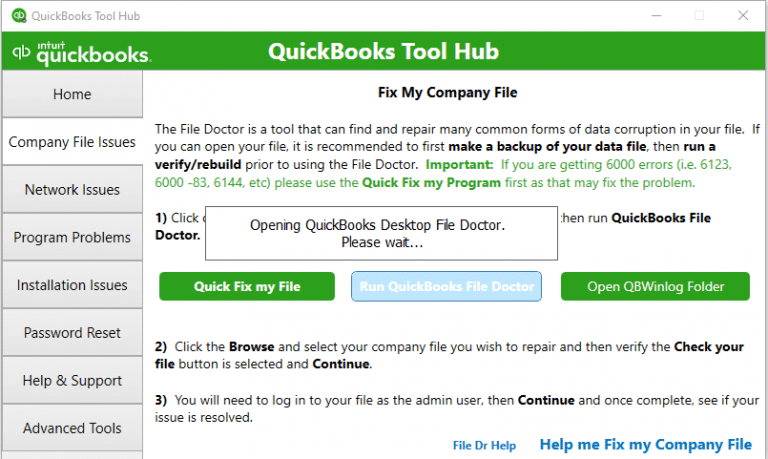
QuickBooks tool hub is a one stop solution to fix the issues that can be faced when working on QuickBooks. You can try fixing the missing name list problem by performing the below stated steps:
The very first step is to open QuickBooks and the company file.
After that, press F2 key.
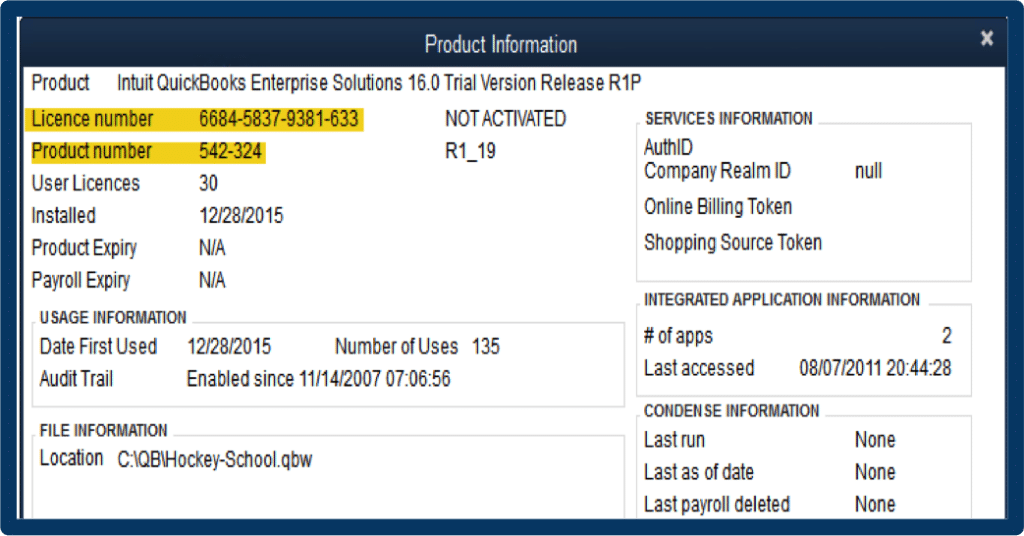
And also, open the Product information screen.
On the versions used on the file section, you will see Find the RB Tag (Rebuilt) that shows when the file was rebuilt.
Now, after the rebuild date and time has been determined, you have to restore the backup file that has been made just before to that rebuild.
If you are unsure about when the backup file is located, then you will have to refer to the display hidden files folder. You can also find the files using windows for assistance in searching for QBB files.
If you are unable to locate the RB in the file versions, then this indicates that the file hasn’t been rebuilt.
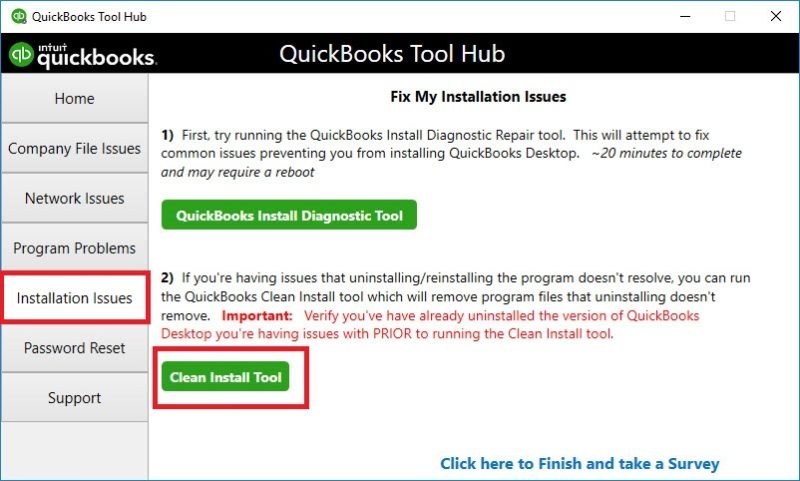
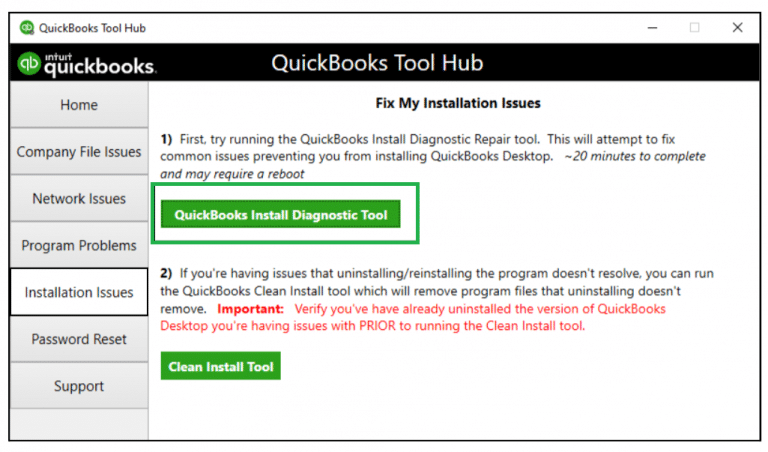
You need to head to QuickBooks Tool Hub program and select Company File issues.
If none of the above methods helped, you can try to restore the previous backup file. Try to re-enter transaction entries into the file to keep it updated. The backup can be a few days older and the volume of the transactions can be way too much.
Conclusion!
This drives towards the end of this segment, and we believe that one might be able to resolve the QuickBooks missing name list issue after performing the set of steps discussed below. Just in case you fail to do so, then contacting our XpertBooks Pro professionals at 1.800.761.1787 is recommended. We have a team of independent accounting professionals, who can help you in fixing a bunch of issues.
Did you just see an Error in reload.sql at line XXXXX Sybase Message when trying to open the portable company file? Well, need not to worry, this error is a bit unique yet easy to fix. You can come across the error in reload.sql in QuickBooks for Windows when you open an accountant’s copy transfer file (QBX) in QuickBooks for Windows. The error in reload.sql has different Sybase error messages and in this article we have discussed all about them accordingly, along with it's solutions. Thus, make sure to pay a keen attention till the end of this blog.
What are the different forms of Error in reload.sql in QuickBooks for Windows?
The error appears at line XXXXX Sybase Message and can appear in assorted forms of error messages. These include:
Message
Error in reload.sql at line 29886. Sybase message: can’t convert hex string to varbinary
Message
Error in reload.sql at line 25514. Sybase message: Right truncation of string data
Message
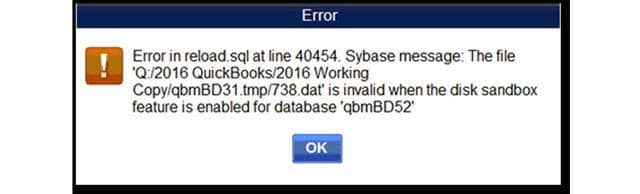
Error in reload.sql at line 40454. Sybase message: The file 'Q:/2016 QuickBooks/2016 Working Copy/qbmB31.tmp/738.dat is invalid when the disk sandbox feature is enabled for database 'qbmBD52'
Error
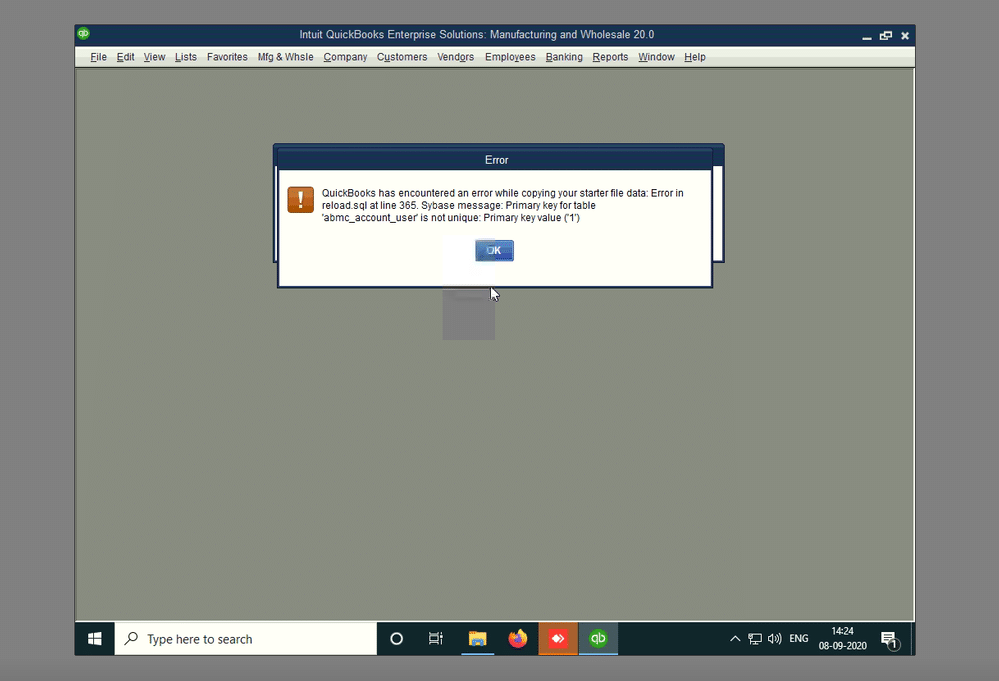
QuickBooks has encountered an error while copying your starter file data: Error in reload.sql at line 365. Sybase message: Primary key for table 'abmc_account_user' is not unique: Primary key value ("1")
One can experience this issue when the portable company file, or accountant’s copy transfer file is greater than 3MB and you try to open it across a network. It further shows up with a message: Error in reload.sql at line 40454. Sybase message: The file [file_name] is invalid when the disk sandbox feature is enabled for database '[database]’. Fixing this issue requires you to just move your file to the system where you use QuickBooks. To help you in eliminating this complicated issue, we have drafted this segment. To find out the fixes, let us have a look:
Primary causes that lead to Error in reload.sql in QuickBooks
This error may occur due to different reasons given below:
Still facing the issue? You can try repairing QuickBooks and get rid of the Error in reload.sql in QuickBooks. The steps involved in repairing the QuickBooks software are:
Step 1: Rebuild company
The very first step is to close QuickBooks.
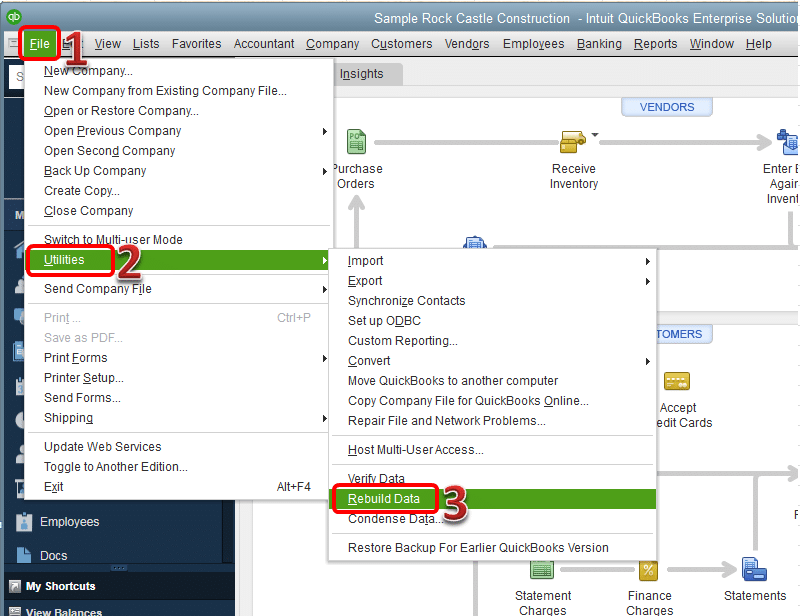
Head to the file menu and hover over Utilities tab.
Choose Rebuild data.
Now, on QuickBooks information window and hit OK tab.
Let the tool repair your file.
The next step is to choose OK tab.
And also, select the File menu.
Let the tool check the file for data issues.
Step 2: Repair QuickBooks installation
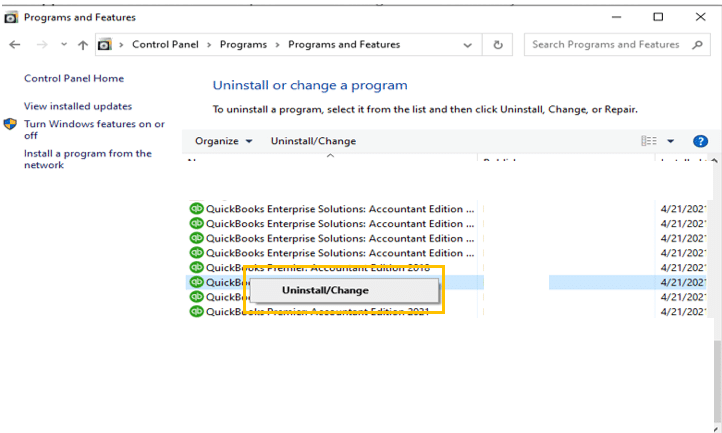
Click on the Start and type Control Panel.
After that open Programs and Features tab.
Here you need to select QuickBooks and click on Change/Uninstall.
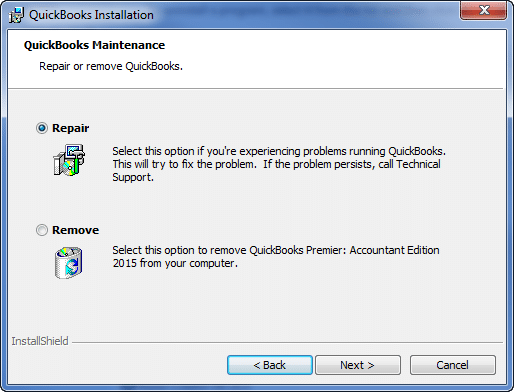
Click on Uninstall/Change and then choose Repair option.
Now follow the onscreen instructions.
Once the repairing process completes, try to run QuickBooks and restore the accountants copy again.
Solution 4: Clean Install QuickBooks
Often a mere reinstallation can help you fix the errors that you experience in QuickBooks The steps to reinstall QuickBooks desktop are as follows:
You need to first close QuickBooks.
After that, uninstall and then re-install QuickBooks.
Hit on Start button and move to Control Panel.
Go to Programs and Features.
After that, scroll down the list and select QuickBooks.
Now, click on Uninstall/change and then hit on Uninstall option.
Error in reload.sql in QuickBooks for Windows can be successfully resolved once you perform the set of steps we have enumerated above. However, if you stumbled upon the same issue again and again or if you have any query that needs to be addressed immediately, try contacting our independent accounting professionals at XpertBooks Pro, and they will definitely help you with your issues. Our team will help you get out of this problem instantly without affecting your operations and data.
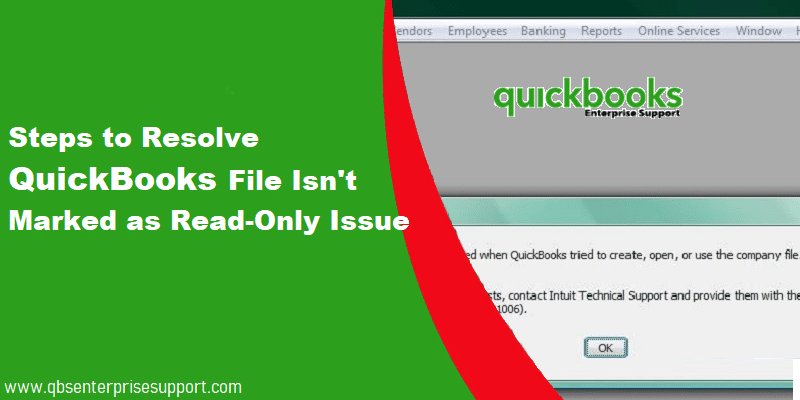
Is your QuickBooks showing read-only file, when you open it and not letting you make changes? Well, don’t worry, this is a basic glitch that you can see due to a bunch of reasons. One of the basic reasons for this is the nature of the medium in which the files are stored. The QuickBooks ready-only error usually permits you to read a certain file and is not permitted to make any changes. This error can further show up when a file cannot exit ready-only mode despite quality changes and replacement with a portable or backup file.
The QuickBooks read-only error might pop up on the screen with the following warning message:
Error Name:
Error Description:
Read Only Error
“[Company_Name].qbw This file is set to read-only. Try again with a different file name.”
Just in case you are experiencing the same issue, then we can help you with it. We have drafted this segment just to help you with QuickBooks read-only error. Just scroll through and understand the causes and fixes to this error.
Factors causing QuickBooks Read Only Error
Some of the most common causes that instigate the read only error in QuickBooks are:
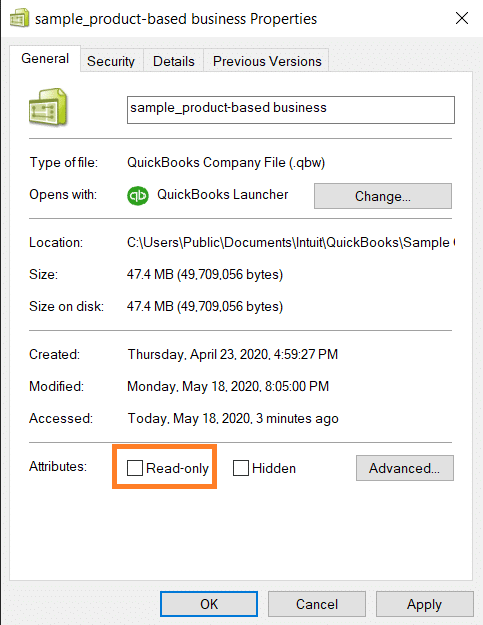
In case a file is configured to block all changes by setting it to read-only, then such an error can be experienced.
Or if QuickBooks unintentionally downloaded payroll updates and didn’t delete them using Windows user control or permission settings.
Another reason can be if read-only was set as the default status when you copied the file from the CD-ROM.
Moreover, if any former user has added this status to the file, then such an error might show up.
Important Points to Consider
There are a few pointers that you need to consider before you proceed to the steps to fix the error. Let us have a look:
You are supposed to verify the status of your Windows system’s updates.
And then, opt for a backup of QuickBooks company files.
Also, ensure that the required drivers are updated.
Another essential point is to avoid missing to check the QuickBooks Program’s Status as Active.
Further head to the installation of the most recent version of QuickBooks.
And verify that your QuickBooks is not being interrupted by antivirus.
Towards the end of this segment, we believe that you might be able to successfully get rid of the QuickBooks read-only issue. However, if you weren’t able to deal with it even after performing the steps above, then in that case, feel free to contact our accounting consultants, and they will help you with all your queries immediately.
FAQ's
What is meant by the read only error in QuickBooks?
This error indicates that the company file which you are trying to open cannot be modified as it has been configured to be viewed only and not edited or modified.
Does it indicates a damage in the QuickBooks company file?
This issue doesn't always indicate a company file damage since a minor change in the settings can fix this issue.
Can I use QuickBooks File Doctor to fix the Read only error in QuickBooks?
Yes, QuickBooks File Doctor Tool is an effective tool provided by Intuit that can fix different technical issues related to the company files.