QuickBooks offers many pre-created reports for the user’s convenience, and along with that, it allows you to create your own customized and tailored reports, which can also be mailed. The feature of customizing reports is also present in QuickBooks Desktop for Mac. This feature helps you in having the data and style as per their choices. If you are interested in learning the process to customize reports in QuickBooks desktop, here is a step-by-step guide for you people. So, make sure that you stay tuned to the article till the end and unleash the process to customize reports in QuickBooks Desktop for Mac.
This video will help you to run and customize reports in QuickBooks Desktop for Mac and Windows versions.
Advanced steps to customize reports in QuickBooks Desktop
Here's how to run and customize reports in QuickBooks Desktop.
The very initial step is to Create a report.
And then, select the Customize option on the report window.
After that, from the customize window, choose the tab that you wish to update, and you are done.
As we said before, this is the most basic procedure, for detailed one continue reading.
How to customize report options?
You will have a couple of fields and options and it all depends upon the type of report you are customizing. In case you want these options to appear every time the report is opened up, the below-mentioned steps could be followed:
First, select the QuickBooks software and then go for the Preferences option.
Once done with that, navigate to the Reports section and then choose Display customize report window automatically.
Report Options
Now that you know the steps to customize report options, it is important to know what report options would be there for you. Let us check out:
Advanced: You can control more advanced layout options, especially in case you based the report on the fiscal or calendar year.
Columns (list): Default settings for this is total only. Whereas the report displays a single column for totals, and there are no columns for subtotals. In order to display the report with separate columns for each month within the specified date range, you can choose the month from the list.
Columns (checklist): Select the columns that you wish to include in the report. Column headings with the check mark are to be included. And also, in order to un-select a column, select it again.
Customer: Job: It is supposed to select the name you wish to pick from the customer: job list.
Days Past due: You will have to limit a collections report, in order to ensure that it only shows invoices that are past due by at least a specific number of days. For this, you need to enter the number of days past due that you want QuickBooks to use as a basis for the report.
Days per aging period? And age through how many days: This might be confusing, but you need to restrict the transactions included in the report according to their aging status. For this, type the period of time for each column to represent under the days per aging period field.
And in the Age through how many days field, make sure to type in the number days you need for the breakdown of aging intervals:
Delay receipts how many days: It is supposed to make a more conservative and realistic cash flow forecast by slowing down receipts. Also, you can account for delays in funds availability that result from the bank holds on deposits. In case you leave this field set to 0, then the cash flow forecast includes all receipts where the due date falls within the date range for the report.
Filters: You should restrict the report to transactions that meet certain criteria.
Formats: Also determine the way in which the report breaks down the amount of time worked.
Include: This field basically affects the subtotal heading in transaction detail reports. When you subtotal a transaction detail report, it normally includes a subtotal heading only if there are transactions for the heading.
Open balance/aging: It is supposed to understand the process of calculating a customer’s open balance or an aging report. You can select the:
Current: This shows the customer’s open balance as of today. All the payments you will get today will be reflected in the open balance that the report shows
As of report date: Showing the customer’s open balance as of the ending date of the report.
Other columns: It is recommended to opt for the columns to be included in the report.
Report basis: Select if you want the report to be based on an accrual or cash basis. For accrual basis, QuickBooks counts income as of the invoice date and expenses as of the bill date. Whereas for the cash basis report, the income is counted as of the date the payment was received and expended as of the date the bill is paid.
Report dates: Select a new date range from the list. Also, one can go for typing a beginning date for the range in from the field and an ending date in the to field.
Reporting periods: Selecting a time interval from the list is recommended for the report.
Row Axis: Customize the row heading you desire for the report and select it from the list.
Show actuals, difference, and % of budget: It is needed to select whether the report should portray the actual amounts in addition to budgeted amounts. Selecting show actuals allows you to either select either or both of the fields i.e., difference and %
Sort by: It is supposed to change how QuickBooks usually sorts the transactions on a report. The transaction appears in the date order, but it can be altered to the amount and document number order.
Total by: It is important to change the ways QuickBooks groups and subtotals the individual transaction on the report.
It should be noted while creating a report, it might have various unnecessary data. This is where the need to use filters arises, as it allows you to customize the report to ensure that you see the data needed and not the useless one.
How to add a report filter?
Adding a report filter doesn’t involve any rocket science; all it needs is a couple of steps given as under:
At the initial stage, select Customize option from the report window.
And then, go for the Filters tab.
Followed by selecting the Checkbox next to the filter you wish to use.
And then, scroll or use the Search field to find the specific filters.
To clear all the filters, select the Clear all option.
Types of report filters
There can be a wide number of report filters, which include the following:
Account
customer job
Item
Posting status
Aging
Days per aging period?
Job type
Received
Amount
Detail level
Memo
Ship date
Class
Due date
Name
Source account
Billing status
Duration
Number
To be printed
Cleared
Entered/Modified
Paid status
Transaction type
Customer type
FOB, Item, Payment method, terms
Payroll item
Vendor type
Grouping and sub-totaling data
Pick the column heading for subtotals
A couple of reports allow you to subtotal the amounts in columns for time periods or other possible factors. This can be done by:
Initially, Create a report.
And then, go for the Customize option.
Followed by selecting the Filters tab.
And also selecting an item from the columns list. You can also select the Show all option in case the column you are searching is not available.
After this, the column will automatically appear on the P&L Detail report.
Select the row headings for groups
You can customize the report and change the row headings as desired. This can be done by:
Selecting Reports and then selecting Custom summary report is recommended.
After that, you will have to navigate to the Customize option.
Followed by selecting the Filters tab.
And selecting the Item from the row axis list.
Alter the subtotaling of transactions
You can easily group and subtotal the data on a transaction detail report by carrying out a couple of steps:
To begin with, create the Transaction detail report.
And then hit click on Customize.
Next, select the Filters tab.
And then, click on the Select an item from the total by list.
Altering the sort order of transactions
In case you don’t want the date order within the group on a report, you can sort the transactions by the amount or document number.
All you have to do is to Create the transaction detail report.
And choose the Customize option.
Followed by selecting totals only on the Options tab.
And then, to sort the transactions by amount, you can go for the Amount option.
Whereas, for sorting out the transactions by document, you can choose the Num option.
In QuickBooks, one can easily format the report and its look and feel. All you have to do is to:
Firstly create a report.
And then, choose the Customize and format options.
Selecting fonts and colors
You also get the option to customize the fonts and colors, which can be done by:
This can be easily done by selecting the Font & color for the drop-down from the format tab. And also select the area of the report to be customized.
You will then have to select the Font and color, and when done, click on Save.
Selecting the number handling
In the reports, you can easily customize the way in which the numbers have to be formatted and also the way in which the negative numbers would appear
Number formats: You need to opt for the divide the number by 1000 and if needed include cents or zero amounts on the report.
Negative numbers: In case you are having negative numbers on the report, you can select the method in which you have to be formatted, and also whether you are to be shown in red.
Customizing the header
Header is the text that shows up at the top of the report. QuickBooks includes the company name, title, subtitle, and date automatically. Let us check out header customization options:
Company: Company stands for the company name that would be displayed on the report.
Title: The title is basically the report title.
Subtitle: Here, the subtitle is the report subtitle.
Date: This is the date when the report is created.
Show time prepared: This option indicates the time the report was generated.
Show report basis: You can select whether to go for an accrual or cash basis.
Print header on: The last option is to select the pages on which you wish the header to appear.
Customizing Footer
Footer is basically the text that can be seen at the bottom of the report. You can easily customize this text by carrying out the steps below:
Page Footer #: This is the page footer, which means the page number i.e. pg#1
Extra footer line: In case you want another line on the footer, then you can make use of the extra footer line.
Print footer on: You can also select the page on which you want the footer to be, like the first page or on all pages of the report.
Setting alignment
If you want to alter the alignment of the report, then it can be easily done by selecting the alignment dropdown and then selecting the option to align the report. The report info can be set to its standard format or can also be aligned to left, right, or center as per the choice of the users.
Use a format template for your report
To make things easier, you can opt for a template as a starting point for formatting the report. Here is how you can do this:
This can be done by simply selecting the format setup drop-down and then click on the report theme.
After that, customize the Report theme and then choose the Save tab.
What is the process to customize the report sidebar?
The report sidebar allows easy access to all the report customization options in a single window. With the help of this sidebar, you can alter the report and see the effects instantly. For opening or closing the panel, you are supposed to opt for the customize option and also select the report settings. It should be noted that the QuickBooks software will remember the settings for each type of report created by you.
Memorizing customized reports
When you customize a report, you can memorize it in order to save the changes that were made. And once done, you are recommended to select memorize.
In order to open a memorized report, move to the reports and also choose memorized reports. In case any changes are made, you can replace the existing report or create a new one with a different name.
It should be noted that when you opens a memorized report, it will only apply the customization settings that were memorized. Also, the current data won't be changed.
We hope that we were successful in providing you with all possible information related to customizing reports in QuickBooks desktop. However, if you are still confused or if you found the procedure to be too technical for you, then do not think much about contacting our XpertBooks Pro consulting team. We will surely guide the way through the process and also will assist you in the entire journey of customizing reports in QuickBooks.
Are you looking for a way out to check relevant QuickBooks product information, including your desktop version and release? If yes, there is no need to wander anymore as this article will unravel quick and simple steps to check your Version and Release.
QuickBooks is multi-beneficial accounting software, which is available in different versions. It is very much important to know the version you are using. Knowing the version can be of very much help in various scenarios, especially when it comes to troubleshooting the technical snags in the QuickBooks product. If you are interested to learn about the process of checking QuickBooks product number, license number, version, and release, then this post is just for you with all the necessary information.
Today, we will talking about the step-by-step procedure to find out the product number, license number, version, and release date of the QuickBooks desktop. Follow the instructions mentioned later in this post. If you need technical assistance regarding QuickBooks Desktop and related products, then you can contact our XpertBooks Pro Experts using our helpline number: 1-800-761-1787. Our accounting professionals will help you find the QuickBooks product name, product number, version, license number, and release.
Quick Guide to Check QuickBooks Desktop Product Version and Release
You can carry out the below instructions, in order to identify the version and release of the QuickBooks software being used and the process to update it:
Method 1
Initially, you need to move to Home screen.
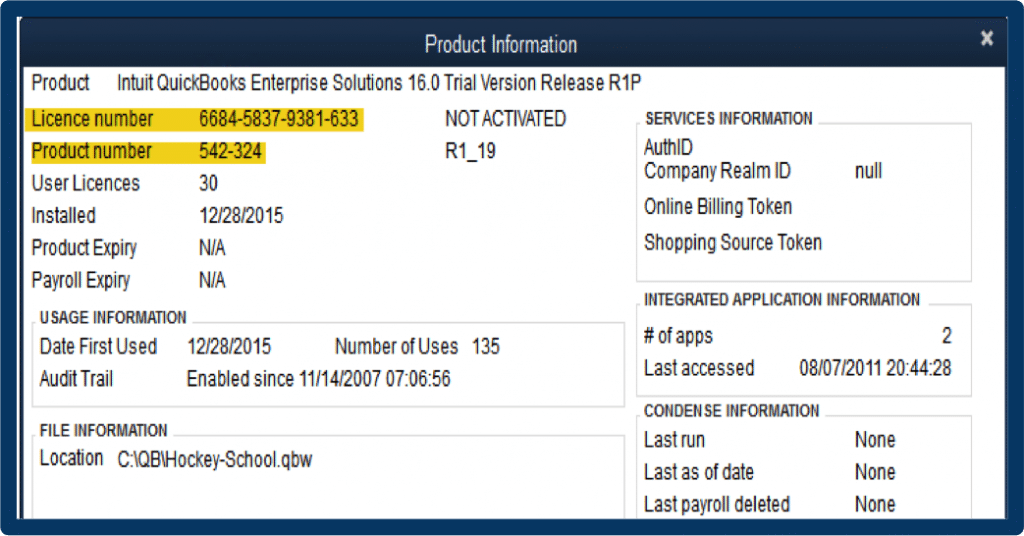
After that, hold Ctrl + 1 or F2 key to open the Product information window.
You will find the version, edition, and release appearing on top of the window on the product line.
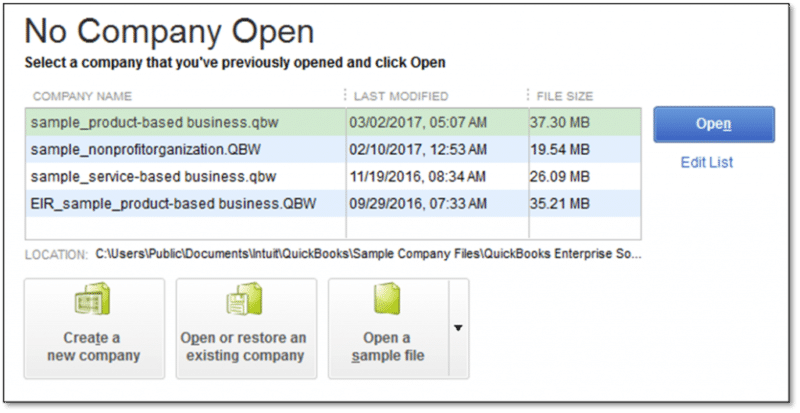
It should be noted, if you are unable to open QuickBooks to get the product information due to the QuickBooks login screen displaying on the screen, and the admin password is not known, then it is recommended to click on Cancel. QuickBooks will be in the No Company open window by default.
And you are recommended to press Ctrl key and open QuickBooks and double click the QuickBooks program icon on the desktop. You should continue to press Ctrl key, till the company open window is seen.
Method 2
In case QuickBooks is still not opening, then follow the below-mentioned steps:
Move to the QuickBooks program icon on the desktop and right-click on it.
After that select Properties.
When the Properties window shows up on the screen, head to the Shortcut tab and hit on Open file location.
You will see the program executable file (QBW2.EXE) on the screen.
Right-click on the QBW32.EXE file and click on Properties.
Move to the Properties window and look for the General tab. The location line shows the year of your QuickBooks version.
Also, move to the Details tab and check out the product version, the latest release update of the copy of QuickBooks shows. To understand it better, let us take a example: 26.0C R5. The number 26 here refers to QuickBooks 2016. The "C" identifies the program as Canada English. The R5 refers to maintenance release 7.
QuickBooks Desktop (Pro, Premier, or Enterprise)
For this, you need to start with QuickBooks desktop and press F2 key.
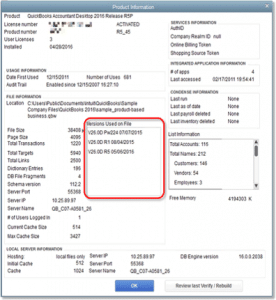
In the Product information window pops up on the screen. Look for the Product name, product number and also the license number.
You will now be able to see the release at the end of the product name.
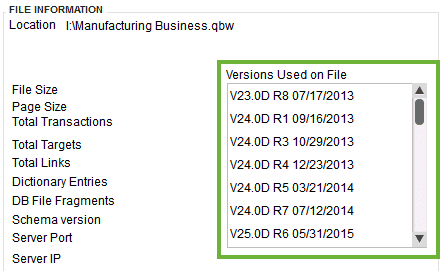
Now look at the version in the Version used in the file section. The list is sorted with the oldest version at the top and the most recent at the bottom.
Apply this to identify the version of QuickBooks last used to open the file
Open the QuickBooks desktop software and press the F2 or Ctrl + 1 keys.
Navigate to the Product information window and then look for the File section to find the versions being used.
It should be noted that the most recently used version is shown at the bottom of the list:
First of all, open the QuickBooks desktop and then navigate to the Help menu > Product information, in order to check the version, licence number and release.
Check if the QuickBooks Desktop For Mac demands any update or not.
QuickBooks statement writer (QSW)
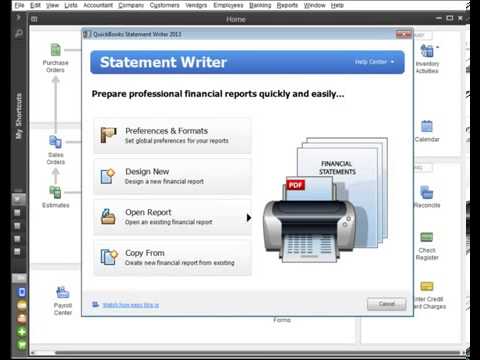
For checking the version and release, you are recommended to open QuickBooks desktop and then navigate to the Report’s menu > QuickBooks statement writer. Once the program opens up, you need to select the Help and About QuickBooks statement writer. After that, the information of the version will be seen in the about window.
For updating the QuickBooks statement writer:
You need to Open the QuickBooks statement writer.
Select the Help Center and also Update option.
QuickBooks Basic or Enhanced payroll (US only)
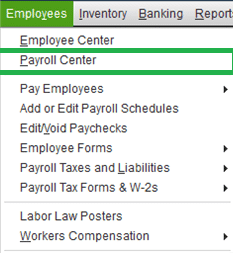
You need to apply this to check the payroll version: Open QuickBooks Desktop and then go to the Employees menu.
Followed by select Payroll Center option.
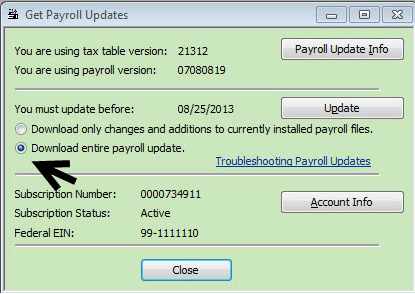
Choose the Payroll tab to check the subscription status window.
We expect that after going through this post, you might be able to find out what which QuickBooks product number, license number, version, and release you are having. However, if you are stuck somewhere or in case you are facing any difficulty, then we recommend you to have a discussion or schedule a call with our Intuit-certified professionals. Our team of QB specialists will help you out by providing the best possible support services.
Are you troubled by QuickBooks Error 6189, 816 while trying to access your company file? Don’t worry, you are not alone. Many QuickBooks users experienced such and issue in the recent days. This error is common error and generally seen when a user or multiple users try to access company file from a network device in a multi-user mode or when the transaction log file (.TLG) doesn’t sync with the company file (.QBW). Well, the good part is that it can be resolved with the right steps.
A detailed view for fixing of this QuickBooks error code 6189, 816 will be seen in this article. Thus, make sure that you read the article till the end attentively. Moreover, you can also ask the accounting experts to troubleshoot the error on your behalf, especially if you feel that tackling this issue is out of your league.
What is QuickBooks Error 6189 and 816?
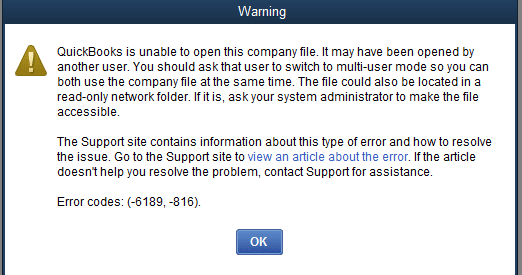
Error code 6189 is basically a run-time error that can be seen when a user try to open the company file stored on a network or server. This problem indicates any kind of error with the multi-user network and not with the accounting data. Thus, it can be resolved easily. It is important to make sure that you have the QuickBooks file storage instructions in place. This error comes up with an error message on the screen stating as:
Error
Description
Warning
An error occurred when QuickBooks tried to access the company file (-6189, -816),
Error Codes: (-6189, -816)
QuickBooks is unable to open this company file. It may have been opened by another user. You should ask that user to switch to multi-user mode so you can both use the company file at the same time. The file could also be located in a read-only network folder. If it is, ask your system administrator to make the file accessible.
There can be a bunch of possible reasons causing this error, which will be discussed below, along with the fixation methods.
Factors Leading to the QuickBooks Error 6189
Before you digging in deep and learn the quick fixes to this error code, it is better to first unleash the important facts related to it. There are a couple of factors that could drive you to this company file error 6189, 816, namely:
Missing or damaged QuickBooks components can be one major factor.
If the company file on a network computer is in use by a program or a process.
Also, accessibility issues with the company file or folder on QuickBooks host system can be a common factor.
In case you mistakenly deletes the important drivers from the system needed for running QuickBooks, then this blunder could lead you to this error.
If another client signed into the company file in single-user mode, then this error could be faced.
Any kind of issue with the QuickBooks registry values in the Windows Registry.
Or if the operating system is affected by any sort of antivirus.
Damaged network data source file on the QuickBooks server or host system.
There might be a trouble with the QB hosting processes.
And a couple of other factors might lead to this annoying error.
In case you detect an error message that we mentioned above, then here are a few methods that you can opt for in order to get rid of the QuickBooks error 6189 and 816. Let us have a look at the methods one by one:
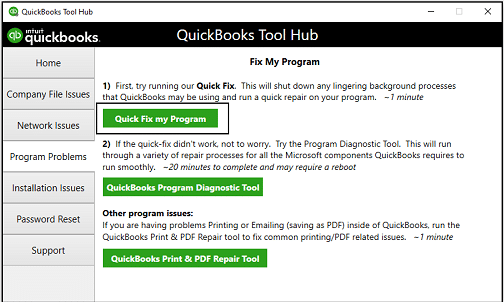
Solution 1: Run Quick fix my program from the QuickBooks tool hub
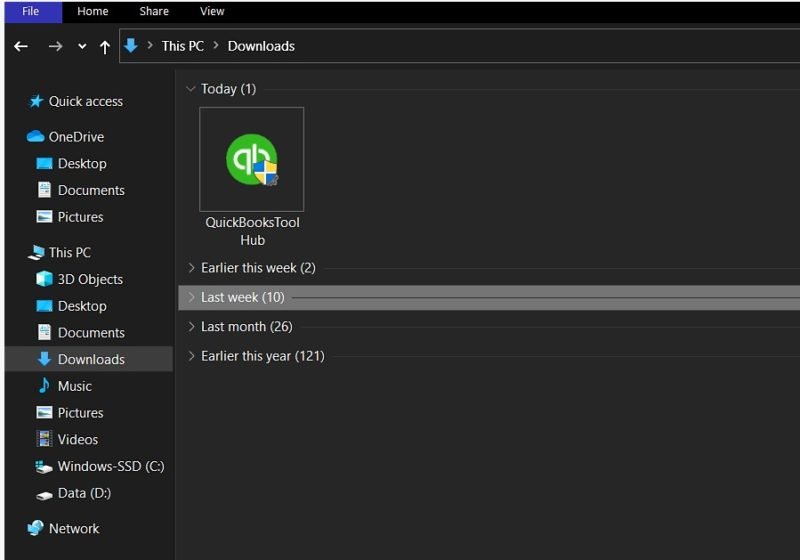
In this method, you need to download the QuickBooks tool hub program and then run Quick fix my program.
1st Step: Download and install the QuickBooks tools hub program
For this, firstly you need to close the QuickBooks software.
Now proceed to repair the damage to the company file and the network, and then retry to access the company file to see if the error has been fixed.
If the Error Code 6189 in QuickBooks still pervades, conform to the following solution.
Solution 2: Moving your company files to the local hard drive
You are recommended to Move the company file to the local hard drive, if the error continues and also if the company file is stored on a removable drive or online.
You can store QuickBooks files on the server system’s hard drive. However, the online file hosting services, including Dropbox, Google Drive, etc. might seem convenient, but are prone to issues.
Also, you are recommended to avoid storing the files on removable drives, as they aren’t designed in a way to run QuickBooks or multi-user networks.
Another important thing is to avoid encrypting the QuickBooks files on the hard drive storing them, as it can block the multi-user network connection.
Solution 3: Run QuickBooks database server manager
The server system stores the QuickBooks desktop files, whereas the other systems are the workstations. If you have hosting your own network, then in that case, the QuickBooks database server manager will help to keep the multi-user network stable. The steps involved in this process are as follows:
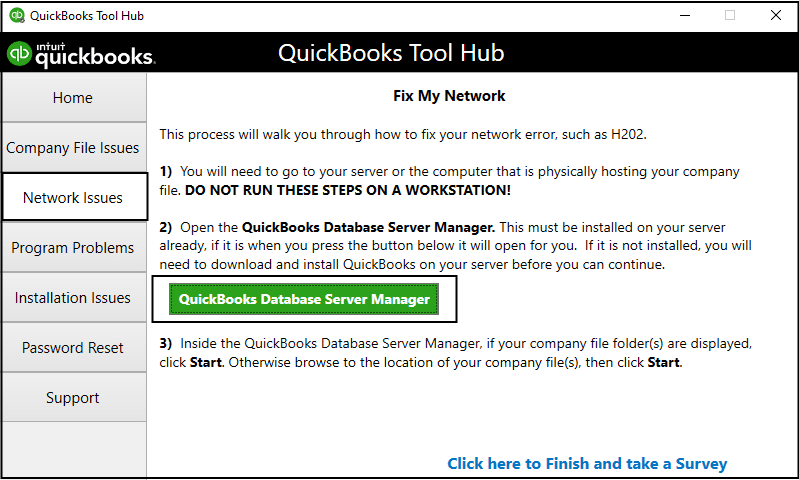
Open the tool hub program and the first step is to select the Network issues.
Moving ahead, select QuickBooks database server manager option.
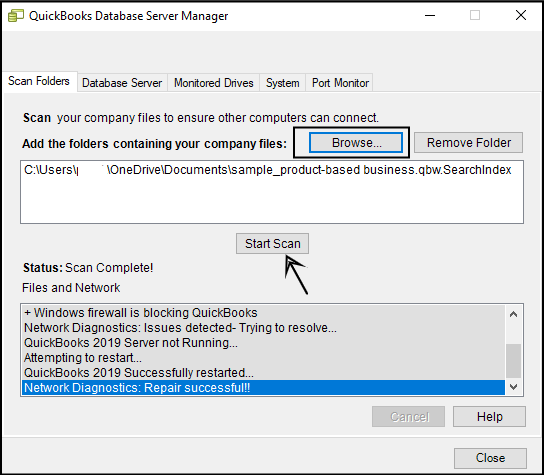
After that, inside the database server manager, you need to opt for the Start scan option if you can see the company files. Or else, you can Browse to the location and then click on Start scan option.
Now the database server manager will fix the Firewall permissions on its own. And then hit close, once the process ends.
The last step is to open QuickBooks.
The point should be noted here is that, if the database server manager runs on one of the workstations you have, then you need to make it sure it is not configured to host your multi-user network.
Corrupted Windows drive
In case the error continues after following the above steps, then it might be due to a damaged Windows drive being used for QuickBooks. You can download or run a new window drive update utility to update or run the Windows drive. In case you are unable to do so, then you can take help from any specialist or master/professional.
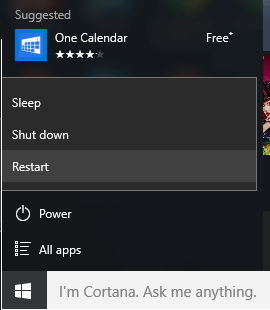
Solution 4: Restarting the computer and the servers
At times the whole system demands a full reset. The steps to be followed in such a situation are as follows:
You need to restart the server computer.
Important: It is very much important to find out where the company file is hosted. If you are making use of the QuickBooks enterprise hosting rather than the server system, then you can consult a professional to help you out in restarting.
Reboot the Workstations and open the QuickBooks desktop on the server system.
And then, open QuickBooks on each of the Workstations.
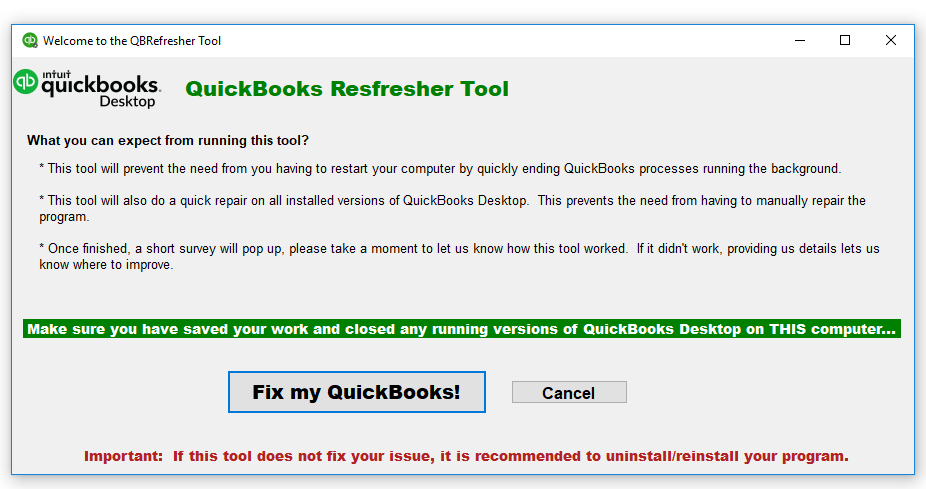
Solution 5: Downloading and running the QuickBooks Refresher tool
You are recommended to download and run the QuickBooks refresher on the system facing the issue. This process will close all the background programs that might be the reason for the error. This also refreshes all the process:
Initially, Download the QuickBooks refresher and then install all the files from it. You are then recommended to save the files to access them easily.
After that keep a check whether no other task is running on the QuickBooks desktop.
You are then recommended to check and Close all the versions of QuickBooks running on the system.
And then, you need to double-click on the QBRefresher.exe file to run the program.
Also, the QBRefresher runs in 30 seconds, follow the onscreen instructions.
The final step is when the installation is finished, you will have to reopen the QuickBooks desktop.
Note: If in case the issue persists, we recommend you to opt for a full reset.
Yes. Install the latest QuickBooks Desktop updates on server and workstations and use the current Tool Hub version (e.g., 1.6.0.8) to access the newest repair utilities.
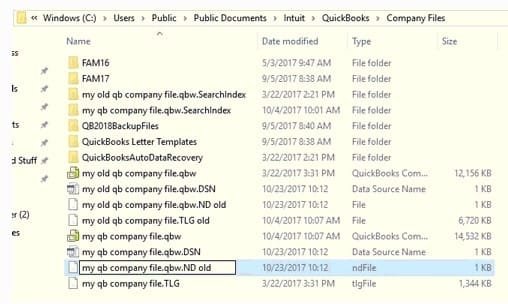
Could a mismatch between .TLG/.ND and the .QBW cause this?
It can. Rename the .ND and .TLG to .OLD to force QuickBooks to recreate fresh pointers, then retry opening the company file from the server share.
Should I move the company file locally to test?
Yes. Temporarily copy the .QBW to a local, short path (e.g., C:\QBData$$ to rule out share/permissions issues; if it opens locally, fix the network share and rescan with Database Server Manager.
Do folder permissions and share access matter?
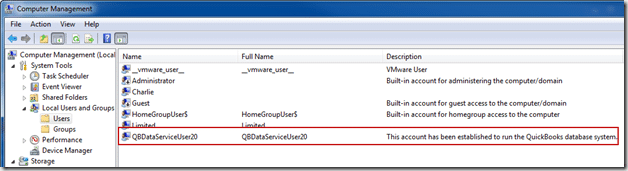
Yes. You need to ensure Full control on the company file folder for the Windows users and the QuickBooks data service account, and avoid read‑only attributes on the share/folder.
Can Quick Fix my Program resolve this error?
Often, Yes. Open QuickBooks Tool Hub and run Program Problems > Quick Fix my Program, then reopen the data file; this clears stuck background processes tied to QuickBooks desktop.
Concluding lines...!
We have tired our best to sum up the various possible rectification methods in this article, but if in case you continue to face the QuickBooks error code 6189, 816 then need not to be worry, as we will be there to rescue you in all the situations. You can definitely rely upon our XpertBooks Pro consulting team for the best possible assistance in hardly anytime. We understand the value of your time, so we ensure that your software becomes error free as soon as possible. Our U.S based accounting professionals, and ProAdvisors will ensure to provide you with immediate assistance.
QuickBooks each year come up with some amazing features, and one of the recently introduced features is Landed cost in QuickBooks enterprise. Thus, if you are in search of the process to set up landed cost in QuickBooks enterprise services, then going through this segment will surely make sense to you. Landed cost is basically the total price of the product by the time it reaches the buyer. It includes everything, be it the handling fees or the cost of parts used in manufacturing. Calculating this cost manually is one of the most tiresome and time-consuming process.
But, ever since this feature is introduced in QuickBooks, managing business has become a lot easier and more accurate. Landed cost basically helps to factor in freight, duties, insurance, and other expenses, in order to understand and evaluate the actual product cost with much ease.
There are a lot more facts associated with thelanded cost and its set up in QuickBooks enterprise, which we will be discussing later in this post. However, if you feel the need for an expert who can guide you through the setting up and calculating of landed cost in QuickBooks Enterprise, then connect with our tech geeks directly using our dedicated helpline number. Our experts and certified team will be there to assist you.
What is Landed Cost?
Landed cost basically assists in tracking the product costs more precisely. You can make use of it to factor in things such as shipping, customs duties, insurance, and miscellaneous items. It is basically the total price of a product by the time it reaches the buyer. Calculating this number manually is pretty much time-consuming and also leads to a loss in profits. After the landed cost is set in QuickBooks desktop enterprise, you can see it for any bill that is adding inventory and shipping items. QuickBooks involves the landed cost calculation in the bills as part of shipping and handling bills. Here are the possible reasons why the landed cost is not calculated in the bill:
The bill is missing inventory and assembly items.
Or the inventory and assembly item bill are open, or another user is working on it.
The currency of the cost is different.
In order to ensure that the landed cost is calculated accurately, it is recommended to use the enhanced inventory receiving workflow.
Steps to Setup the Landed Cost in QuickBooks Enterprise
As we mentioned above, landed cost actually helps you in tracking the product costs more precisely. It can be used to factor in things like shipping, customs duties, insurance, and miscellaneous items. After setting up the landed cost, you can see it for any bill added to inventory and shipping items. The process to set up the landed cost is not huge; a few simple steps could work. Let us have a look:
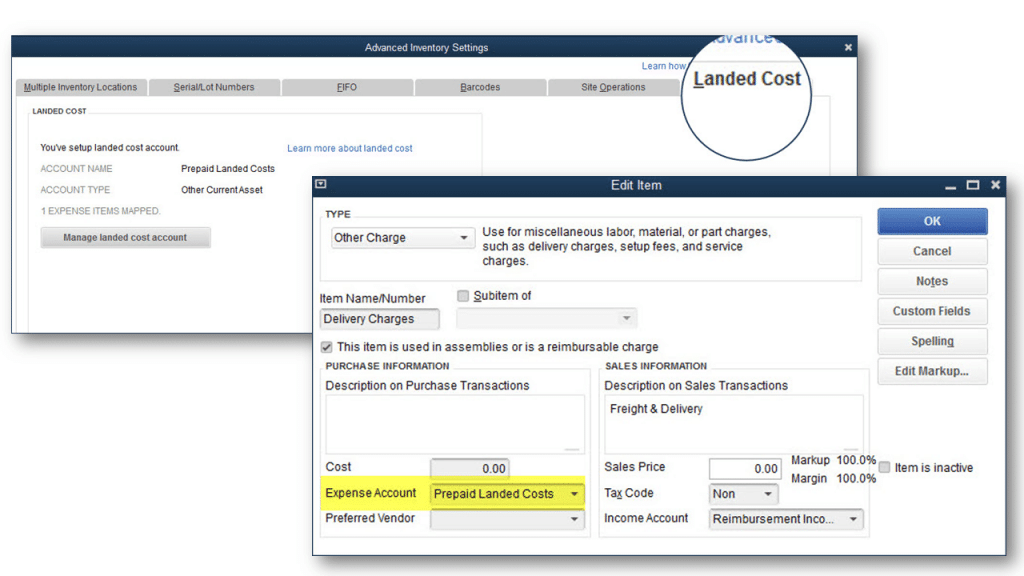
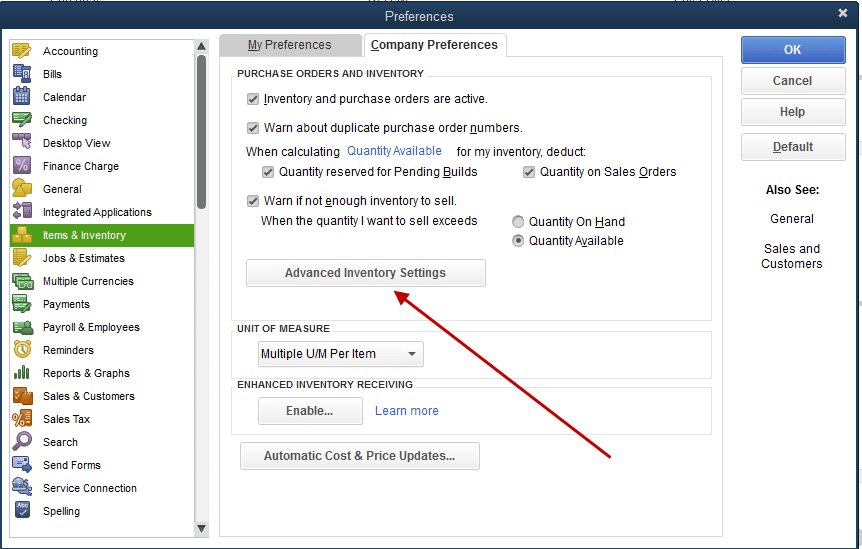
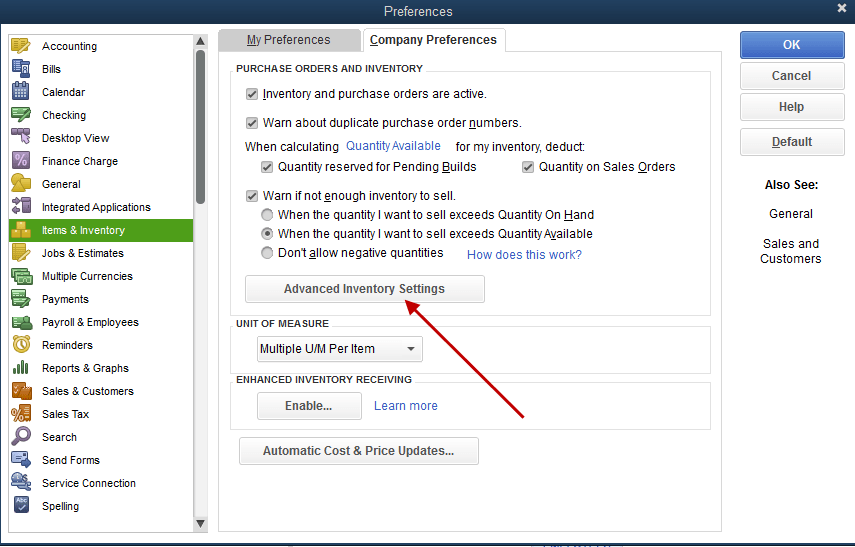
Start off with opting for Preferences from the Edit menu.
Go for the Items and inventory, followed by selecting Company preferences.
Moreover, pick the Advanced inventory settings.
Make sure to opt for the Landed costs tab.
Next, select the Setup landed cost account.
Sum up the procedure by creating either a New account or Using an existing account, followed by selecting the Save and Continue tab.
Step 2: Map shipping and handling items to the landed cost account
Select the shipping and handling items, or add new items similar to shipping, customer, etc. The steps to do that are:
Select the Shipping and handling items drop-down.
Opt for the Shipping and handling items to map.
Conclude the process by picking the Save and Close options
Steps to create new items for landed cost
In order to create new items for landed cost, you will need to create an item type of other charge and then add it to the landed cost account. For this, you need to:
You need to choose the Item list
Opt for the Item and select New
You will be required to add it to the landed cost account:
For this, you need to choose the Preferences option from the Edit menu.
Go for the Company preferences after selecting Items and inventory.
Next step is to choose Advanced inventory settings.
The landed costs, along with the option to Manage Landed cost account, are to be selected.
Now hit a click on Save and Continue.
Also, hit a click the Add item option, and choose the Item to add.
End the process by opting for save and close.
You have now mapped shipping and handling items, it is now time to calculate the landed cost. This can be done by continuing with the below process.
How to Calculate Landed Cost in QuickBooks Enterprise Services?
After you have successfully set up the landed cost, it is time to calculate the same. Let us check out the steps for calculating the landed cost.
Step 1: For this, you need to add inventory and assembly items from a bill
In this, opt for the Inventory.
Go for the option to Calculate Landed cost item.
Opt for the Add bill from inventory and assembly items.
Choose the Bill having the inventory items that are to be calculated.
And the final step is to choose the Add bill option.
Step 2: Adding shipping and handling items to the bill
Select the Add bills option from the shipping and handling costs section.
Also, choose the Shipping and handling bills for the inventory you would like to calculate.
And finally, select Add bill.
Step 3: Calculating the landed cost of the bill
For this, opt for the split bill drop-down menu. You can split Shipping and handling costs between the inventory and assembly items by quantity, amount, and percentage, can also try them out manually.
Next, select the Post to bill option to add the landed costs to the bill.
Step 4: Updating the selling price based on landed cost (This step is not mandatory)
As the landed cost gives a more accurate cost of the goods, you might wish to update some of the selling prices. The steps involved in this are:
Pick the items they would like to update the price for.
And then, Add new selling process, and also select the Update and proceed. Also, opt for the skip and proceed if you don’t need to update the price.
The final step is to update the bill and opt for Save.
Setting up and calculating landed cost in QuickBooks Enterprise doesn’t involve any rocket science. Carrying out the above steps properly can work. However, if somehow you encounter any technical glitch or in case of any questions, do not hesitate to call our team of QB specialists anytime. Help is available round the clock, 24/7.
QuickBooks transactions are one of the most essential parts of the desktop accounting software. It is the transactions that help the users in giving an idea of the financial dealings. You might often have an issue of damaged transactions, which ultimately poses threat to the company file data. The company file stores all the necessary information of the company, and can get easily damaged, due to damaged transactions.
Fixing the damaged transactions doesn’t require any technical knowledge, as some few simple steps can rectify them. In this post, we are going to discuss the causes contributing to damaged transactions and also the various fixes for damaged transactions in QuickBooks desktop.
What can lead to Damaged Transactions in QuickBooks?
There can be certain factors leading to damaged transactions in QuickBooks namely:
Sudden power surges can force the hard drives to accidentally overwrite the data, which affecting your company data.
Quitting QuickBooks desktop without exiting the company file.
Network glitches are caused while the QuickBooks software is being used over a network.
Over-sized company files can also end up in this issue.
Any sort of virus infection or malware attack can result in corruption of transactions.
In case you use journal entries instead of preferred data entry methods for accounts receivable or accounts payable etc., it might damage the transactions.
Using QuickBooks when the system is running low on resources.
Steps to Fix the Damaged Transactions in QuickBooks Desktop
You can simply fix the damaged transaction in QuickBooks Desktop by implementing the steps below:
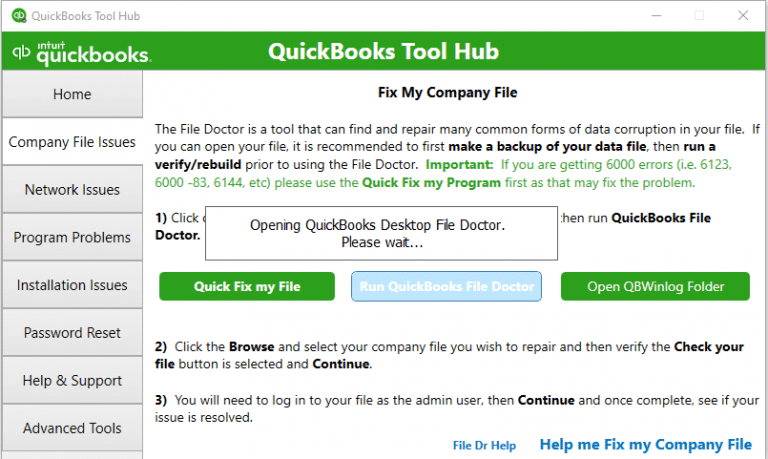
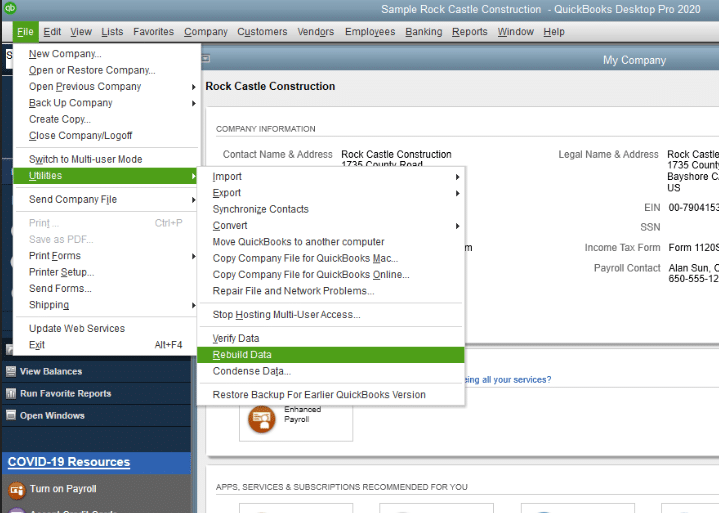
Step 1: Launch the Rebuild and Verify Data utility
The next step requires to Repair the company file using the rebuild data tool.
For this, navigate to the File menu and then move to the Utilities tab.
Now, choose the Rebuild data option.
The next step is to choose the OK opt on the information window, and then follow the on-screen instructions to Save the backup.
Next, let the tool to Repair the file. This might take some time, as QuickBooks may seem stuck, but as long as you could move the mouse, tool is working.
Once the process ends, click on OK tab.
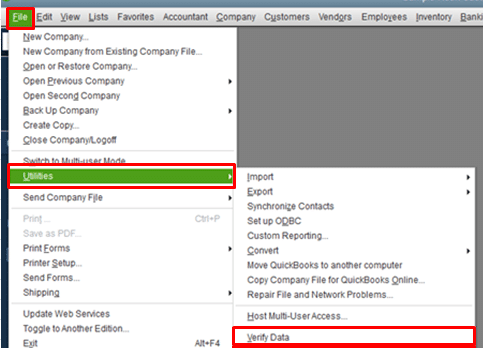
Now move to the File menu and then hover over the Utilities option.
Finally, select the Verify data tab.
Allow the tool to check the file for any Data issues.
You can also go for the manual process to Run the rebuild and verify data utilities. The steps involved in this are as follows:
First step is to move to the File menu, and then hover over the Utilities tab.
And then select Verify data.
Moving ahead, let the tool starts checking the file for Data issues.
When the check is over, from the Verify results screen, and then choose the Expand all option to see the issues.
Now, choose the see online article to fix the error.
We have firm confidence that the above-illustrated steps worked for you and went a long way towards repairing the damaged transactions in QuickBooks desktop. However, if a situation arises when any of the steps doesn't work out, then in that case, you can contact our 24/7 XpertBooks Pro team at 1-800-761-1787. Our dedicated accounting experts having profound experience in the field will help you fix the error on your behalf.
FAQs
Que. How to Fix data damage on QuickBooks company file?
Ans. Data damage on QuickBooks company file can be fixed by repairing the company file, with the help of the Rebuild data tool. This is a built-in tool that automatically fixes some minor company file data issues.
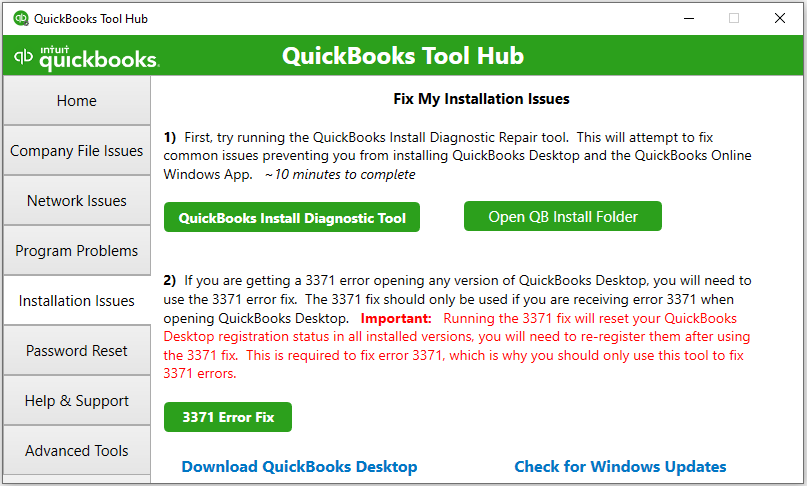
Que. How to fix QuickBooks desktop install errors?
Que. How to Fix beginning balance issues in QuickBooks desktop?
Ans. You might see the beginning balance as zero or incorrect when you open up the begin reconciliation window and then select the account to reconcile. This error can be fixed by recreating the opening balance. Whereas an incorrect balance issue can be resolved by correcting edited, deleted, or cleared transactions.