Exporting lists from an old company file into a new data file can be a bit tricky if you are new to QuickBooks. This article intends to provide you with detailed information for exporting lists from old QuickBooks company file into a new data file.
Important: We expect that you have an active QuickBooks Desktop payroll Subscription and you already have created a company file.
Important points you shouldn't avoid
Following are the pointers which you have to keep in mind before exporting lists from a old QuickBooks company file to new QuickBooks data file: So keep, read on:
These steps will only allow you to import lists. Batch Entry is a third-party software that allows you to move your transactions.
You can't import names or list items into your new file, if you have custom fields enabled. Before you import the file to the new one, delete the custom field information from the .IIF file. Once you import your lists, you will need to enter the custom field information again in the new file.
Your file will be damage or corrupt, if you try to import damaged lists into your new company file.
How you can export lists from old company file into a new data file in QuickBooks
Follow the steps provided below in the same order to get successful results.
Step 1: Export list
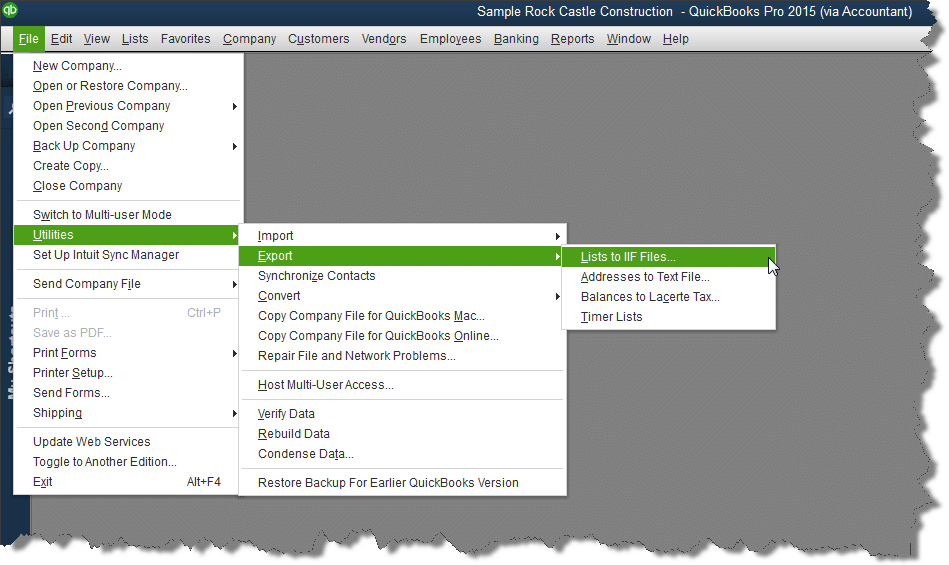
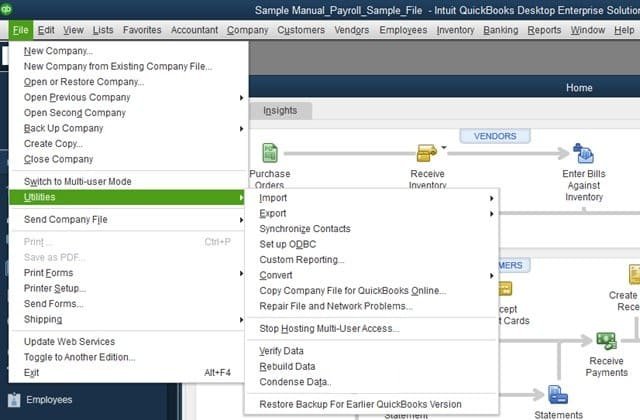
Go to QuickBooks File menu, and select Utilities, followed by Export and Lists to IIF Files.
Select the list that you have to export and click OK.
Now search the location where you want to store your file and click Save.
Things you should know:
Exporting the list from QuickBooks creates an .IIF file that can be opened on notepad or excel.
You shouldn’t Export the major lists (Item, Customers, Vendors) simultaneously but one at a time to keep from facing any issues caused by exporting very long lists.
Step 2: Clean up your lists (Optional)
Initially, you need to click on file and open the IIF file that you exported from your company file in Excel.
Open MS Excel.
After that, click on the File menu and select Open (Click on the Office Button Open if you're using Excel 2007).
Select the storage location where you saved the .IIF file.
In the file type field, select All Files.
Now select your IIF file, then click on Open.
Click on Next two times and then Finish in the Text Import Wizard. The IIF file will next open in MS Excel sheet.
Make the necessary edits in MS Excel.
Click Save to save all the changes you made to the IIF.
Go to File menu and hit a click on Save button (Click on the Office Button and then Save opt, if you're using Excel 2007).
Click Yes when prompted and exit Excel.
Next, you will be once again prompted to save the IIF file.
Click Don't Save.
Things you should know:
What should you clean up from the list?
Customers you no longer sell or offer services to
Vendors you no longer do business with
Ex-employees
Items that you have discontinued selling
Any other entries unnecessary in the new company file
Login into QuickBooks with admin credentials in single user mode and open the new company file.
Click on the File menu, and select Utilities.
Select Import and click IIF Files and Import the Chart of Accounts.
After that choose Import and hit a click on IIF Files.
After the Chart of Accounts is successfully imported, import the other list in the following order.
Import the lists that have no information in common with other lists such as,: Customer Type List, Vendor Type List, Class List, Job Type List, Payment Terms List, Payment Methods List, Shipping Methods List, Customer Message List, To Do Notes.
Import the lists one by one in the given order: Vendor/Supplier, Employee, Other Names, Sales Rep, Item, Price Level, Customer, and Budgets (follow the sequence).
Points to remember:
You can ensure a smooth import by following the instructions given above.
It is strongly recommended that you back up your company file prior to importing any lists. This will also be true after you have successfully imported one or two major list.
Step 4: Set up the opening balance
Here is how you can set up an opening balance for a bank, credit card, and other types of accounts.
1: Set up balance for bank or credit card accounts
Firstly, sign in to your bank's website or find a bank statement.
After that, open QuickBooks Desktop, go to Company menu and select Chart of Accounts.
Right-click anywhere on your Chart of Accounts and then click New.
In account type, select Bank or Credit Card and then click Continue.
Give a name to your account. If you have more than one account of the same type or with the same bank, save them with unique names so they're easy to distinguish.
Fill out the rest of the data fields and then select Enter Opening Balance.
Next, if you want to edit your opening balance, click the Change Opening Balance button.
2.: Asset, liability, and other types of accounts
Sign in to your bank's website or find a bank statement.
Open QuickBooks Desktop, go to the Company menu and select Chart of Accounts.
Right-click anywhere on your Chart of Accounts and then click New.
After that select Fixed Asset, Loan, or Equity and then click on the Other Account Types drop-down and one of the types.
Now select Continue tab.
Give a name to your account. If you more than one account of the same type or with the same bank, save them with unique names so they're easy to distinguish.
Fill out the rest of the data fields and then select Enter Opening Balance.
If you later on want to edit your opening balance, click the Change Opening Balance button. What you put in for your opening balance depends on how you want to handle your past transactions:
If it’s not needed to enter older transactions that come before the opening balance date in QuickBooks: Enter the last balance and date from your most recent bank statement and select OK. All your past transactions are now summarized, and you can start tracking new transactions from now on.
If you wish to enter your past transactions in detail: Select a date. You should select a date older than the oldest transaction you may want to track in QuickBooks. Your opening balance summarizes everything before the date you pick. Enter the date you chose in the Ending date field, and then in the Ending balance field, put in the balance of your real-life account for that date. At the end, select OK. This process would keep you from counting past transactions twice.
Now select Save & Close to record the opening balance.
We hope the above-given steps might be helpful for you in order to export lists from the old company file into a new data file. However, if you have any more queries or you need assistance with any QB-related issue, you can contact our XpertBooks Pro experts. Our goal is to help users resolve problems efficiently while minimizing disruptions to their daily workflow. We will be more than happy to help you out with your accounting concerns.
FAQs
What are the benefits of exporting lists from an old company file?
Exporting lists helps users in saving their time, especially when a large quantity of data is to be transferred. Exporting lists also helps in bypassing data entry errors while making sure that the new data files are accurate.
What are the different lists that can be exported from an old company file?
The different lists that can be exported from an old company file encompass customer lists, employee lists, vendor lists, charts of accounts, inventory items, etc.
What file formats can be used for exporting lists?
While the lists can generally be exported in Excel or in the CSV format. However, other formats, too are acceptable.
Can I customize the lists before exporting them?
Yes! The lists can be customized before being exported. It implies that users have the prerogative to add, remove, or modify items.
What should I do if I encounter errors during the import process?
If users stumble upon any technical error while importing lists, they need to double-check the file format.
QuickBooks desktop 2022 and Enterprise 22 has come up with a lot of new features, but there are certain features discontinued in these versions. In this write-up, we have mentioned the features that didn’t make it into QuickBooks desktop 2022 and Enterprise 22.0. You might have noticed that with the launch of QuickBooks desktop 2022, features like loan manager, scan manager, and cash flow projector are no longer available.
Go through this segment with full concentration to find out the features that are no longer available in QuickBooks desktop 2022 and Enterprise 22.0. You can also connect with our accounting professionals, simply if you need any advice or guidance related to the same.
Below is a list of information that has replaced the earlier features in QuickBooks Desktop 2022:
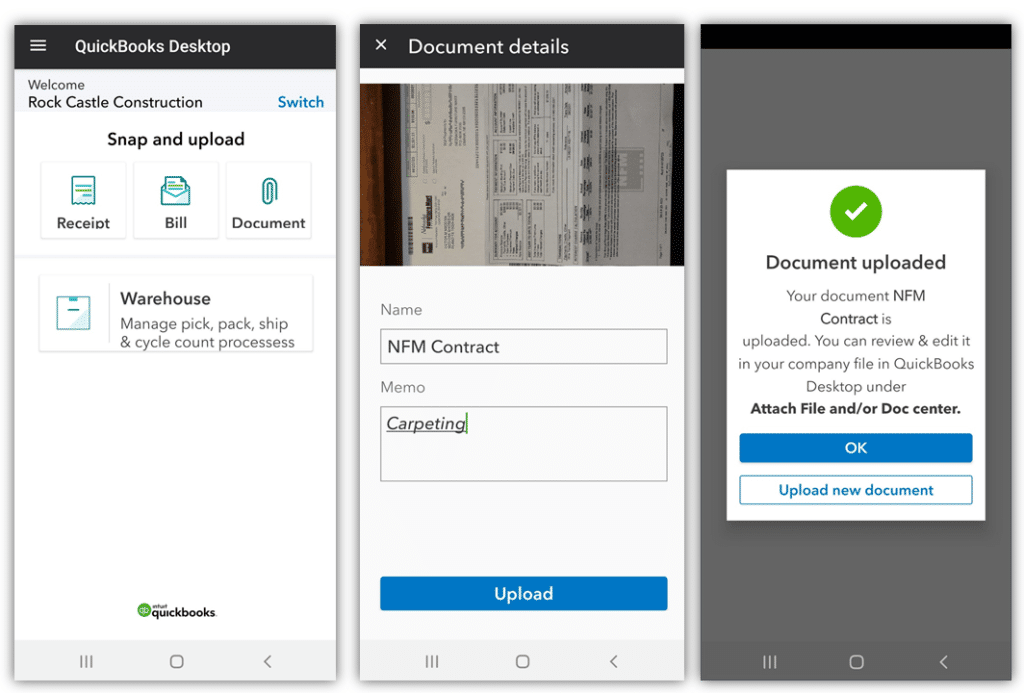
Attach documents to your mobile
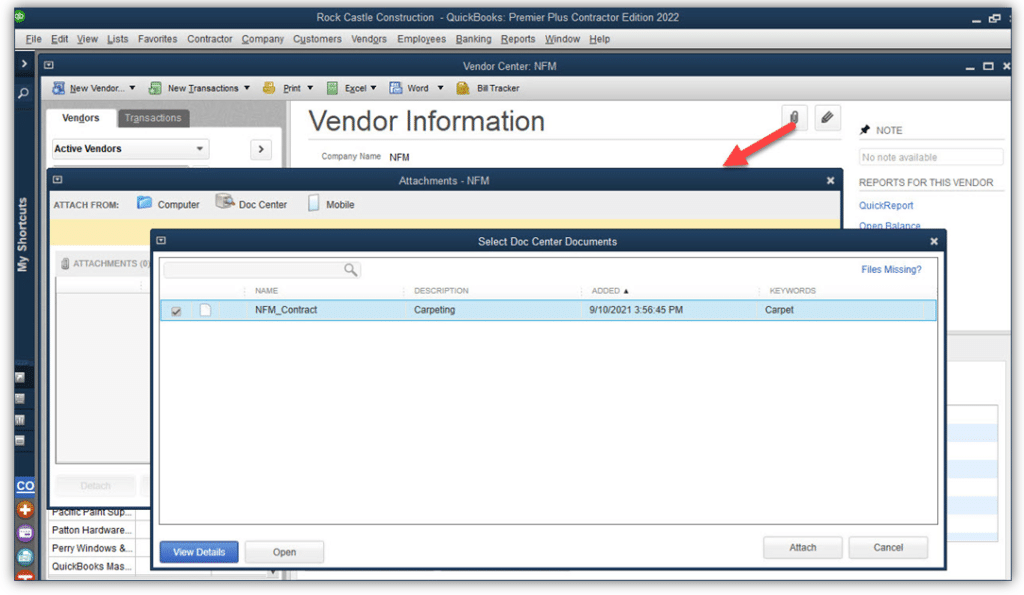
The scan manager feature was replaced with the attached documents. This feature continues to help you in scanning documents using a mobile device and then import the documents into QuickBooks.
Track loans in QuickBooks
It should be noted that the transactions like principal repayment and interest expense are not automated any longer. You will have to manually enter them in QuickBooks desktop 2022. You might need to know the principal and interest components for each of the payments. Further, you should refer to the amortization schedule provided by the lender. In case you aren’t able to obtain the schedule, then look for the amortization calculator online.
Search for QuickBooks desktop Marketplace
You should look for an alternative low-cost solution to cash flow projector in the QuickBooks desktop marketplace featuring third-party applications that are developed by independent developer partners.
If you want a complete article on QuickBooks Desktop service discontinuation policy then click here.
These were the information related to features discontinued in QuickBooks desktop 2022 and Enterprise 22. However, if you have any queries or concerns, then connect with our independent tech geeks using our support line i.e., 1.800.761.1787. Our dedicated accounting consultants will ensure to help you in finding out information related to discontinued features in QuickBooks desktop 2022.
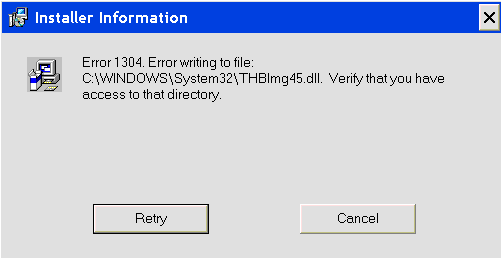
Bumping into some or the other error in QuickBooks desktop is pretty much common, as this software involves numerous codes and algorithms. Error C=1304 is another common error encountered within the QuickBooks Desktop? Due to the technical complexities involved in QuickBooks desktop software, this accounting software is prone to a myriad of errors. Today, we are going to discuss the QuickBooks error C=1304 and get to the effective measures for fixing this issue. This particular error involves Microsoft Windows operating system and appears when installing or updating the QuickBooks desktop. The error message that crops up on the screen will state as:
Installer information
Error 1304. Error writing to file (filename).
C:\Windows\System32\THBImg45.dll. Verify that you have access to that directory.
Check that you have access to the directory. You might land up into such an error due to any error in the CD or the CD drive. Or in case the .net component is damaged. In order to learn other related facts to QuickBooks error code C=1304, you simply have to go through this piece of writing.
What triggers to QuickBooks error code C=1304?
The reasons behind error code 1304 in QuickBooks can be many. So, before you step ahead and start implementing the fixes for the same, make sure to check out the root causes of this issue.
Just in case there is any sort of damaged with the Microsoft .NET components, then in that case you might land up into such an error.
If the CD or disk gets damaged or the CD driver isn’t functioning properly.
Another common reason can be if the CD drive possesses any issues.
Some damage caused to the Windows files may also lead to Error C=1304.
Performing the below methods is recommended so as to fix the QuickBooks error C=1304.
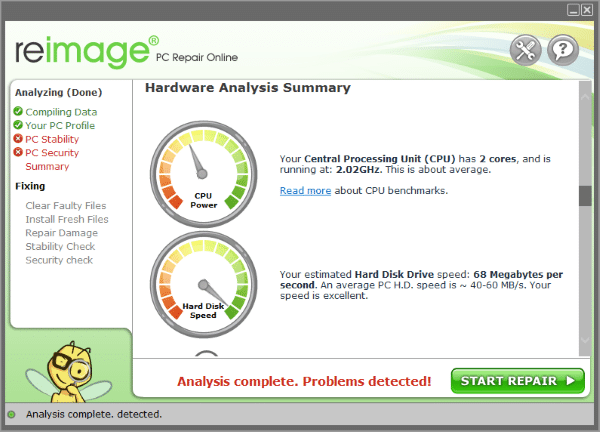
Method 1: Scan the system with reimage repair tool
Under this process, you are supposed to download reimage repair tool.
After that navigate to the file location and double click on the same. You might now see the user account control prompt “if your non-existence to control the program”, where you are supposed to click on yes tab.
You might see a welcome screen, where you need to ascertain that the checkbox remains unmarked in order to permit the repair tool to scan.
Further, you have to make sure that the internet connection isn’t broken, the reimage tool will install itself.
Moreover, the preliminary scan will also start.
Once your scan is complete, you will be able to learn the damaged sectors of the PC and would be able to repair it.
You now have to click on start repair tab in the bottom right corner.
Reboot the system when the repair process ends.
Method 2: Making use of installation CD to replace installation files
Herein, you would have to replace the installation files from the CD to hard drive.
Insert the QuickBooks CD into the CD drive. After the installation process begins, you would have to click on the Quit option.
Move to the C: drive, further create a new folder and also paste the files there:
You would have to opt for the desktop on the left pane of the window in windows vista, and also click on organize and also click on the new folder.
Once you are able to see the folder, you simply have to rename it to QuickBooks.
Right-click the QuickBooks CD and tap on Explore.
Find QuickBooks and other third-party folders and also the setup.exe file in the right pane.
You need to now press the ctrl key and select the folders and files.
Right-click and go for copy option.
Come back to QuickBooks and right click on it, and tap on Paste tab.
You are supposed to initially log in as the system admin.
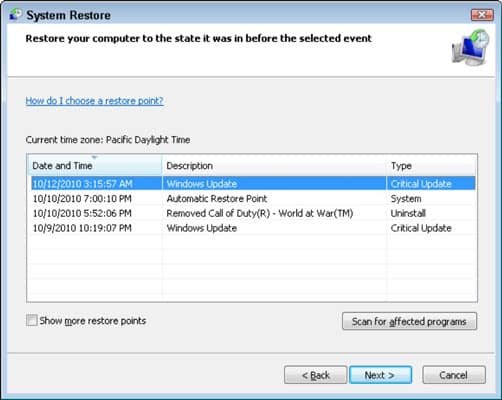
After that, click on start tab and choose all programs > system tools > accessories and click on system restore settings.
Choose restore my computer to an earlier mature point.
Reorganize reduction from on the list, and click on modernize reduction list, and also hit Next.
Finally reboot your system once the restoration is complete.
Method 4: Repairing Microsoft components
To begin with, go to Control Panel from Start menu.
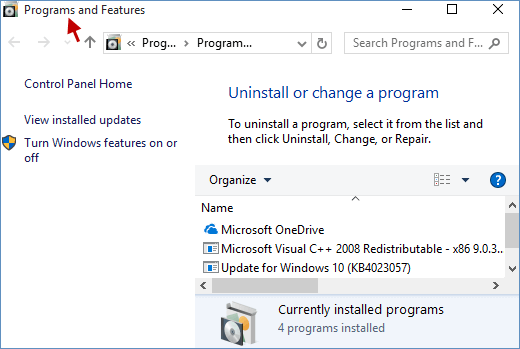
Then select Programs and Features tab.
Later on, click on Microsoft components one by one and right-click on Repair.
Follow the same steps for all the Microsoft components and then visit again in QuickBooks to check if repairing these components helped to get rid of this issue.
Note: If the above step not worked then, uninstall these components one by one and then re-install them from official website of Microsoft.
Winding up!
Fixing the QuickBooks error code C=1304 can be a little easy, once you are go thorough with the above stated set of steps. However, if for some reason you continue to stumble upon similar issue, then it is highly recommended to connect with our XpertBooks Pro team using our helpline i.e., 1.800.761.1787.
FAQs related to QuickBooks Error C=1304
Can I use the QuickBooks Install Diagnostic Tool to fix this error?
Can damaged installation media cause QuickBooks Error 1304?
Yes! Corruption of the installation media due to a scratched installation disk could potentially result in such error.
What if I encounter QuickBooks Error 1304 on a network installation?
In case you stumble upon this error on a network installation, perform the below-given steps: 1. The user account should have sufficient permissions to access the network installation folder. 2. Inspect the network connection. The settings related to the some should be configured properly. 3. Transfer the QuickBooks installation files to the computer and subsequently try running the installation.
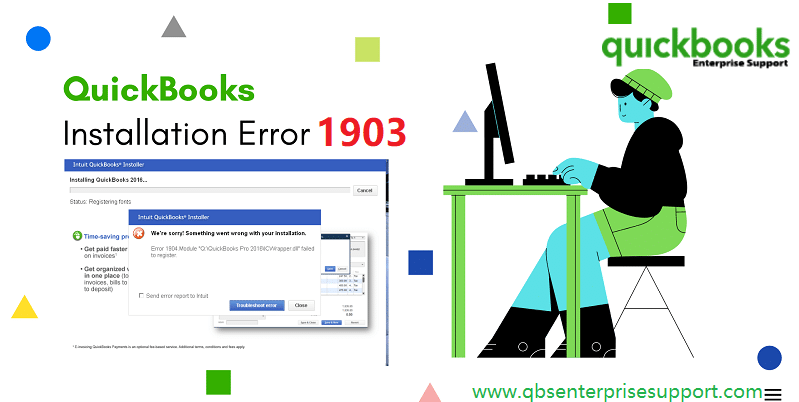
Trying to run QuickBooks, but aren’t able to? Or witnessing QuickBooks error code 1903 on the screen? Well, this error is generally appears when QuickBooks desktop fails to install certain components on your system. This error is commonly linked to Windows permissions or Microsoft components, especially when the installer is unable to write required files. It comes under the category of installation errors, the reason behind can be occurrence of such an error when trying to install the QuickBooks or when opening it after the installation of the software on the system. When this error encounters, you may see an error message on your screen:
“Error 1903: Failed to install Microsoft components.”
This error can be considered as a technical error and can also be categorized as a runtime error. You might face a similar sort of issue as a result of .Net framework. Such sort of technical snags interrupt in opening of the program and might also freeze up the important work. The basic reason triggering this issue can be missing of some mandatory components or damaged Windows files. You can go through this segment with full concentration to find out the right solution to such an error.
What triggers QuickBooks error code 1903?
This particular error can be triggered due to the following factors:
Once you are thorough with the steps and procedures discussed in above, it becomes way easier to tackle through the QuickBooks install error 1903. On the contrary, if you are still not able to deal with such runtime issues after following the troubleshooting steps, you don't have to deal with it alone. XpertBooks Pro is an independent support service provider offering precise technical assistance for all accounting software related issues. Our experienced professionals can help diagnose complex problems and guide you toward an appropriate resolution.
FAQs - QuickBooks Error 1903
What is QuickBooks Error 1903 and 1905?
Error 1903 and similar errors are an installation error encountered while setting up the latest updates for QuickBooks.
What causes QuickBooks installation errors?
The various causes behind Error 1903 are: 1. Inappropriate QuickBooks installation. 2. .NET Framework not functioning properly. 3. The Microsoft components required by QuickBooks are damaged. These include Microsoft MSXML and C++ files.
How to fix installation errors in QuickBooks?
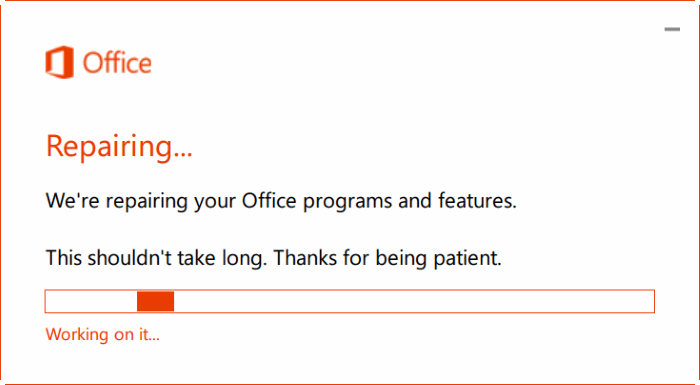
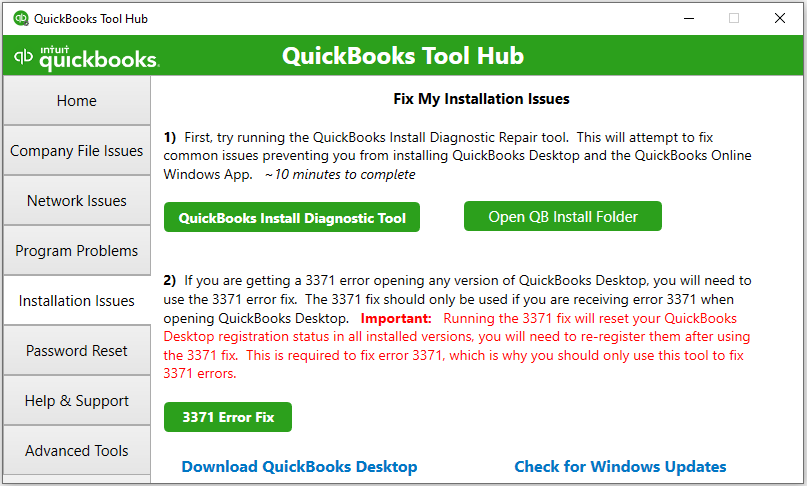
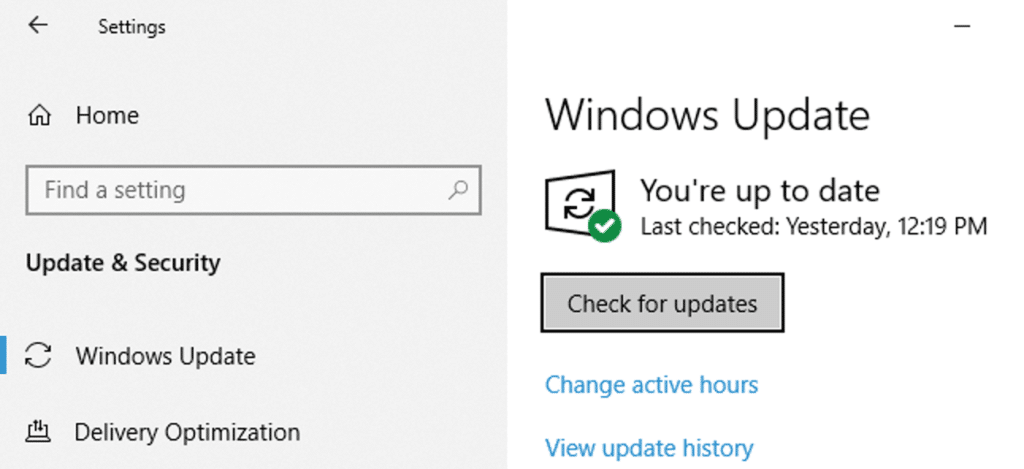
The various methods to fix QuickBooks Error 1903 are: 1: Use QuickBooks Install Diagnostic tool 2: Update Window O/S. 3: Switch to Safe Mode with Networking. 4: Fixing Microsoft components manually.
Planning to switch to QuickBooks desktop 2022? Dicey whether the new upgrade is worth the switch? Well, no worries at all. This write up is going to brief you with the features and functionalities that might come hand in hand with QuickBooks desktop 2022. Before proceeding ahead, the most important point to note here is that Intuit will now only be selling its Pro, Premier, and Mac products, as Pro Plus, Premier Plus and Mac Plus subscriptions. Whereas, the QuickBooks desktop enterprise has been a subscription offering for a few years. Having said that, QuickBooks desktop 2022 has rolled in with several features to assist in automating and streamlining and simplifying your daily accounting tasks.
To unleash the new and updated features of QuickBooks desktop 2022, simply go through this write-up. Or you can simply connect with our accounting personnel at 1.800.761.1787 and let them brief you with the information in detail.
Newly launched features of QuickBooks desktop 2022
Below we have tried to jot down, some of the newly launched QuickBooks desktop 2022 features. Check out what’s new in QuickBooks desktop 2022:
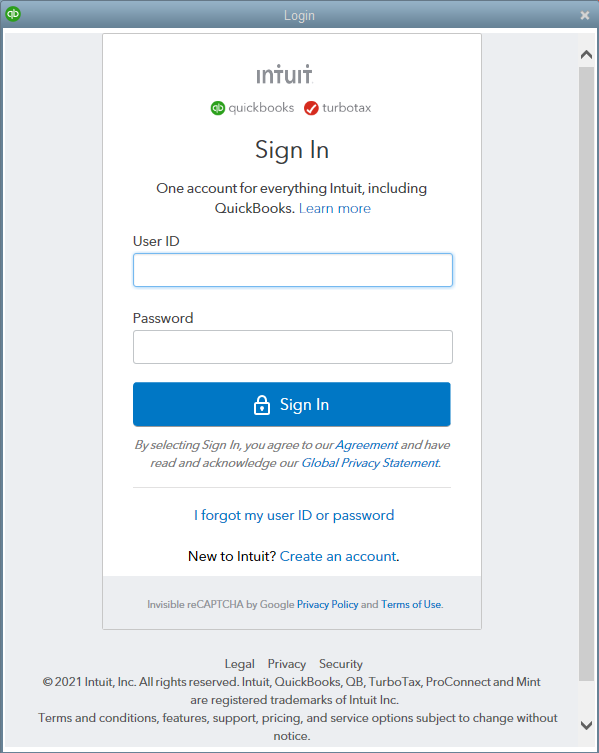
Intuit account required for QuickBooks
An Intuit account gives you a single login to secure all of Intuit's robust offerings, including the renowned QuickBooks Desktop software, along with its connected services. Every user needs an Intuit account with admin credentials to use QuickBooks Desktop. It includes QuickBooks Desktop Pro Plus and Premier Plus, Accountant Plus 2021, and all editions of Desktop Enterprise 22.0.
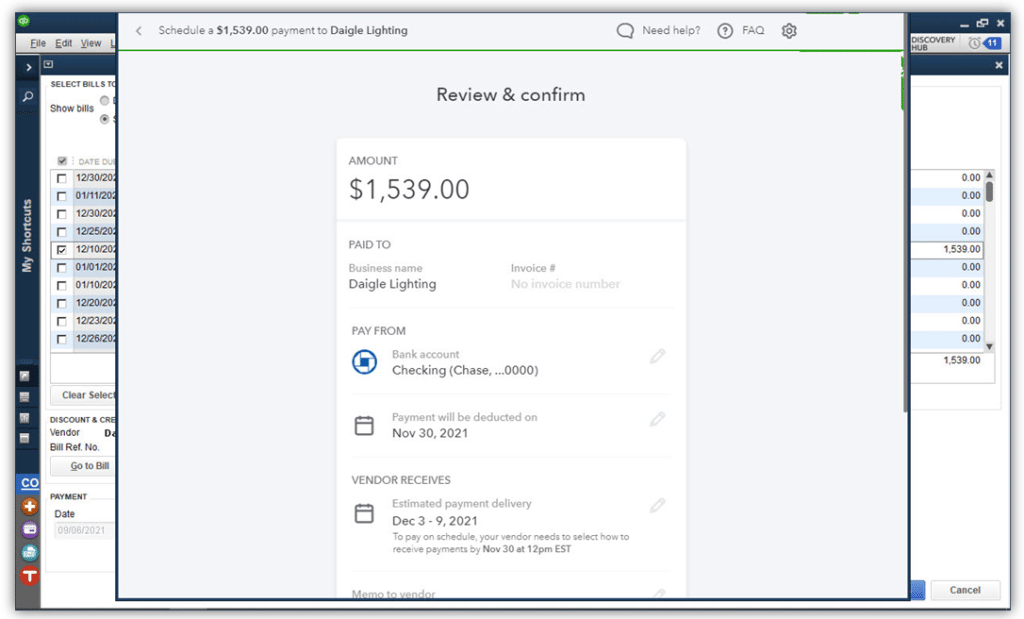
Pay bills with Melio
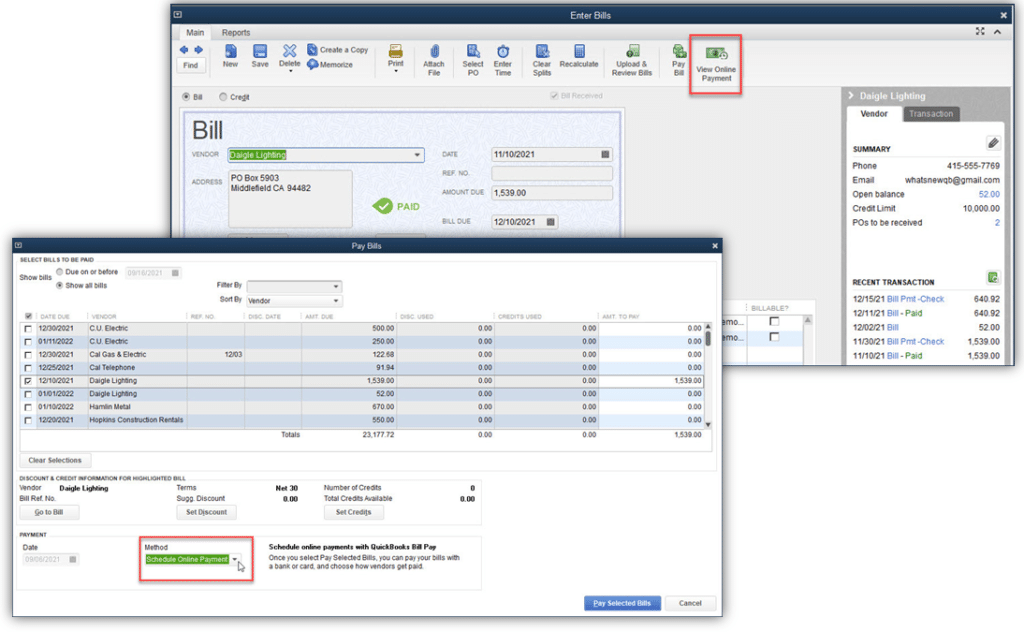
This is the first feature you can explore in QuickBooks Desktop pro plus, premier plus, accountant plus 2022, and all editions of desktop Enterprise 22.0. In order to find this feature, you would have to head to the menu bar, followed by choose vendors and pay bills. Optionally, from a displayed vendor bill, choose schedule online payment from the top right of the main ribbon.
It should be noted that, if you are paying a vendor bill with a payment type that include a separate processing fee, then the QuickBooks accounting software will create a vendor named Melio and these charges will be added as a vendor bill. The charges are deducted from the funding source, the software will record the fee bill as paid. Another option can be to select sync online bill payments from the menu bar to sync these details with the QuickBooks company file.
Perks of using pay bills with Melio
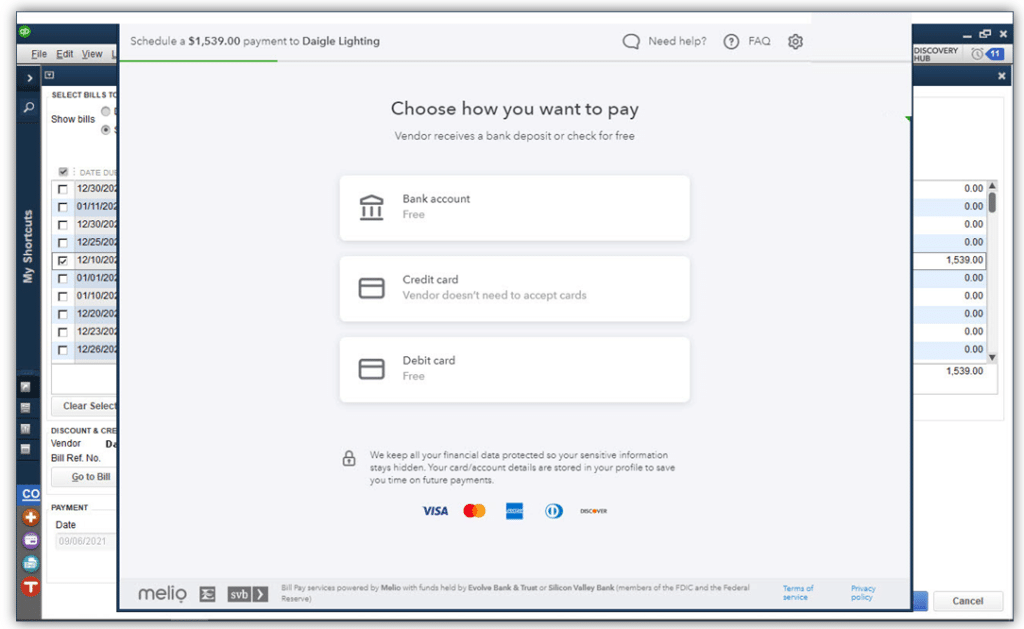
Using this feature can help in scheduling vendor payments online from within QuickBooks. One can also assign a specific day for the payment to be processed and send. Moreover, QuickBooks users can go for the option to pay their vendor bills by ACH, debit or credit card.
You can also opt for how the vendor will get the payment, either as deposit in their bank account or as paper check. It should be noted that the vendor payment details are securely recorded with Melio and not in QuickBooks desktop company file. After the payment gets processed, the QuickBooks marks the bill as paid, for visual confirmation.
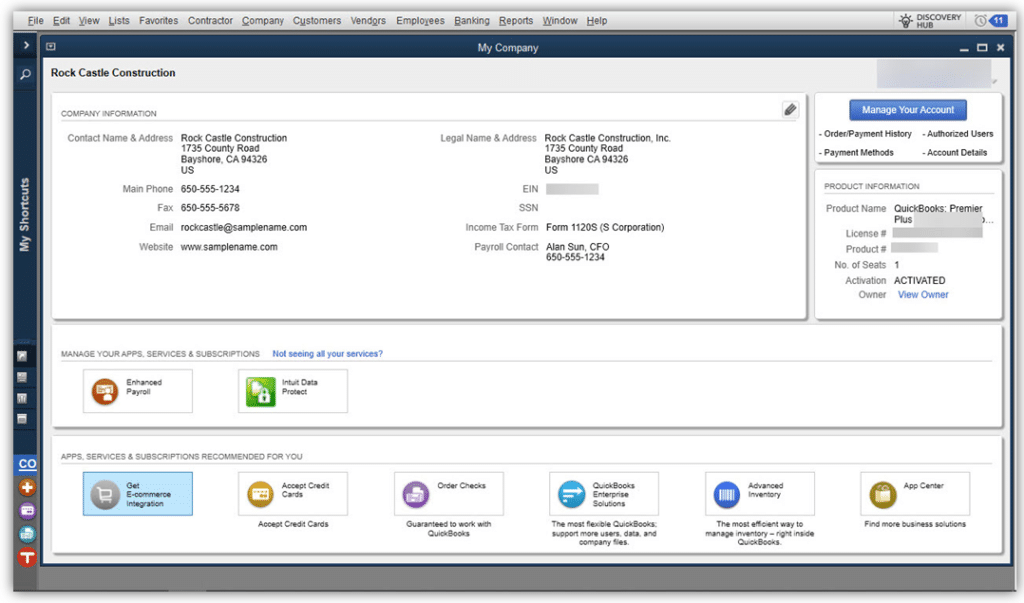
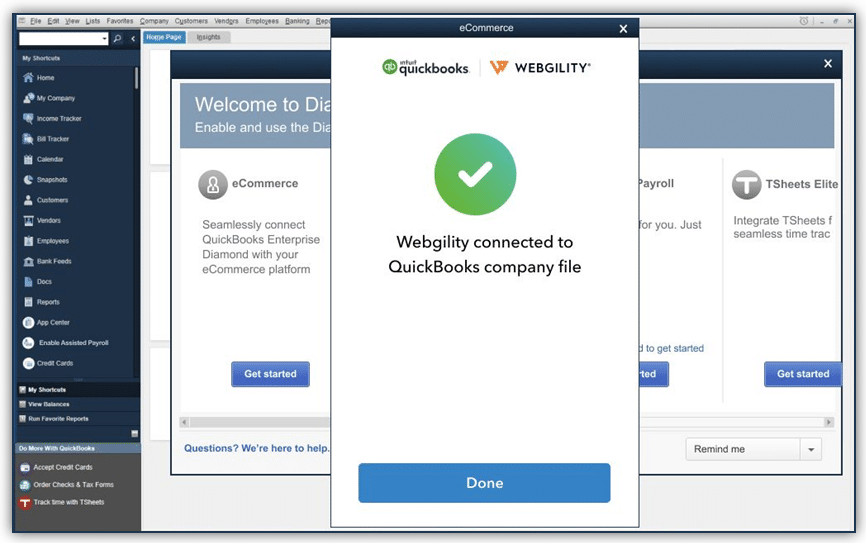
Add on e-Commerce integration powered by Webgility
This particular feature is included with QuickBooks desktop pro plus, premier plus, accountant plus 2022 and all editions of QuickBooks desktop enterprise 22.0. To find it, you can see the add on, which might take additional fee. From the menu bar, choose company and then my company option.
What does it offer?
This particular feature is great for QuickBooks desktop users with an online storefront presence. Webgility integrates with QuickBooks, which makes e-commerce management easy. You can go for any of the three packages available: core, classic, and deluxe. It provides an e-commerce integration with online stores, such as Shopify, WooCommerce, big commerce, Magento, and other online marketplaces like eBay, amazon, and Walmart.com. Moreover, it gives an option to add new product listings and also update the inventory management details for their channels.
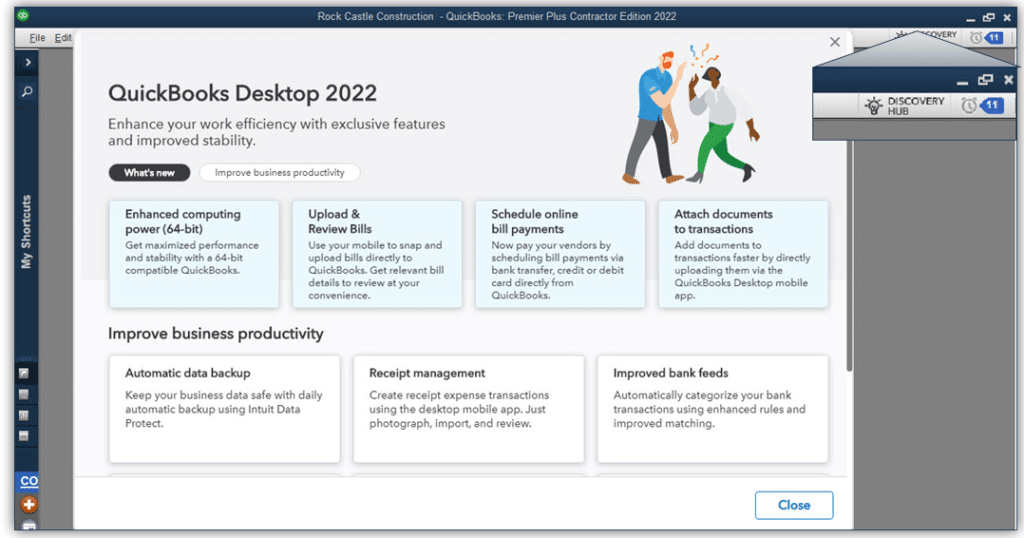
Discovery hub
This is included in QuickBooks desktop pro plus, premier plus, accountant plus 2022 and all editions of desktop enterprise 22.0
You can find it from the top right on the menu bar and choose discovery hub.
What are its benefits?
This is simply a preview of new features included with the release of QuickBooks desktop plus 2022.
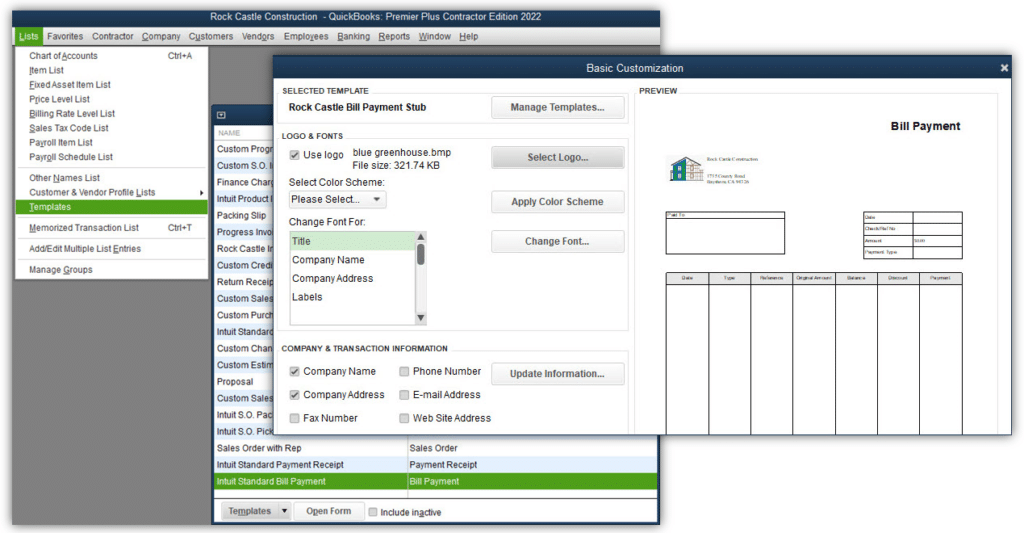
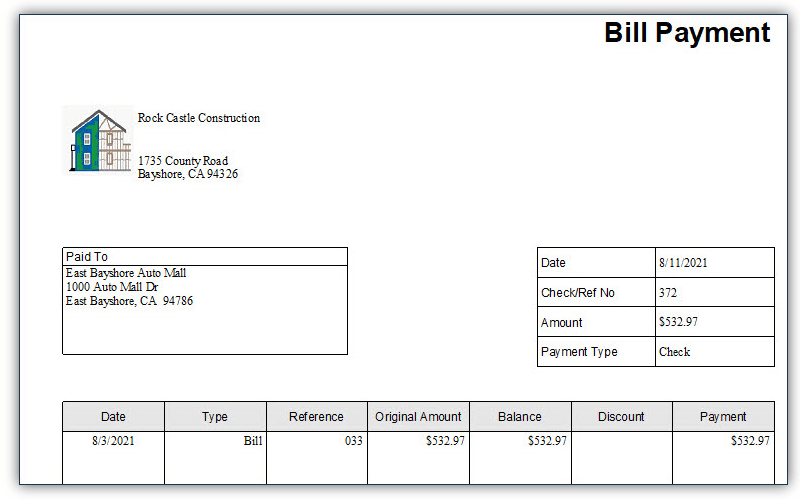
Customize and email vendor bill payments stubs
This one is included in QuickBooks desktop pro plus, premier plus, accountant plus 2022, and all editions of QuickBooks desktop enterprise 22.0
You can find it from the menu bar and choose lists tab. After that go for templates and choose bill payment template. Another option is to select manage from the displayed vendor bill payment transaction on the formatting ribbon. Now, print the newly customized bill payment stub from the payment summary window or from the menu bar choose file and print forms option and also the bill payment stubs.
What it offers?
You can make use of email customizable bill payment stubs to vendors and also modify the bill payment stub to include their business logo, along with the details of the payment made in QuickBooks.
This feature comes with QuickBooks desktop pro plus, premier plus, accountant plus 2022, and all editions of desktop enterprise 22.0. The QuickBooks desktop is available for android and apple mobile devices.
You can try to access this feature from a mobile device and then try to log into the QuickBooks desktop app and choose a document.
What it has to offer for users?
Majority of the QuickBooks users can snap a picture of a document with the free QuickBooks desktop mobile app, with this feature. Or can scan documents into the QuickBooks desktop attachment center. After that attach these documents or transactions or records, so as to avoid the need to keep paper copies.
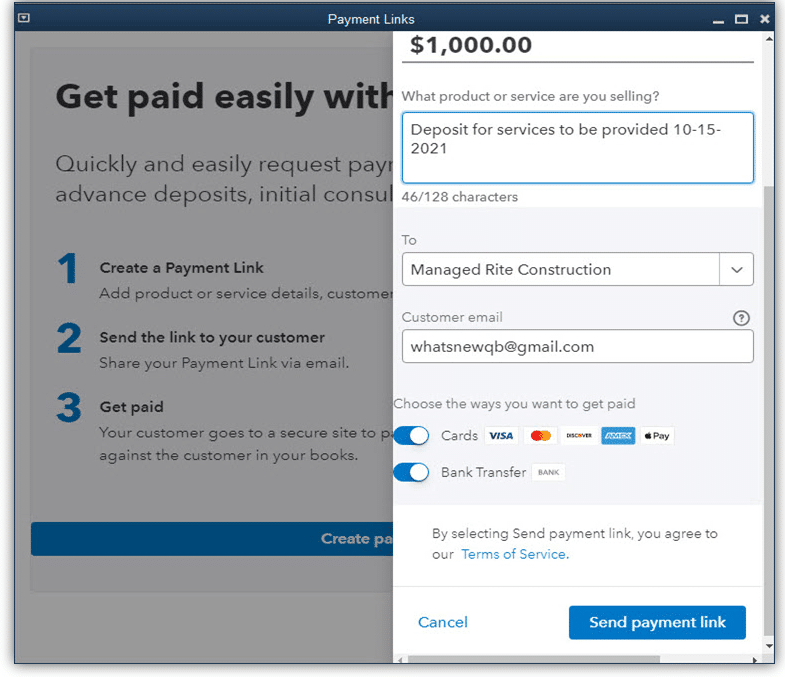
Payment links for customer pre-payments
This particular feature is included in QuickBooks desktop pro plus, premier plus, accountant plus 2022 and all editions of Desktop 22.0 with an active QuickBooks payment account.
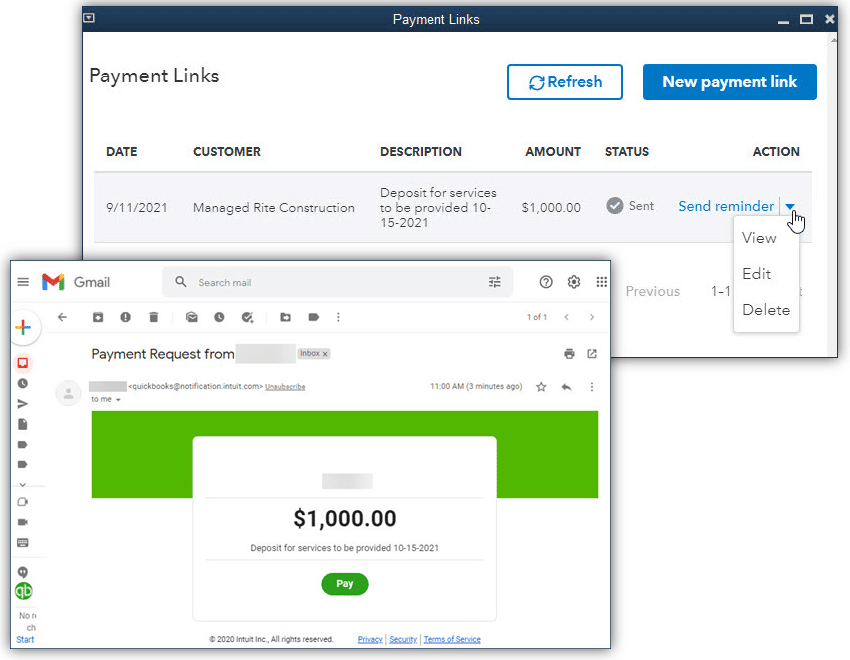
This feature can be accessed from the menu bar and then choose customers, payment links or optionally from the home page and also the payment links.
What it offers?
The users can request money from the customer as a deposit for services not yet provided without sending an invoice. The user can email the link to customers for them to process the payment without having to receive an invoice. Moreover, the users can track the payment links sent in QuickBooks. When the payments are received, the software will record the payment as an unapplied customer credit in the accounts receivable account.
This feature is included in QuickBooks desktop pro plus, premier plus, accountant 2021 and desktop enterprise 22.0. Maintenance release 5 and newer with an active QuickBooks payments account.
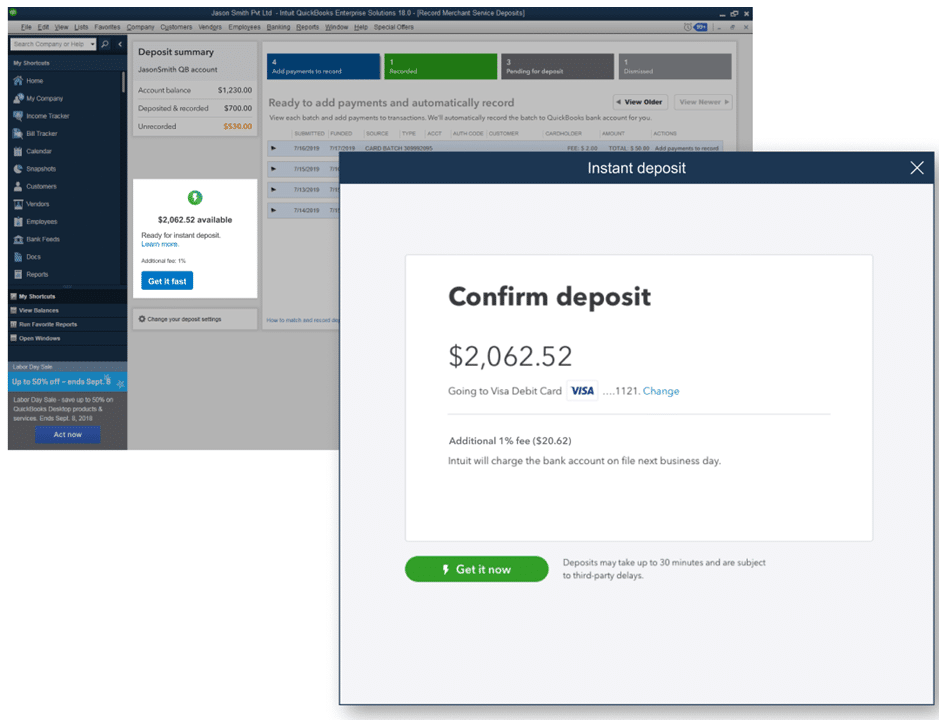
To find this feature, you need to select customers from the menu bar and choose customers and billing solutions, and then go to download payments. There are multiple access points in QuickBooks desktop. The setup needs only debit card details and a one-time verification.
What it offers?
Merchant payments can be deposited into the business bank account. The users can easily review the instant deposit details and accept the deposit in one step.
64- bit advanced processing power
The complete capability of a 64-bit processor can be used with QuickBooks desktop 2022. You can accomplish your accounting tasks faster with a quicker, more reliable QuickBooks.
That was all about QuickBooks desktop 2022 and its newly launched features. Make the best out of this QuickBooks version and get it today. For any query or concern, connect with our XpertBooks Pro professionals.