
Entering accounting transactions incorrectly into the accounting system is one of the common blunders that you can make. When this kind of situation arises, you need to make changes to the transaction even after it is recorded. You can simply perform this by creating a journal entry. In order to adjust or correct transactions and post entries, you can easily make journal entries in QuickBooks Desktop. Creating journal entries is a simple process with a couple of steps. The journal entry process is simple, as we said earlier, but you can only make a journal entry for one customer or vendor at a time. In case you want to correct multiple customer or vendor balances, separate entries are to be posted. Scroll through the post to learn the entire process properly.
Moreover, If you require help with your technical issues at any point in time, then do not think much to giving us a call at our helpline number i.e. 1.800.761.1787, as our XpertBooks Pro team will be there to assist you round the clock. You will get the most relevant answers to all your journal entry in QuickBooks related queries, so get in touch with us today!
You might also see: Move your QuickBooks Desktop file to QuickBooks Online
What is a Journal Entry in QuickBooks?
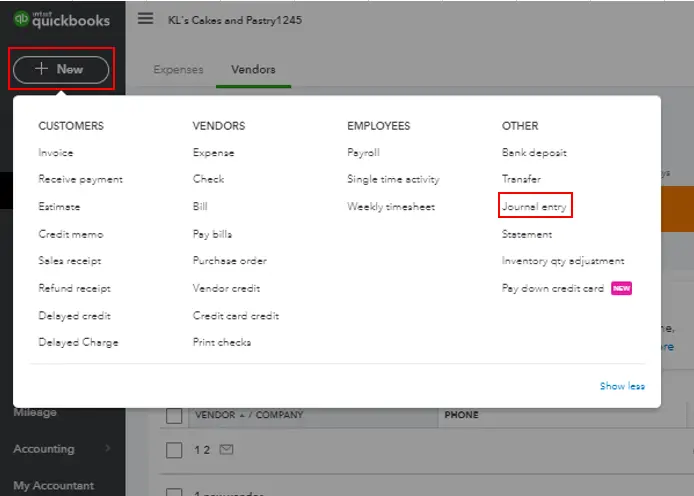
Talking about a general journal entry, it is an accounting transaction entered, or posted directly to the general ledger. A company’s general ledger basically acts as its main group of accounts, which is used to record the balance sheet and income statement transactions. In simple words, it is a record of transactions that show the credit and debit balance of the company. Journal entry is regarded to be a very important and essential part of business accounting. So, it is important for you to learn all possible facts related to journal entries, which we will be discussing later in this post. So, read ahead and explore further!
Pointers you can’t miss while creating the journal entry in QuickBooks
- If in case you create an entry and wish to rectify the transaction, then it can be done by deleting and reversing the journal entry.
- To reflect on the sales or expense tab, you are required to ensure that the entry has a line for either A/R or A/P and also the vendor or customer name.
Other important rules to make journal entries:
- You are recommended not to make journal entries to inventory or payroll accounts.
- The entry to the accounts payable type or the accounts receivable will require a customer or vendor.
- Moreover, it is important for you to use the accounts receivable or accounts payable account on the second line of the journal entry.
- Along with that, you should include one account receivable or accounts payable type account in every entry.
When to use Journal Entry in QuickBooks online?
You are recommended to make use of the journal entry in QuickBooks online when:
- At the time of sending the money between income and expense accounts.
- When transferring money from an asset, liability, or an equity account to the income or expense account.
- In case you enter the debits and credits in the general journal or the ledger.
See this also: How to set up a Chart of Accounts in QuickBooks?
Steps to Create or Record Journal Entries in QuickBooks Desktop
Checkout the following steps in order to record journal entries in QuickBooks Desktop:
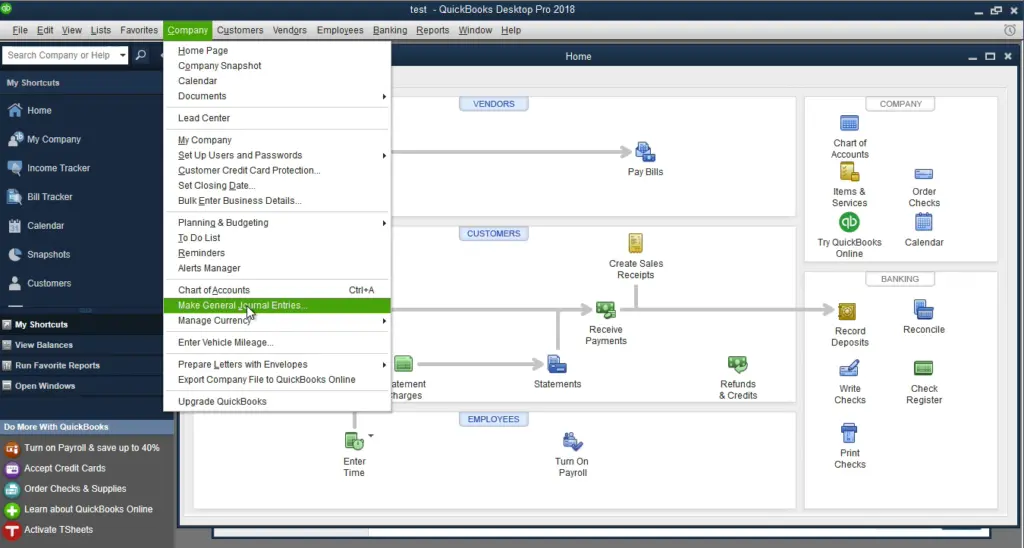
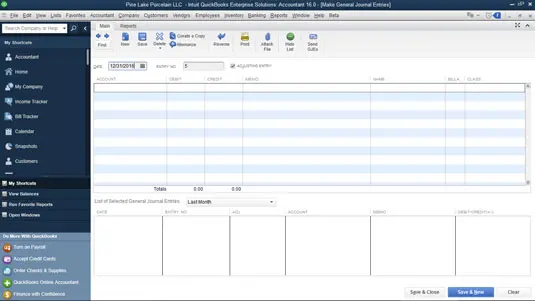
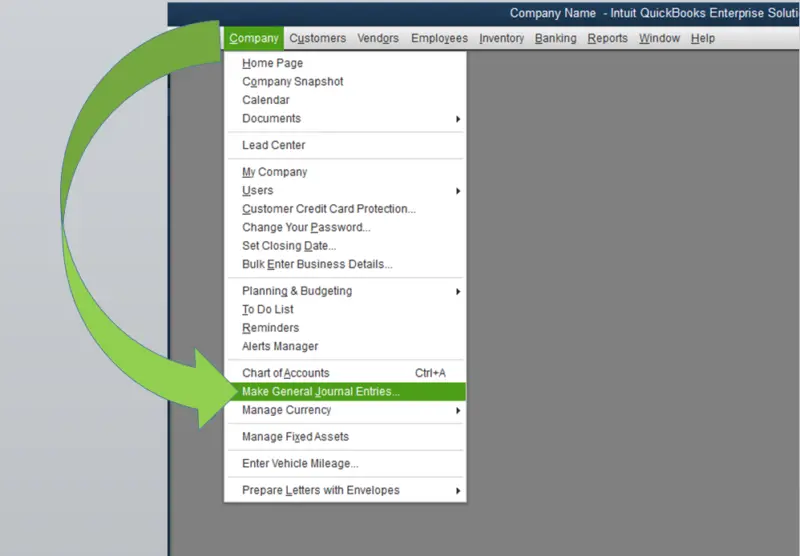
Go to Company > Make General Journal Entries. Select the Adjusting Entry checkbox if this is an adjusting entry, check that total Debits equal total Credits, then click Save & Close.
You may read also: How to set up QuickBooks Desktop to work from home?
Editing a journal entry
Now that you know the process to add and create a journal entry, it is time to learn the process to edit a journal entry in QuickBooks. The steps involved in this process are as follows:
- You need to first visit the company menu and then choose the Make general journal entries option.
- Choose the find option and then enter the name, date, entry no, or amount, then click on find.
- Double-click the journal entry and then make the updates. Once done, choose save and close.
- Lastly, in order to record changes, hit the Yes option.
Deleting a journal entry
In case you are required to delete or void a journal entry, the below steps need to be carried out.
- You are supposed to first visit the company menu and then choose the make general journal entries.
- Choose the find option and then enter the name, date, entry no., and other required info. And then choose to find.
- Now double-click the journal entry and then, choose the delete or void option and hit the OK button.
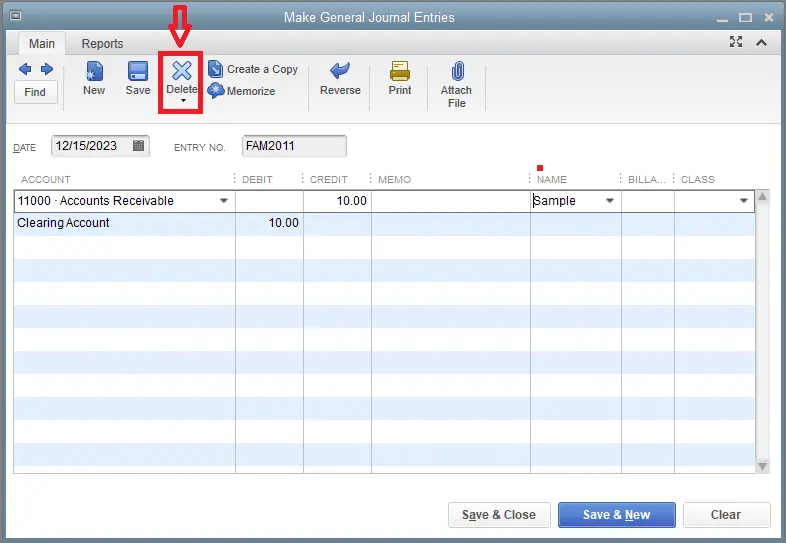
- To end the process, choose save and close.
Reverse a Journal Entry
You can reverse a journal entry by performing the below steps:
- Move to the company menu and then choose the Make general journal entries option.
- Look for and select the journal entry that is to be reversed.
- In QuickBooks for Windows, you are supposed to choose find and then enter the name, date, entry no. or amount and then choose the find tab.
- In QuickBooks for Mac, you will have to look for and choose the journal entry that is to be reversed on the left side of the Make general journal entries window.
- Now choose reverse.
- Followed by selecting the save or save & close tab.
The reversed journal entry has an "R" next to the entry number, and any debit and credit amounts are reversed. The new entry is dated the first day of the next month, following the original transaction date.
Read Also: QuickBooks Compatibility with Windows 10
Conclusion!
We believe that making journal entries in QuickBooks desktop becomes easy with the steps scribbled above. Moreover, if you wish to make journal entries that affect a particular customer’s account receivable or a vendor’s accounts payable, then for that, you require to put the customer or the vendor on the first line of the entry. We have tried our best to provide the steps to create journal entries in QuickBooks. However, if you feel the need of expert assistance, then contact our team of QB specialists anytime. We ensure immediate assistance and customized support services to all our clients across the globe.
FAQs
What is a journal entry in QuickBooks Desktop?
Journal entry is a process of recording financial transactions manually. It allows users to adjust account balances, record transfers between accounts, allocate expenses, record depreciation, and process other accounting entries and operations.
Can I modify a journal entry after it has been saved?
Yes! You can modify a journal entry in QuickBooks Desktop. The steps to modify a journal entry are:
Step 1: The initial step requires locating the journal entry by using the Find feature. A substitute method is to head to Reports, followed by Accountant & Taxes, and finally click on Journal.
Step 2: Follow up by opening the journal entry and making the necessary changes.
Step 3: Finally, save the modified entry.
How can I delete a journal entry in
The steps to delete the journal entry are:
Step 1: Go to the Edit menu.
Step 2: Click on the Delete General Journal Entry option and confirm the same.
Can I create a recurring journal entry in QuickBooks Desktop?
No! QuickBooks Desktop does not have a built-in feature to create recurring journal entries.
More Interesting Reads:
How to Fix QuickBooks not Showing Mapped Drives Problem?